Shopify is one of the fastest-growing CMSs at the time. Day by day, a lot of different types of business services are coming to join this CMS. To achieve success with their goods, they are engaging in various types of marketing. But you know that without data analysis, it’s impossible to succeed in your business?
Understanding your traffic activity is crucial for making informed decisions in the future. Especially every time you make a decision, it’s really important to survey your traffic activity. After making a decision or implementing it, knowing the detailed behavior of your traffic is also really important.
To get a complete overview of your traffic, you must finish conversion tracking. Then, through GA4, you can access all of this data. Because in the time for a new campaign, we also used UTM links to track our campaign activity perfectly.
But imagine the loss if you realize your tracking is imperfect or you cannot track all of the important things for your store! Because you are using Shopify CMS, and you are not getting any way to enable a data layer perfectly.
At the moment, Google Tag Manager stands as the most effective tracking solution. If you use it, you can easily decorate your entire tracking journey in one place. Also, if you face any problem with your tracking, then you can simply check the total setting through GTM.
That’s why, when you are trying to enable the data layer in your Shopify store, completing the tracking through the GTM data layer is really important. Without the data layer, seeing the data and completing the setup will be difficult.
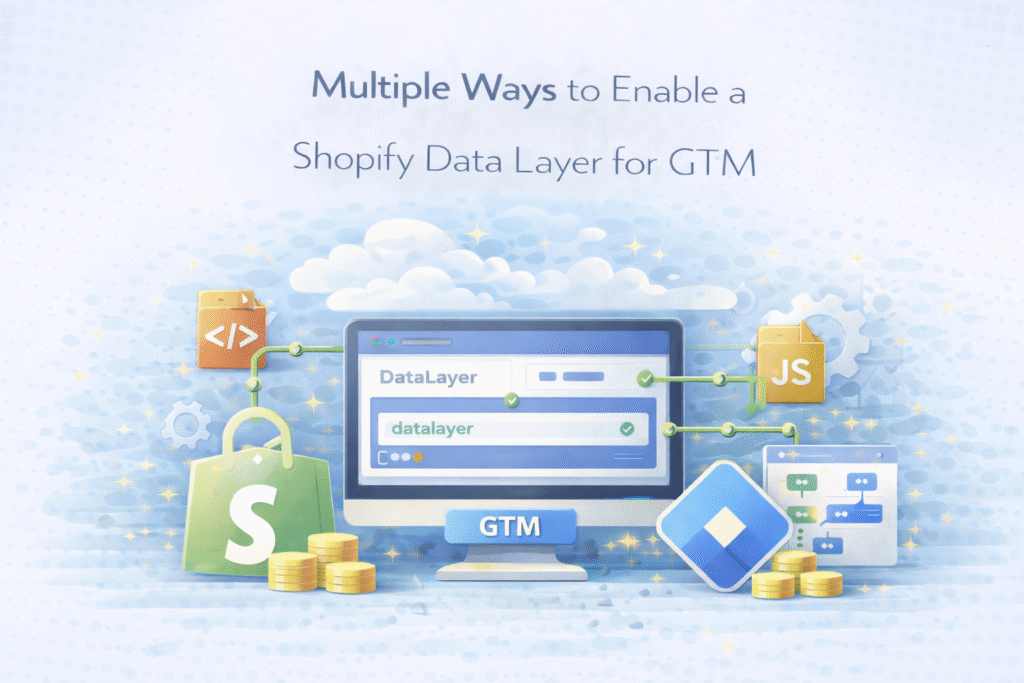
That’s why today we will show you multiple ways that you can use to enable the data layer for your Shopify store. Please read this article and decide which option would be most suitable for you.
DataLayer enable through Stape App
Our first process will be a step app. Through the app from the Shopify store, we can enable the data layer perfectly. It’s totally free.
To start, go to the app store in your Shopify account. You know that the app store is located within the Shopify store settings.
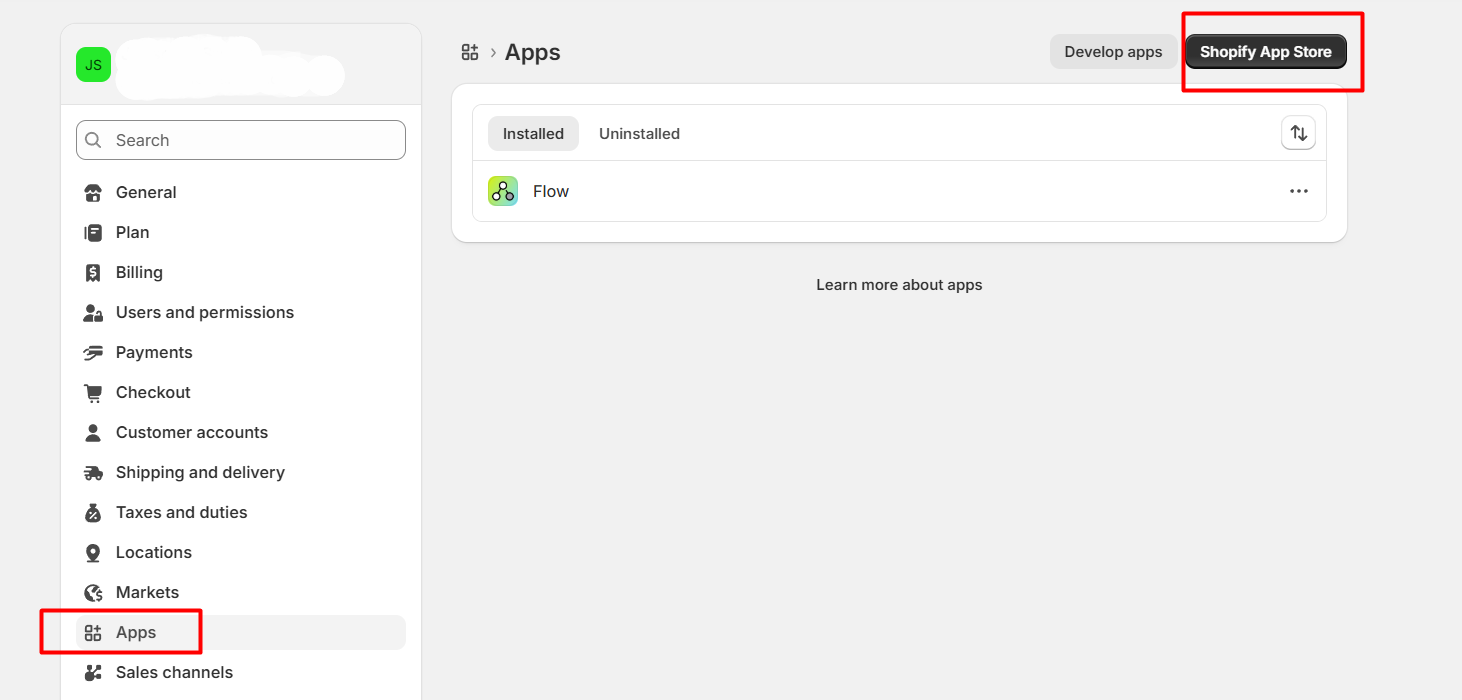
Now from here, click on the “Shopify App Store.”
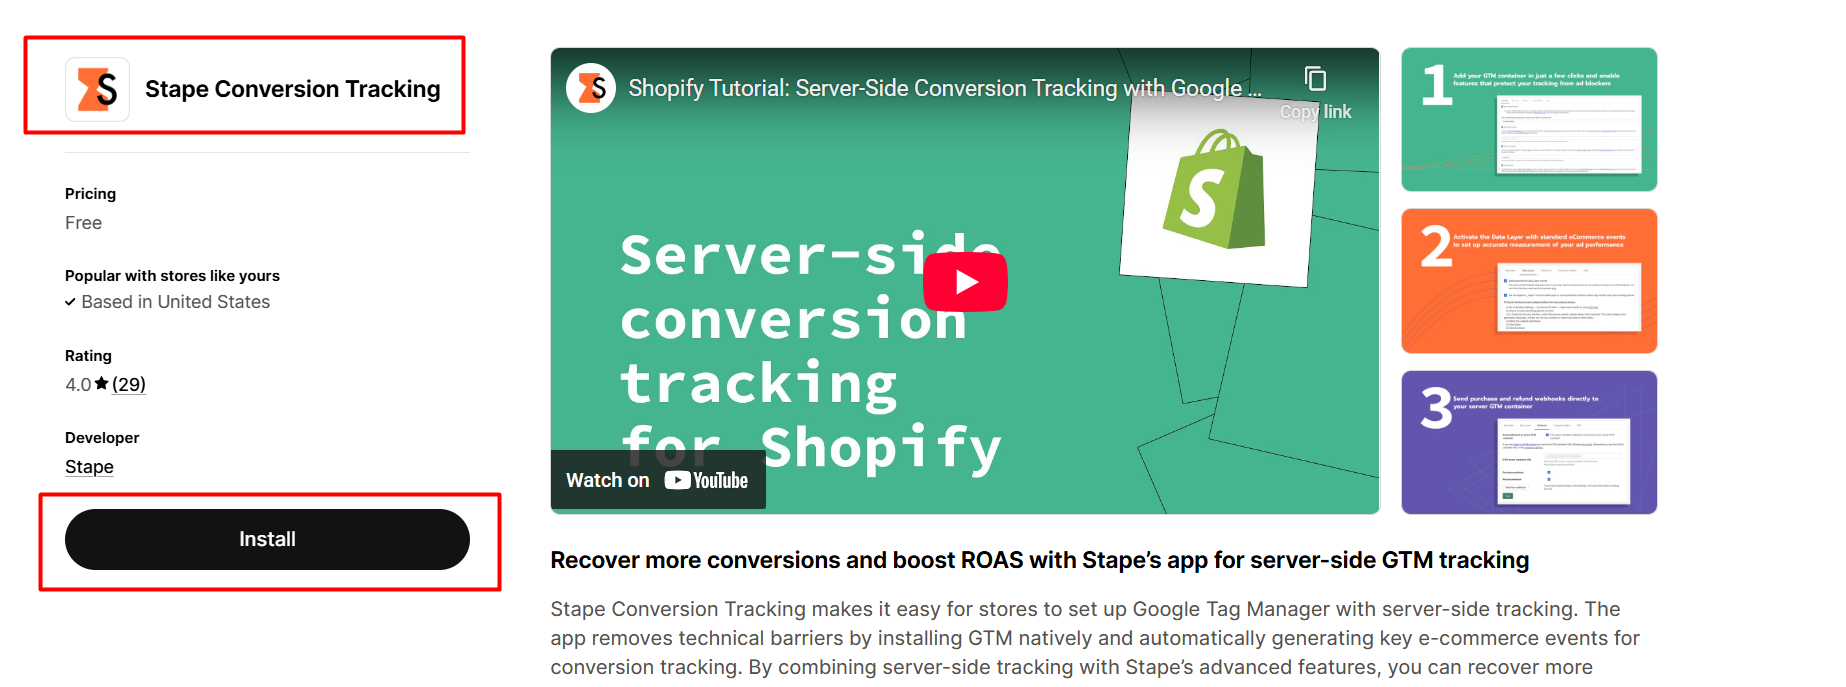
After coming to the app store, search for this app and install it to your personal app store.
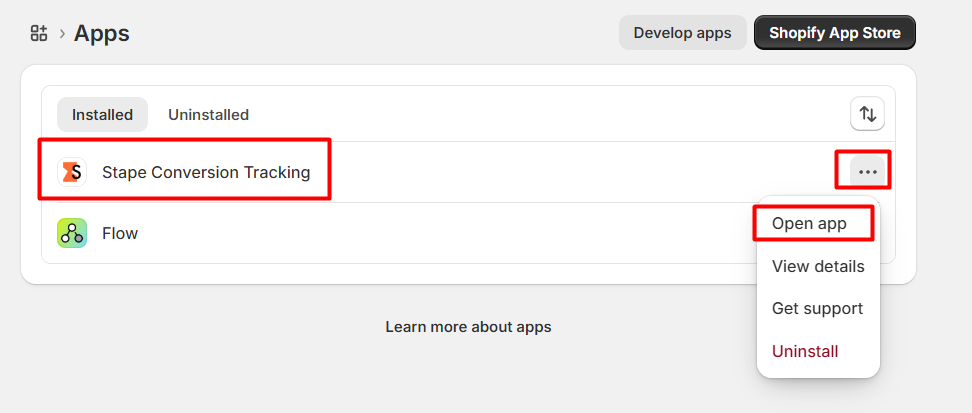
After successfully installing the Shopify app, you can now open it to configure the remaining settings.
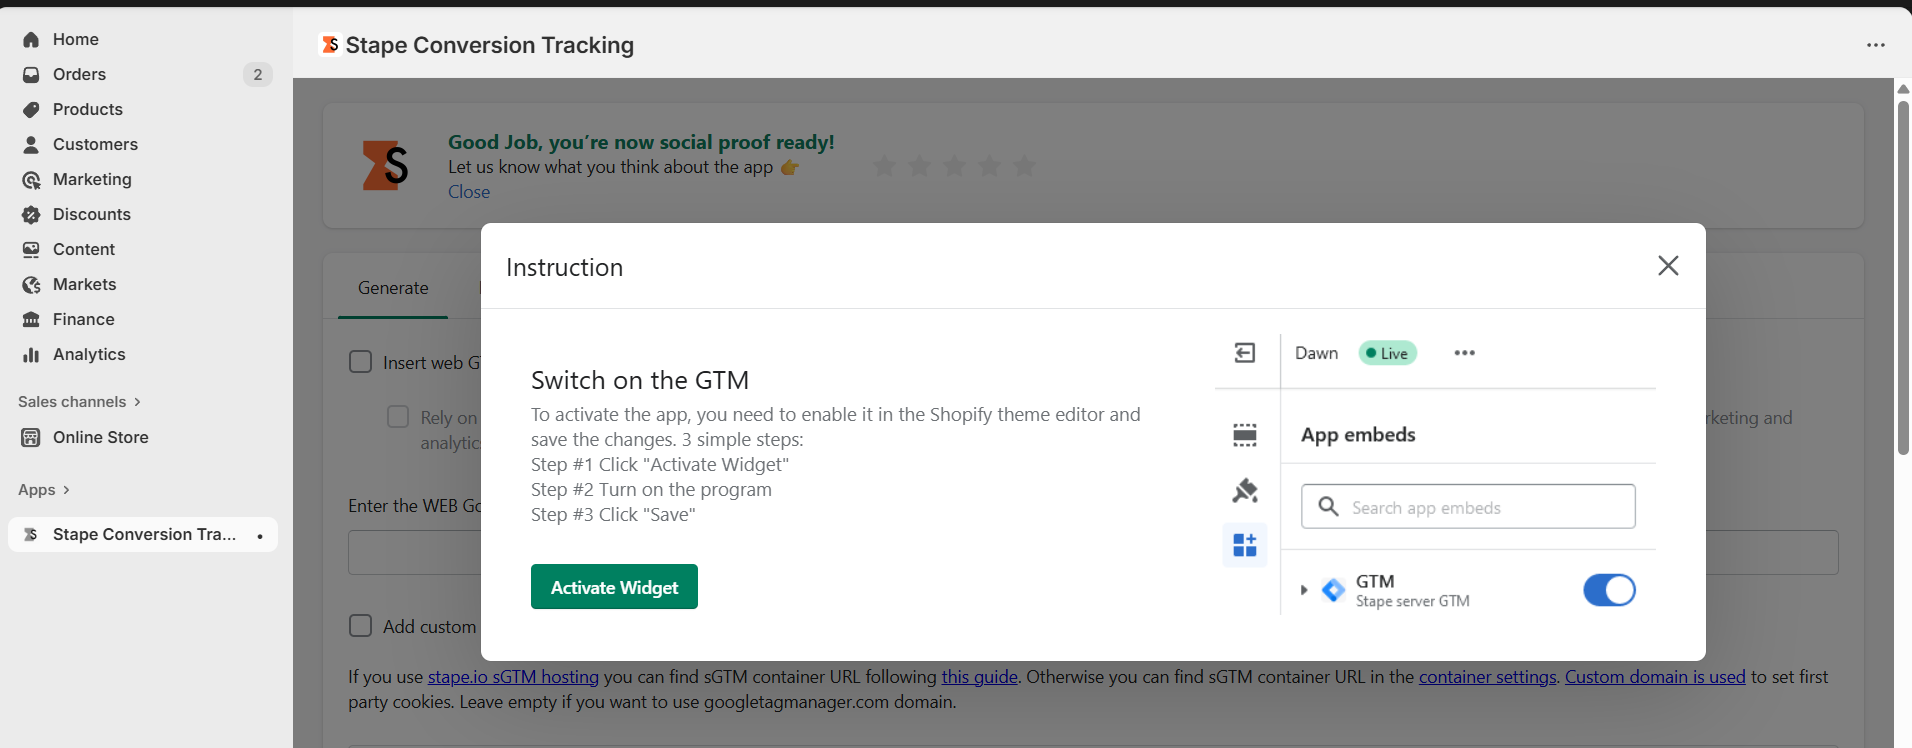
This app can be opened automatically after the installation. So here our first step will be to “activate the widget” and click on the button. At this point, we have activated one program.

You have to open this setting. Please save it, and we can proceed to the next setup.
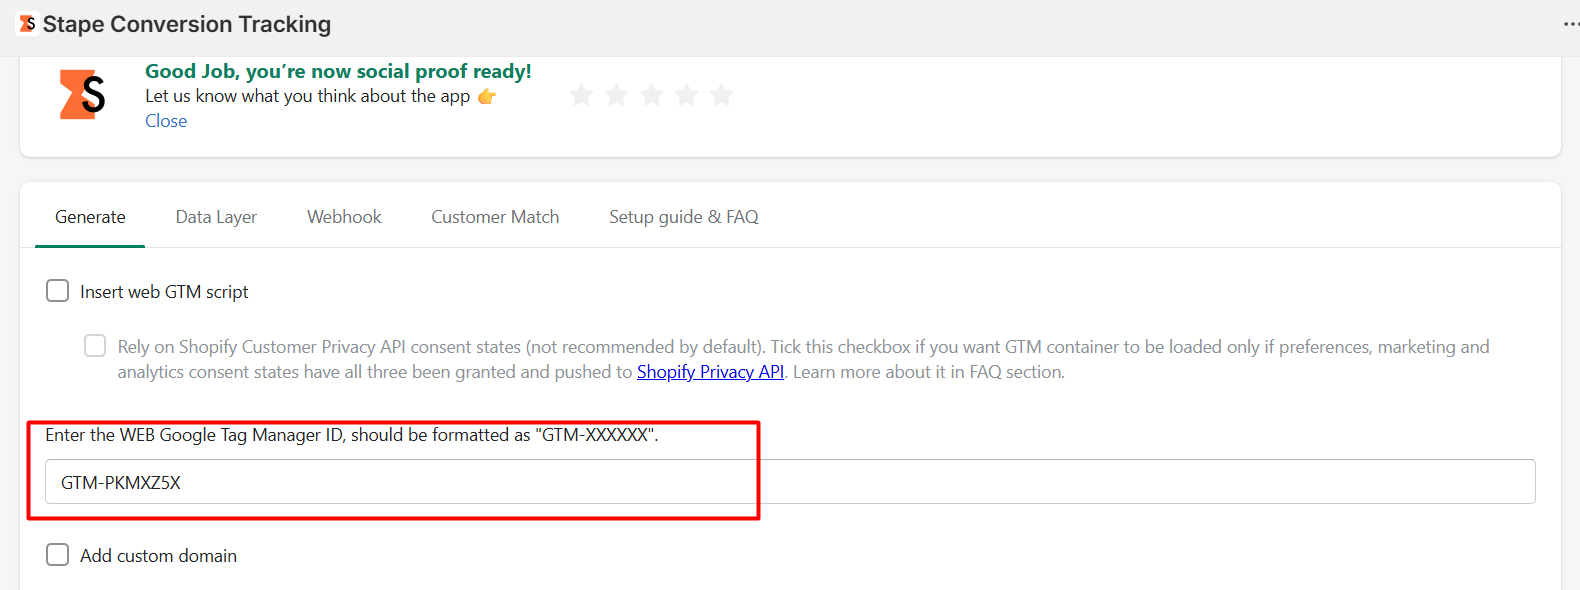
Now, after enabling the option, you have to get back to this page. Here you can see the red line box. On that box, you have to put your GTM ID, and you’re done. Now click on the next page.
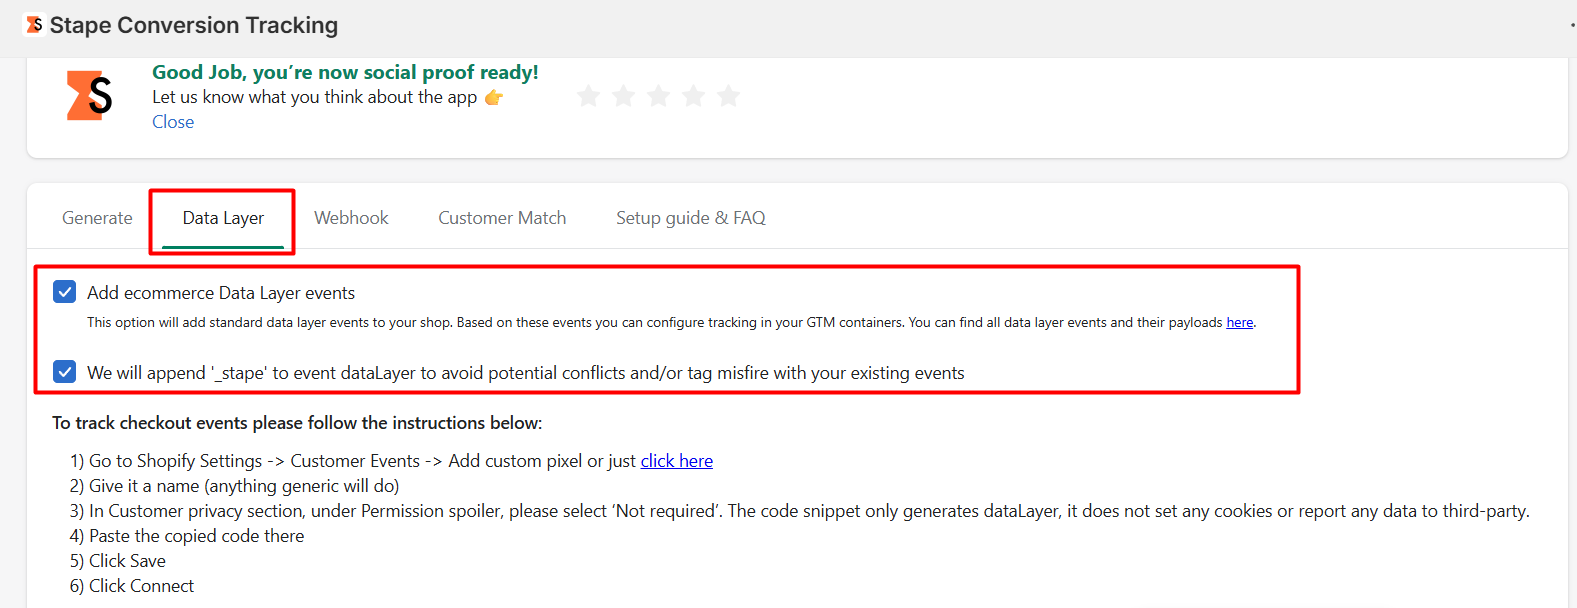
Here on the page, you will have to enable these two settings. If you forget to enable the first option, then your data layer will miss the e-commerce-related events data.
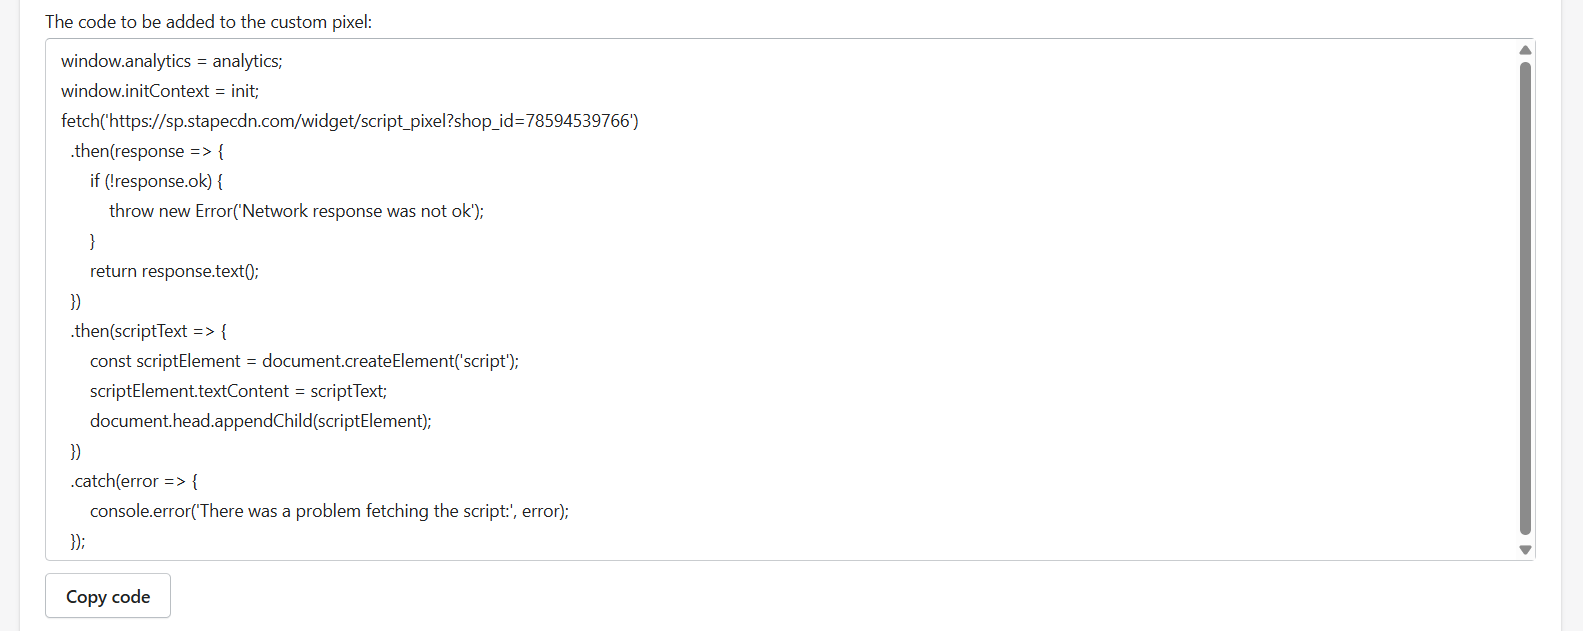
Please scroll down and copy this code. We have to set up this code in the “Custom Events” section of the Shopify settings. If you miss doing that, then your purchase and checkout data will be missing. Please copy this code and ensure all of the settings are saved.
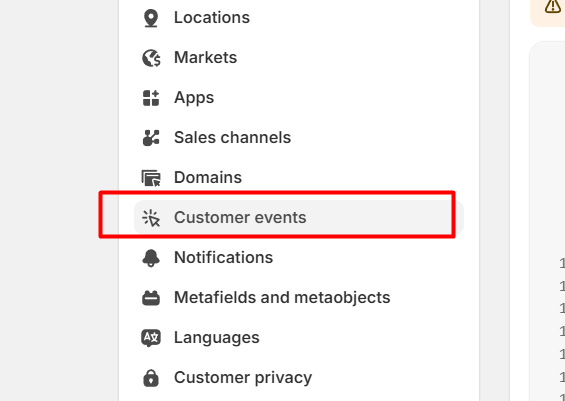
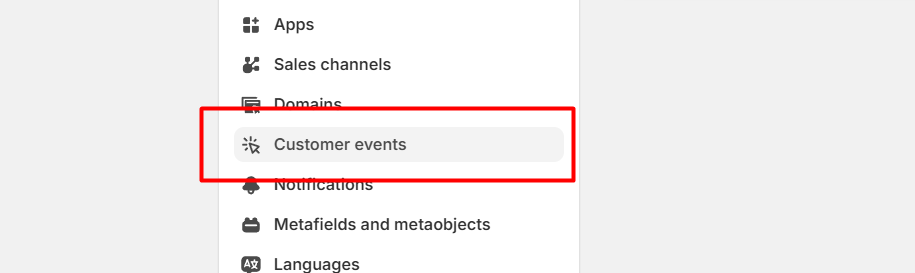
From the setting, select it.
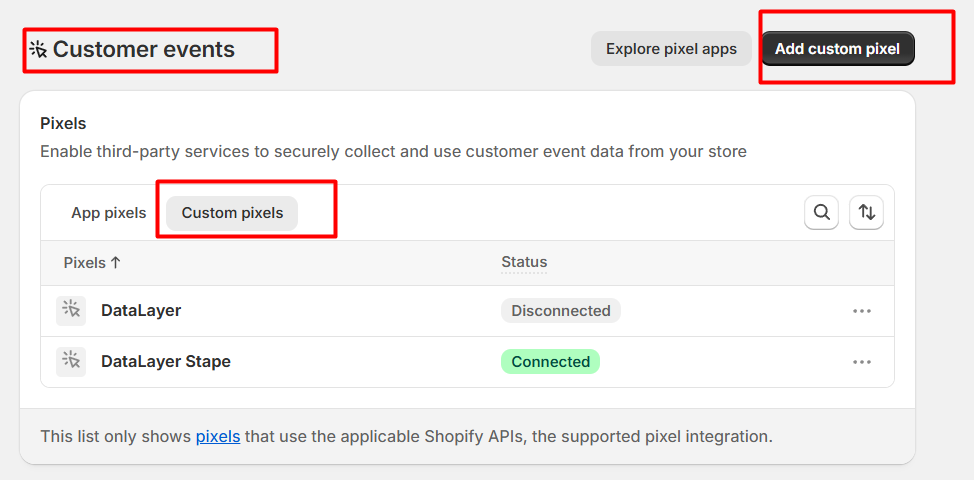
Here we have to create one custom pixel. So click on the “Add custom pixel” button for the next option.
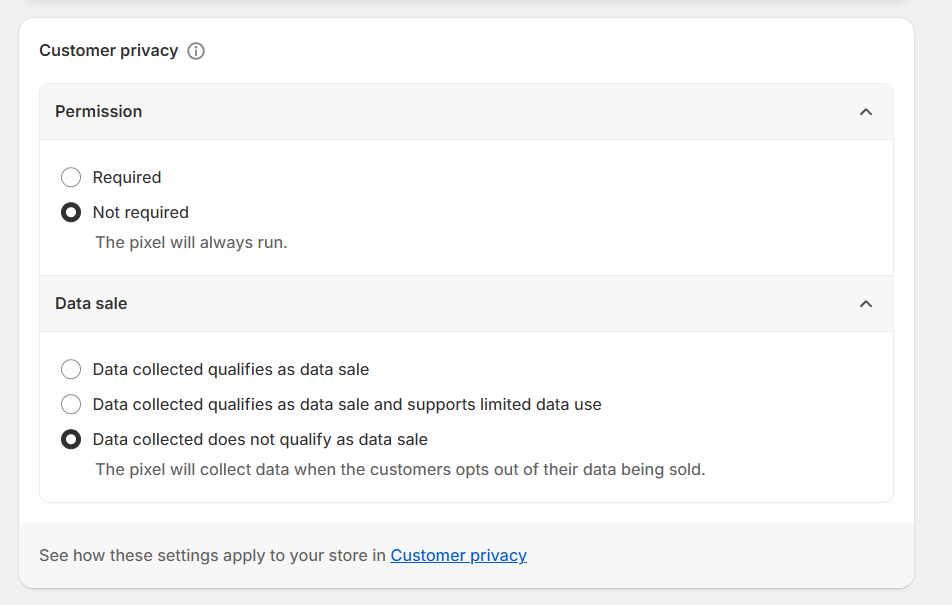
Now you have to change these two settings to be like us.
Now, the last step is to place the previously copied code in the box. Now you have to save the code. After successfully saving the code, you now have to click on the connect button to enable it.
Well done; now your dataLayer is enabled for your store. Also, your Google Tag Manager is now connected with your store.
Preview From Google Tag Manager
Now come to the Google Tag Manager and click on the preview button to see how your data layer is now working.
In the preview section, you can see how the data layer is currently working. Here, you can also see the value of the data layer for your product.
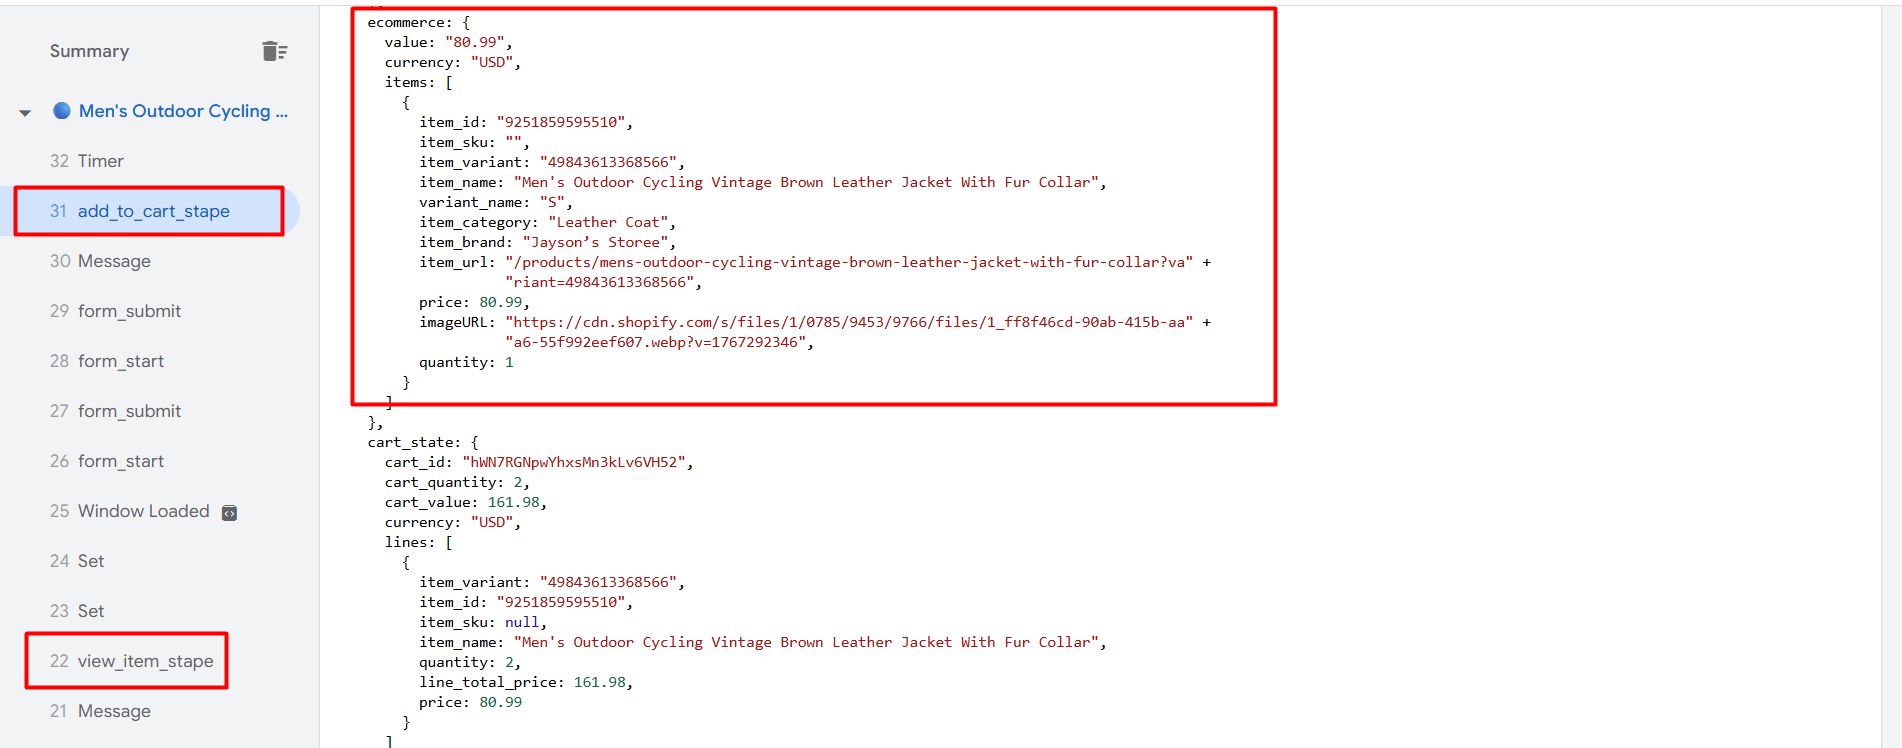
Here is one problem: you will not be able to see the checkout and purchase events in the data layer. If you want to find these two events, then come to the website and go to the checkout page. After going to the checkout page, inspect it and click on the console.
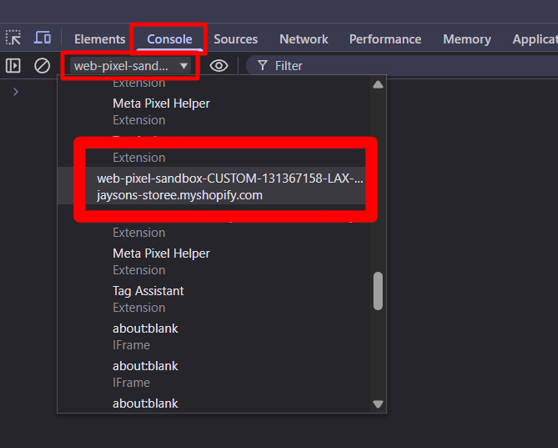
In the console section every time, you will have to find out this section and then click on that.
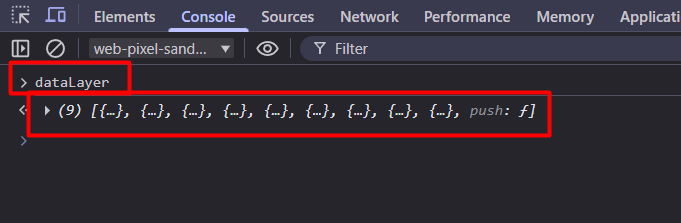
Now you have to type this “dataLayer.” If you type this and press enter, then you will get the second line. And here in the second line is your main data center. In this line, you will see the “checkout” events.
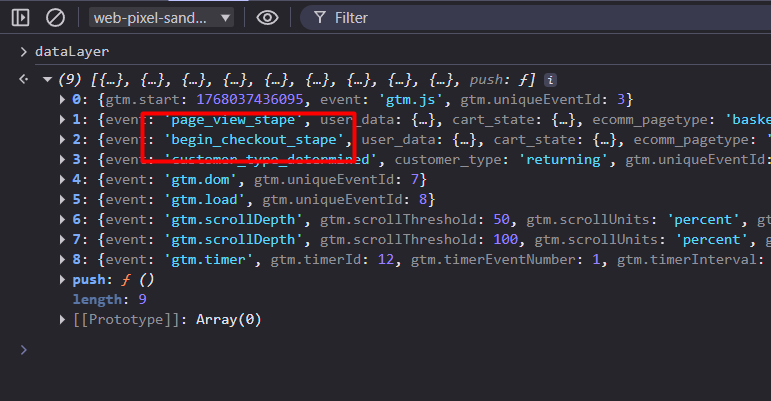
Here you can see your targeted events. If you explore this event, then you will get all of the other data, too.

So check it out: how is your data presented in this section? You can match the data with your checkout items to confirm. In the same way, you will be able to find out about the purchase event. Additionally, all the data associated with your purchase event, including customer data, will be available.
Custom Code to enable the DataLayer
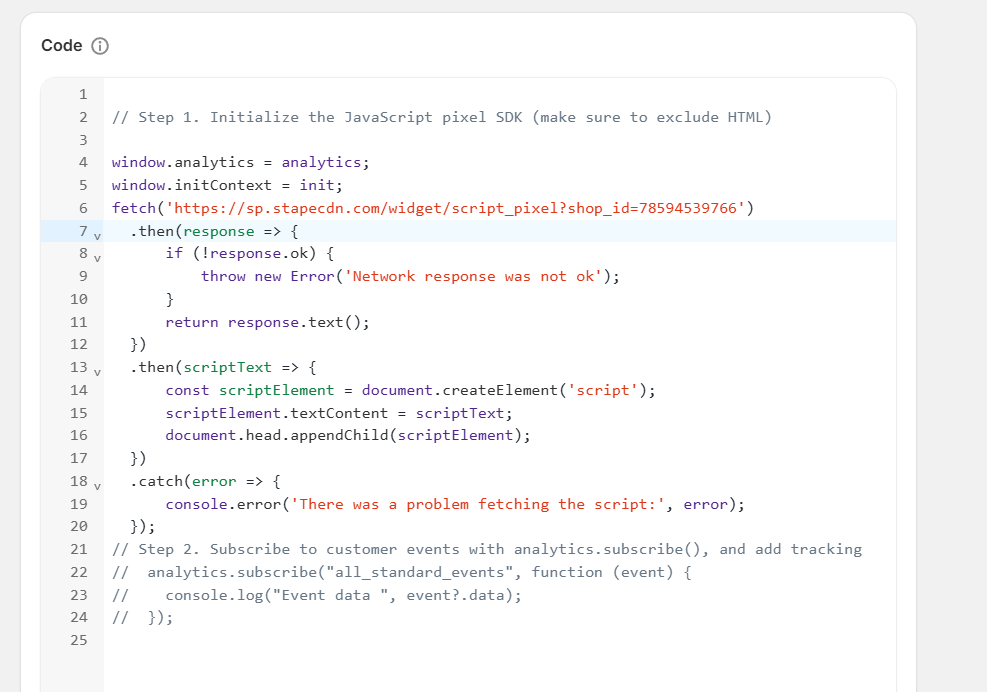
At this point, we need to use a custom code to perfectly enable the data layer in your Shopify store. So at first you have to copy our code. You will get the code at the end of this article.
After copying the code, first navigate to this position in your Shopify settings. Here, like the last time, you have to create a “custom pixel.”
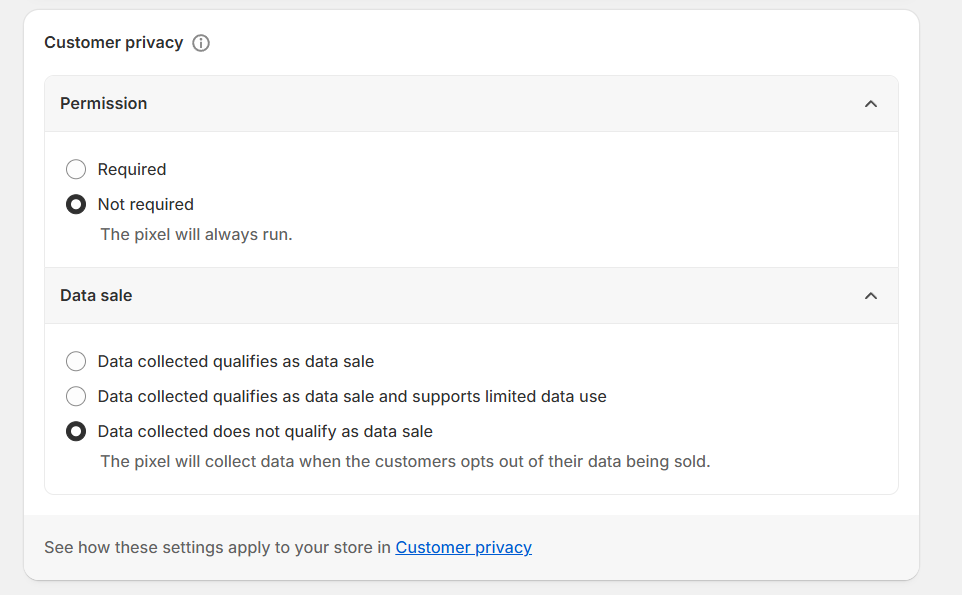
In the same way as the last time, you have to select these settings.
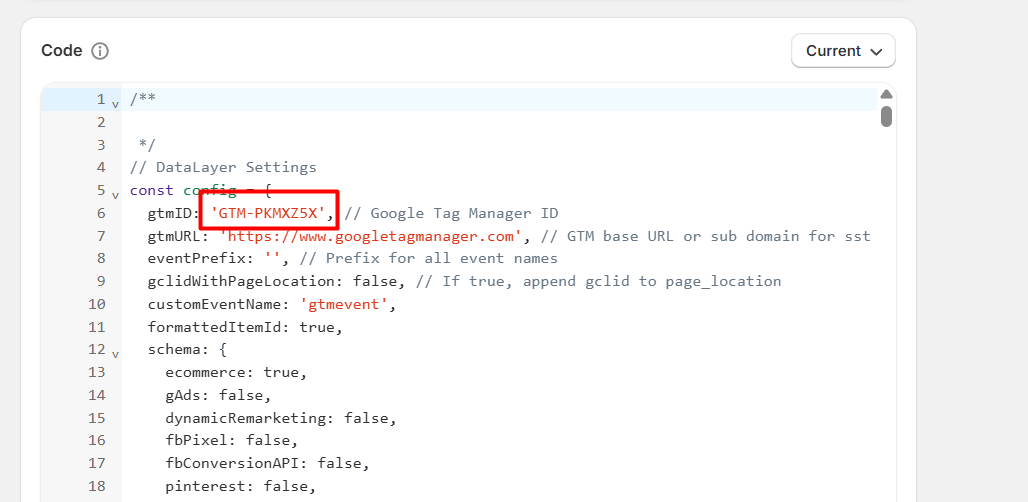
Now in the code section, place the copied code. Here you can see the red marked box. On there, you can change it with your GTM number. Now save and connect. Your data layer is now ready.
Now you can check it through the GTM preview. At that time, you need to identify all of the events in the console section, similar to what we did for checkout and purchase last time. But here, things will be easier; you can go to your console section, and then you will see all of your targeted events after completion.
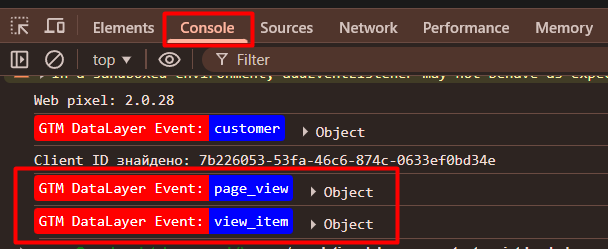
Look at the picture. Once we have finished viewing an item, how can we ensure the event appears in our console section smoothly?
Now it’s totally up to you. Which option will you choose to enable your data layer? Thank you for reading the article. If you want to share anything with us, you can anytime. We are always here for you.


