You can’t achieve consistently good results in Google Ads without a reliable, robust system for sharing your business data with Google. This is the number one way to unlock the platform’s power. If Google is unable to accurately track and attribute your key business activities—such as purchases, sign-ups, or high-value lead submissions—the process of getting success becomes exceptionally hard.
That data is the fuel for Google’s powerful machine learning algorithms. Every conversion you track teaches the system how to find the next perfect customer for you, allowing Google to continuously perfect its own targeting and bidding strategies. Without that constant stream of accurate information, your campaigns will essentially be flying blind, relying on luck instead of scalable, data-driven optimization.
So we shouldn’t waste our time; let’s start the e-commerce conversion tracking.
Purchase Event Tracking Through GTM
To track the purchase event, we have to start our journey from the Google Ads account. So log in to your Google Ads account and select the “Goal” section.


From here we have to select the “Create Conversion Action” to create a new conversion. So click on it.
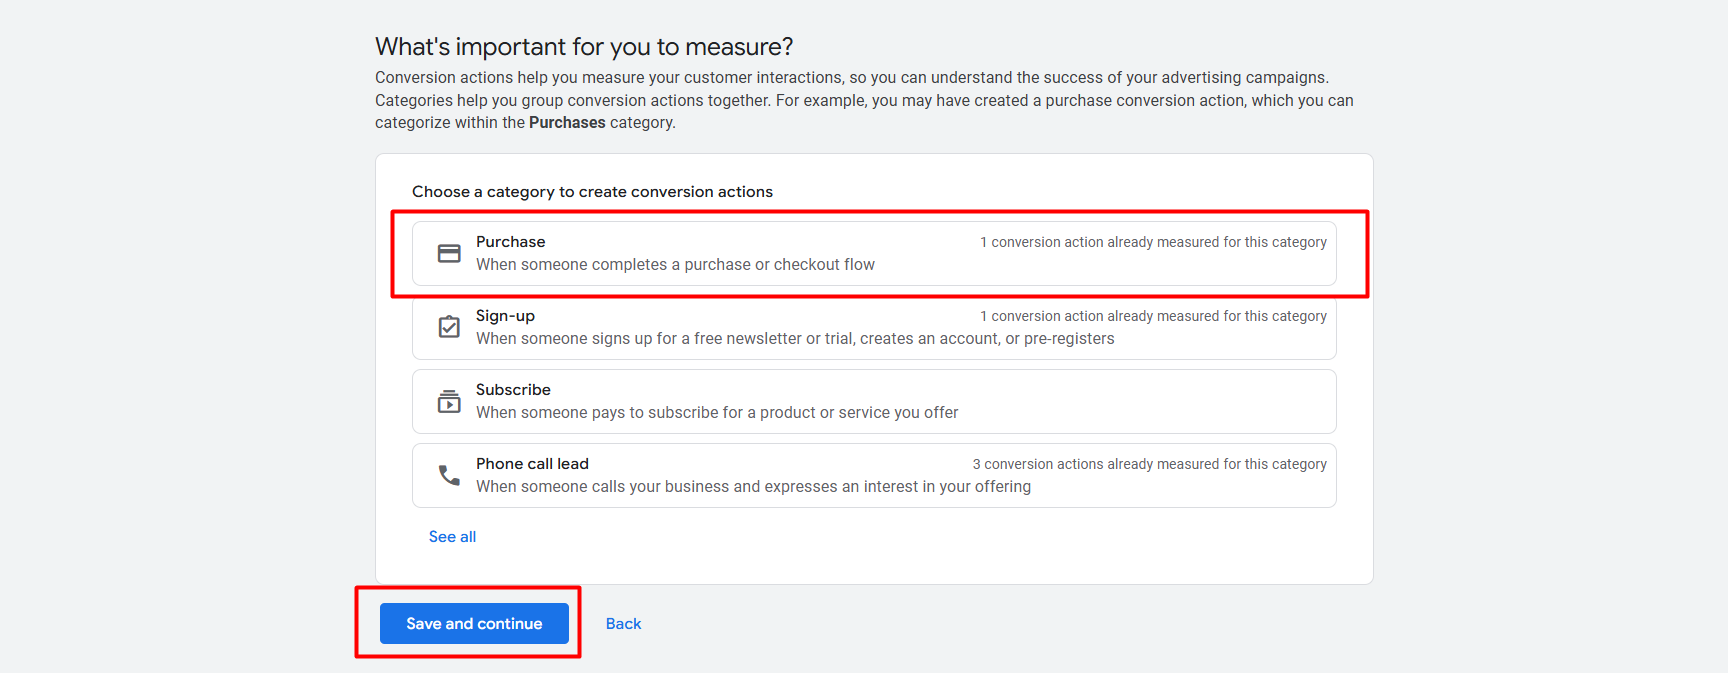
This is your new interface. From here, select the “Purchase” option, and let’s go for the next.
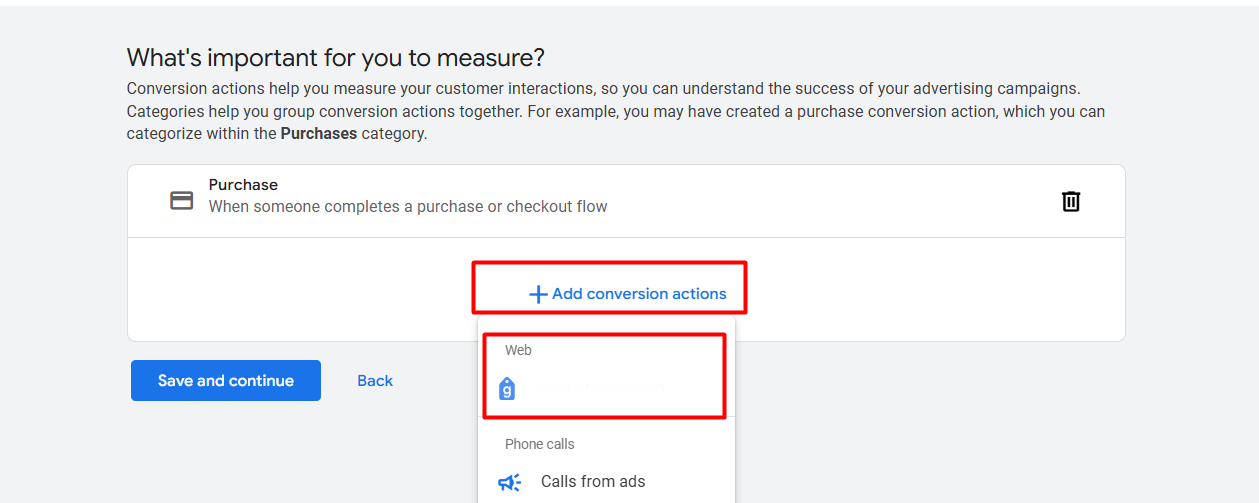
From here, click on “Add conversion actions.” Select the “Web” because through “Web” we will complete our tracking.
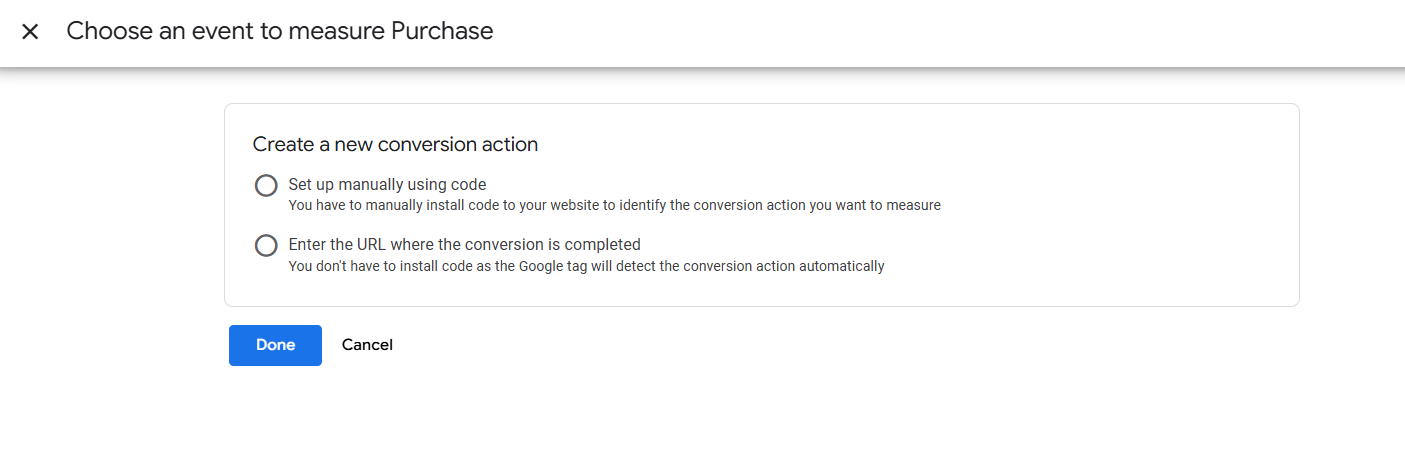
After selecting the web, you will get this new interface. From here, please select the first one, “Manually.” Because we will complete the work manually.
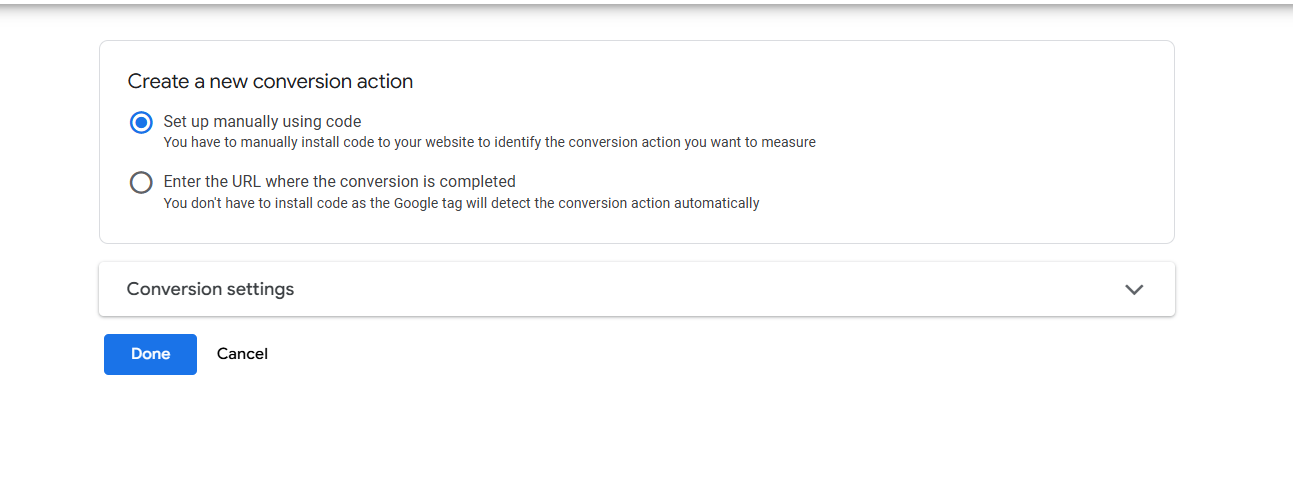
Now click on the Conversion Settings for more setup.
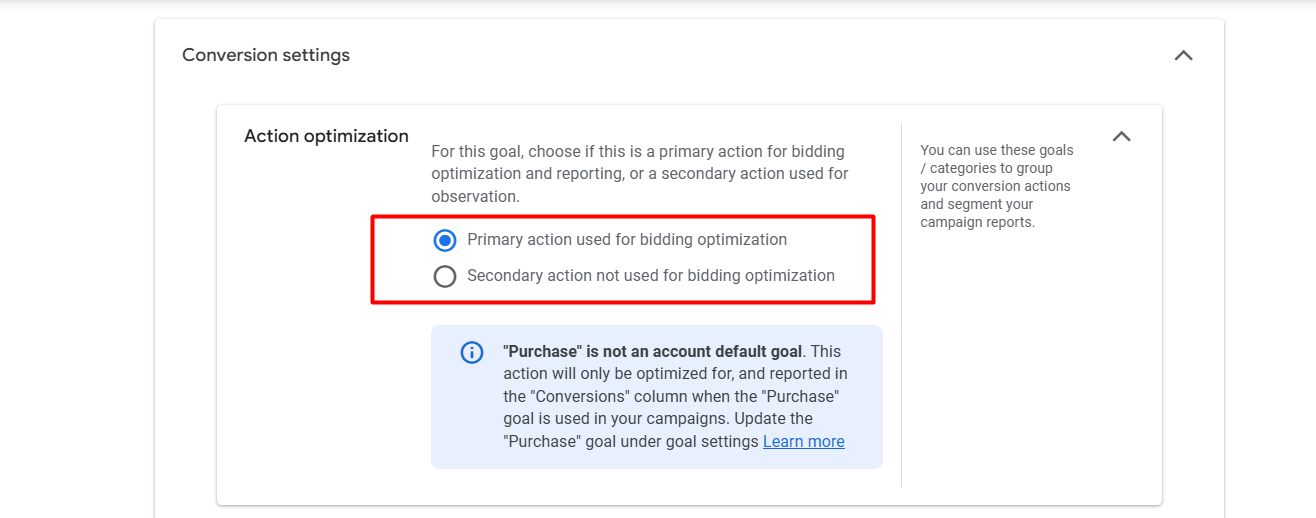
Now from here select the first option because “Purchase” is our primary action.

Now here in the next option, set up your conversion name according to your need.
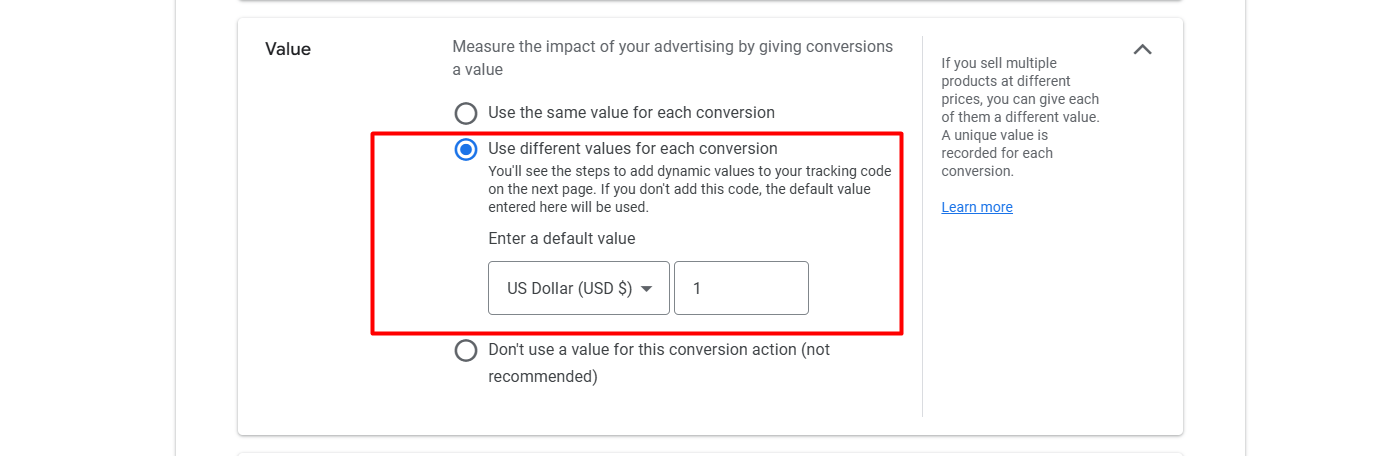
When configuring this setting, be sure to select the middle “Use different values for each conversion” option. This is a critical step because the actual value of a conversion can vary significantly depending on the product value.
By choosing this setting, we ensure that we can dynamically pass the unique conversion value for each transaction—using Google Tag Manager directly, we can send the data to your Google Ads account.
Sending accurate, granular value data is absolutely essential for enabling better tracking, optimizing for maximum return on ad spend (ROAS), and empowering Google’s smart bidding strategies to work effectively.

Here in the “Count” section you have to select “Every” because we want to count every single purchase as a new conversion. Because every single purchase is valuable.

Click-through conversion window: This is how long Google remembers a click on your ad. If a customer clicks your ad, leaves, and buys something on your site within 90 days, it counts the sale as a conversion from that click.
Engaged-view conversion window: How long Google remembers a YouTube ad view. If a customer watches at least 10 seconds of your video ad, leaves, and buys something on your site within 3 days, it counts the sale as a conversion from that view.
View-through conversion window: How long Google remembers an ad that was seen but not clicked. If a customer sees a display ad (but doesn’t click it), leaves, and buys something on your site within 1 day, it counts the sale as a conversion from that view.
Attribution: This determines which ad click gets credit for the sale. Data-driven (recommended) means Google uses machine learning to give credit to all the clicks and ads a person interacted with, not just the last one.
Now click on Done.
Now save and continue for the next option.
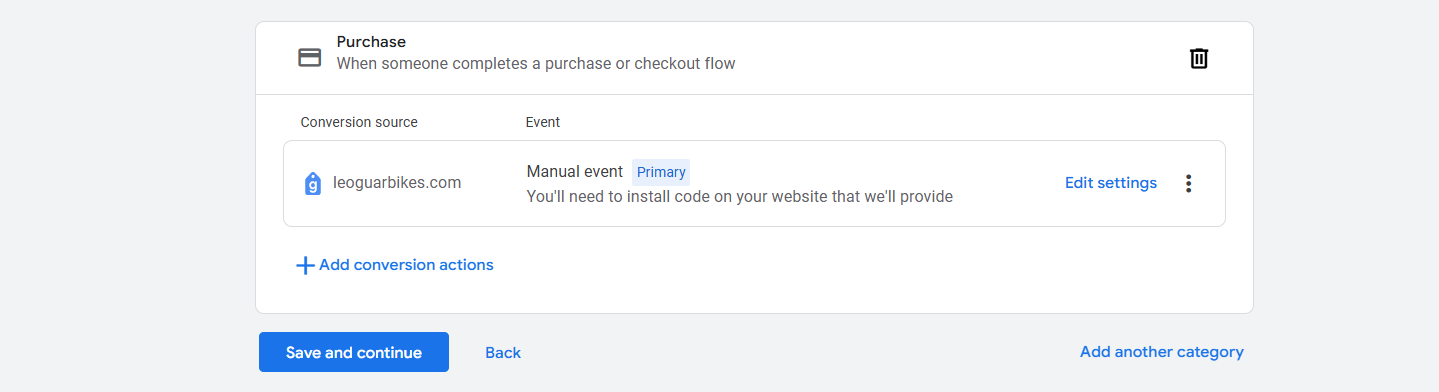
From the new interface we have to select the third option. Because now we are going to complete the setup through GTM.
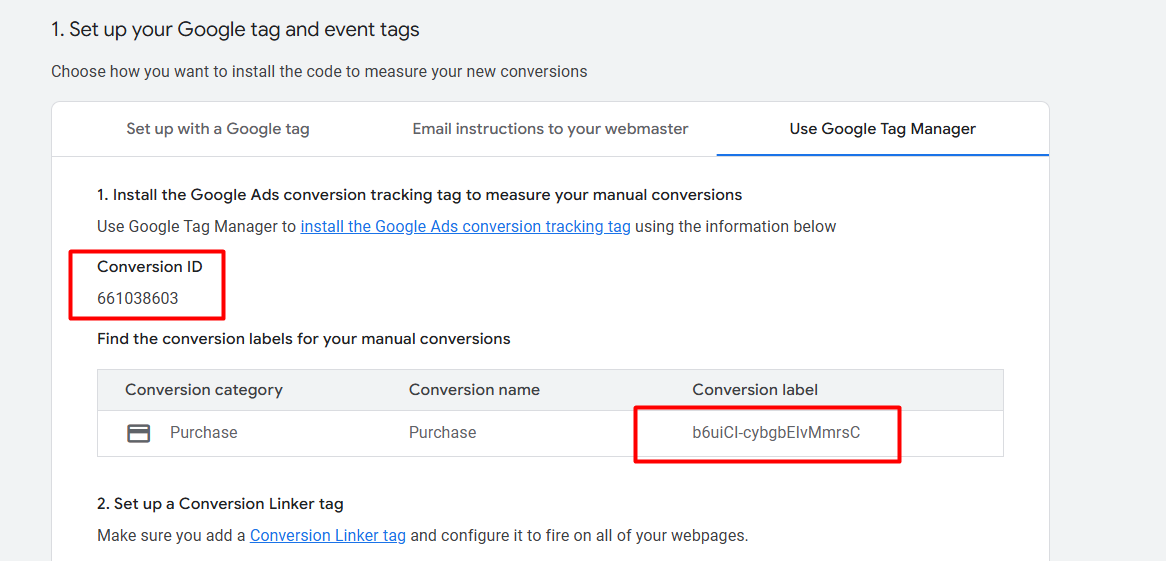
From here, collect the “Conversion ID” and the “Conversion Label,” and now let’s go to your GTM.
Tracking setup through GTM
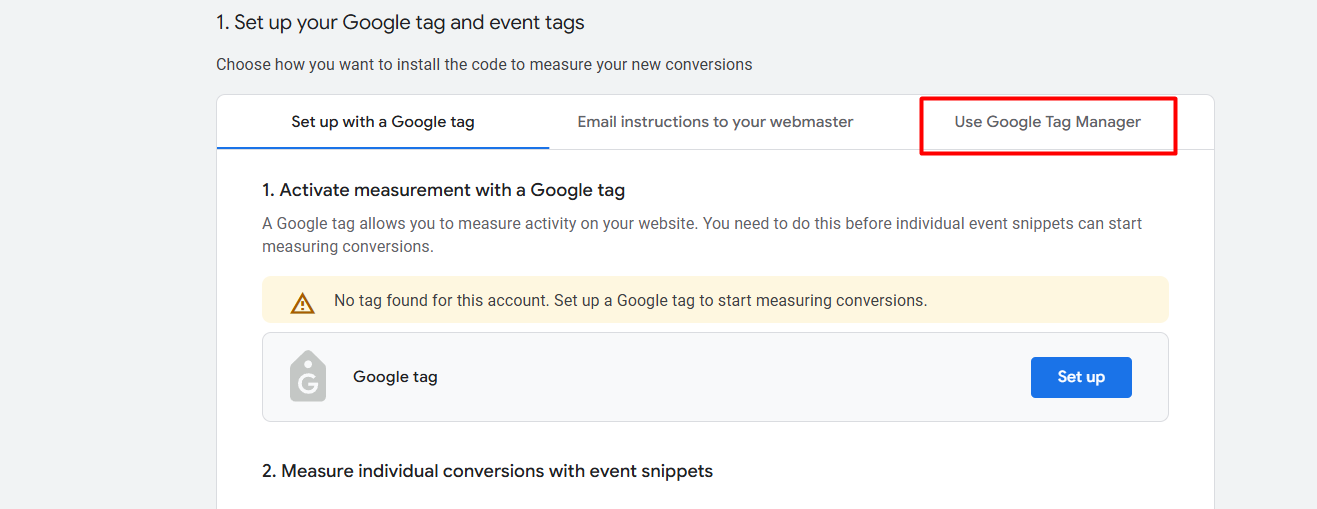
Go to your Google Tag Manager to create a tag. But here first we have to create one “Google Tag.”
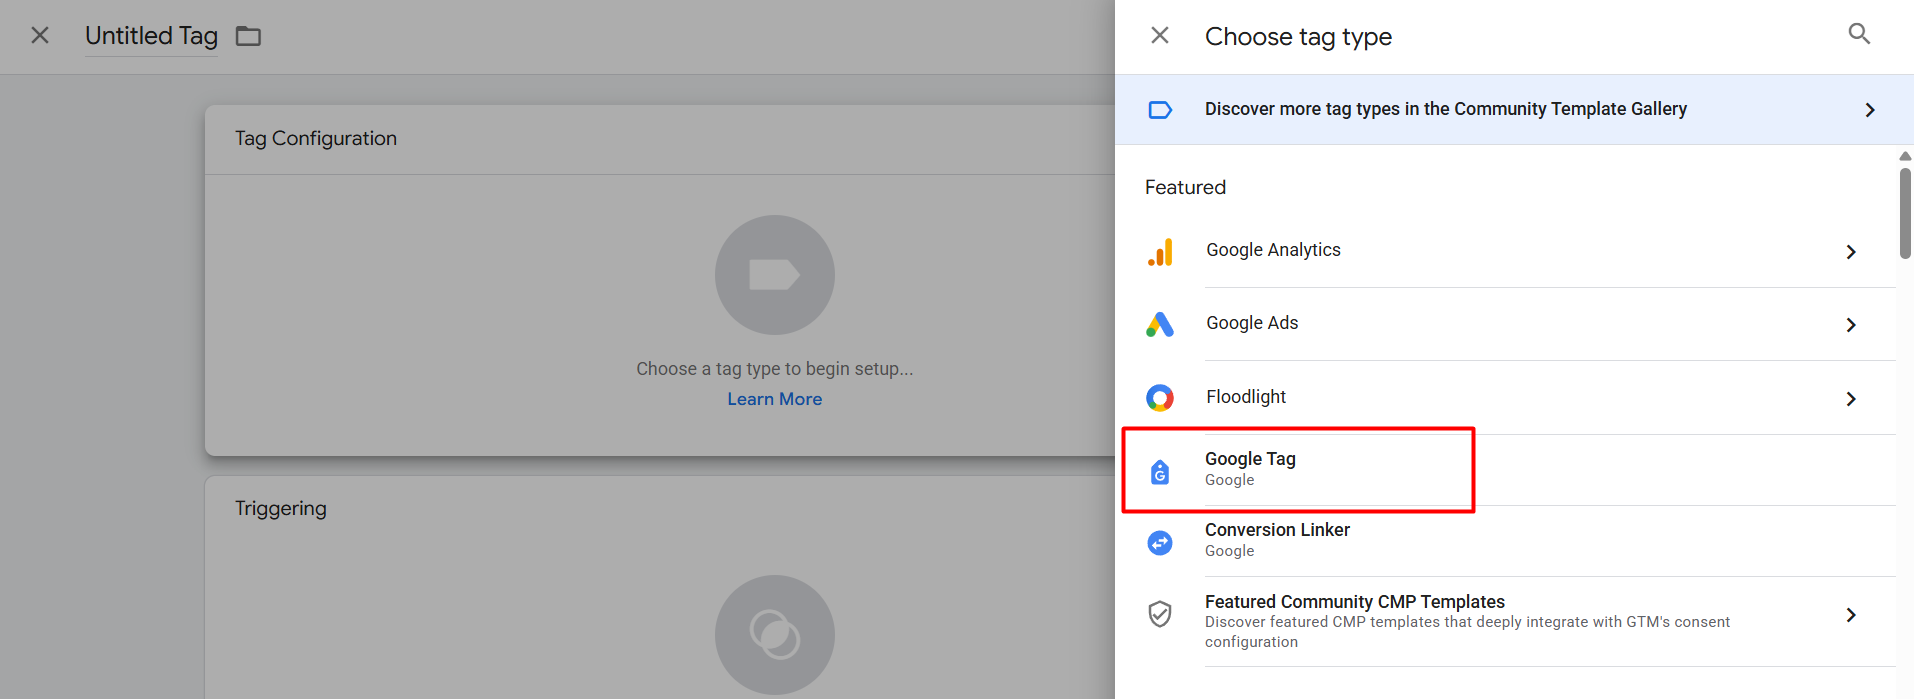
From the tag section, click on the new tag, and then from the “tag configuration,” select the “Google Tag” as your tag type.
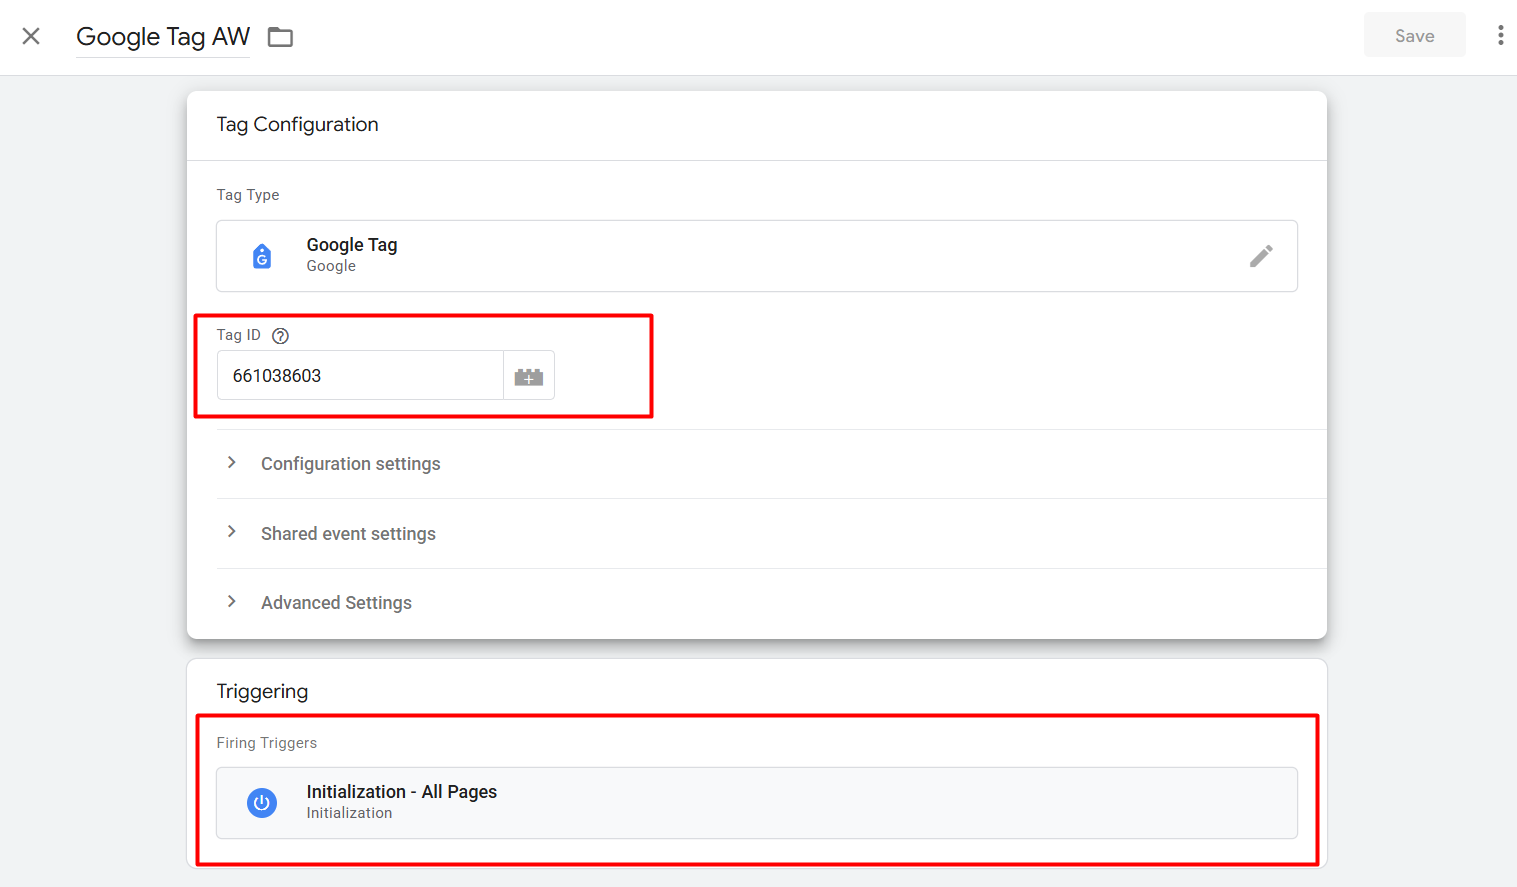
Now in the place of “Tag ID,” place our copied “Conversion ID,” and in the place of “Trigger,” select “All Page” as the trigger type.
Now in the same way again, create one more new tag, but this time, as your tag type, select “Conversion Linker.”
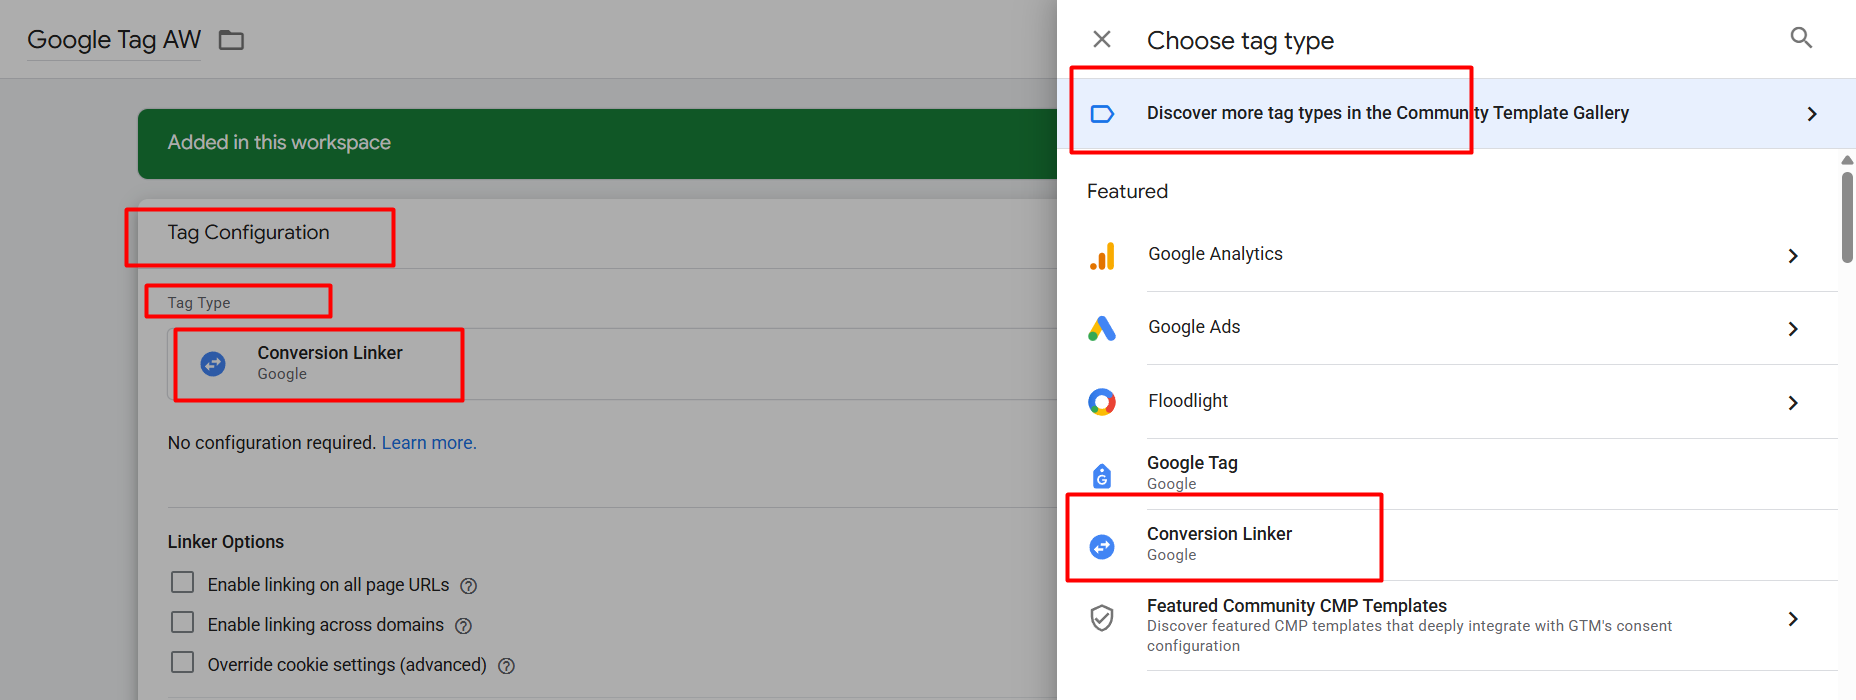
And in the same way for the trigger, select “All Page” as the trigger type.
Now it’s time to set up the main tag to capture the purchase events. So again, go to your tag section and click on the new button to create one more new tag.
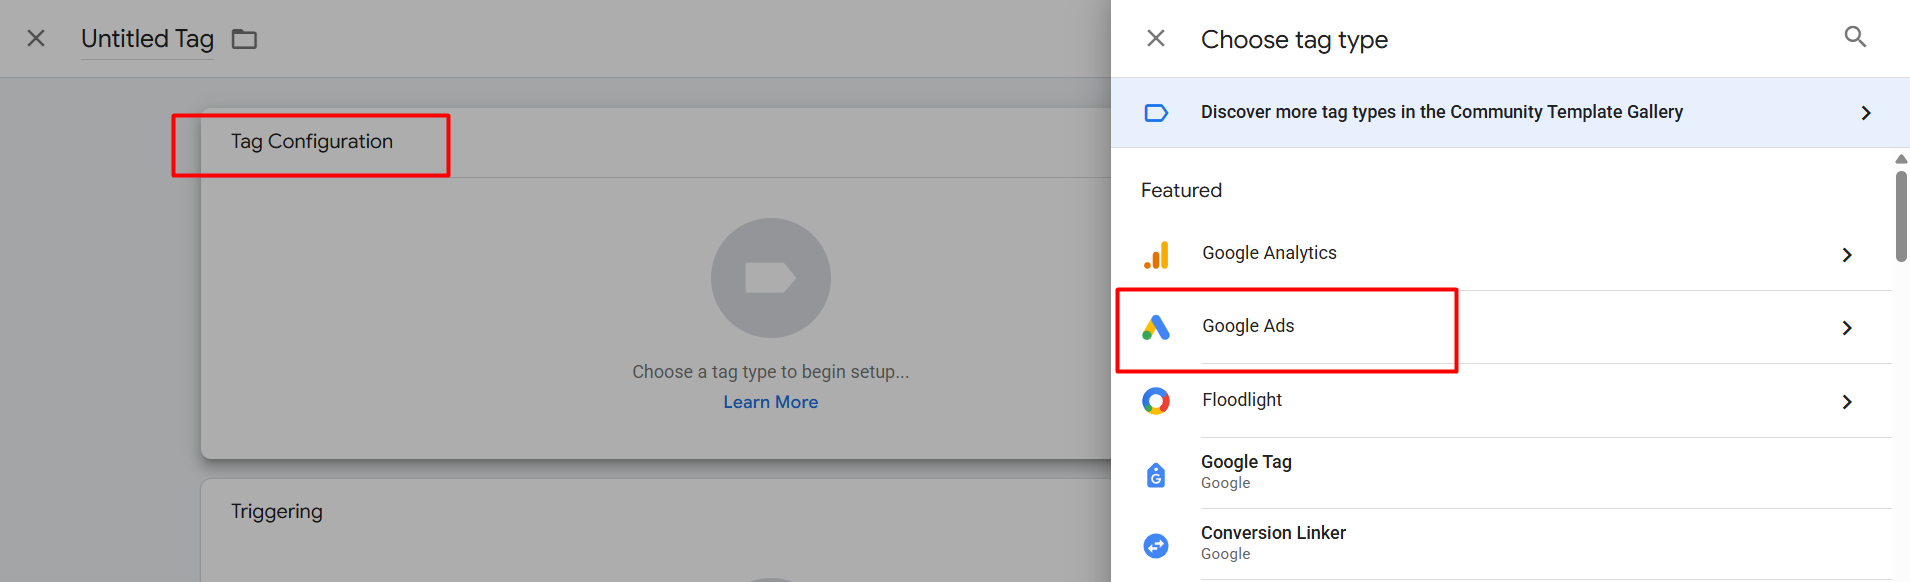
Now for the purchase events, to select the perfect tag type, now click on “Google Ads” to select the perfect tag type.
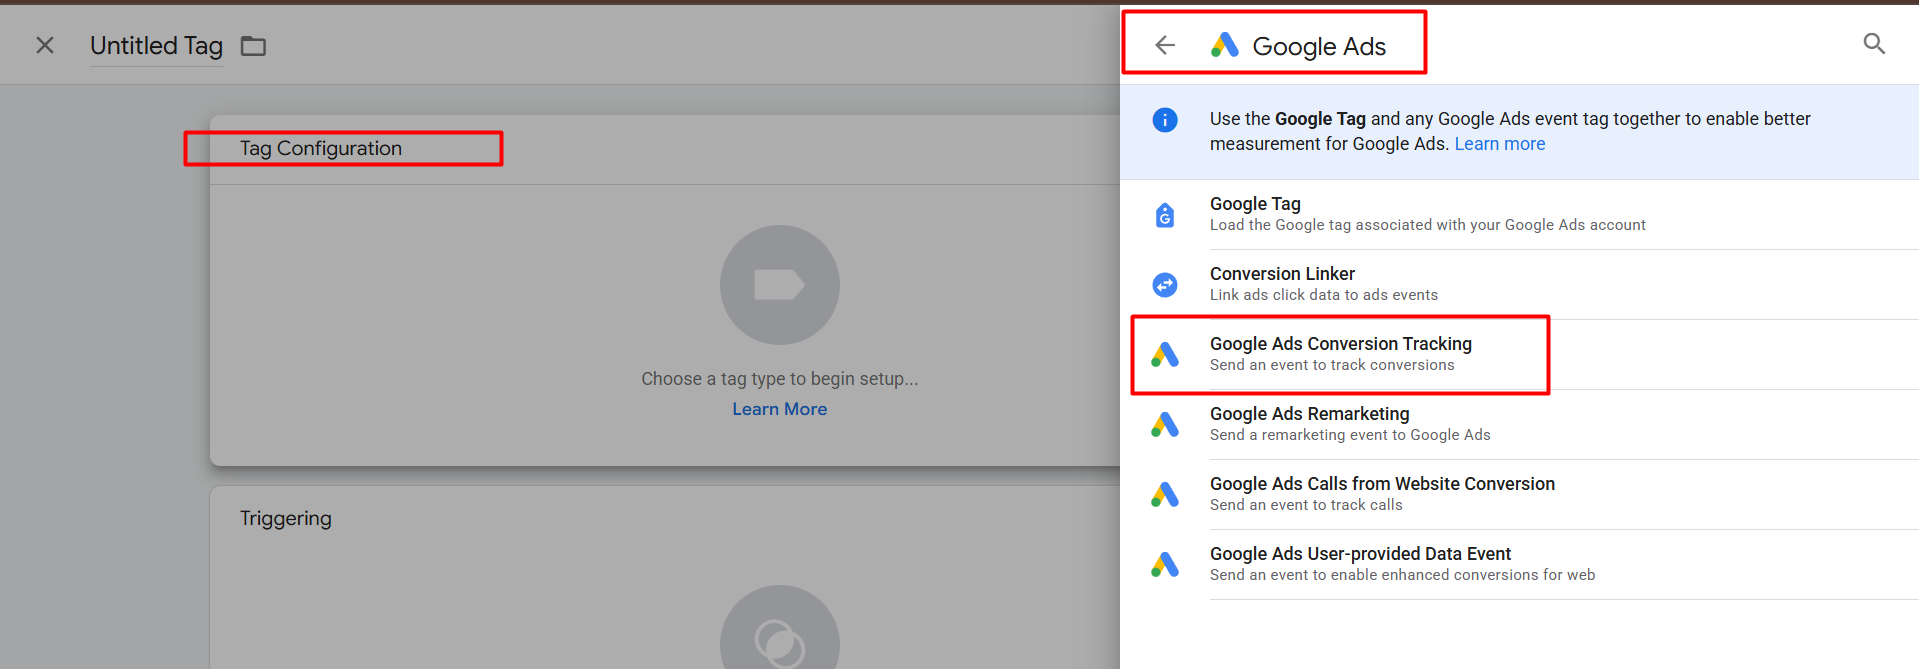
Now from here, select “Google Ads Conversion Tracking” as the tag type. With the tag we will complete the purchase conversion tracking.

Now here in the place of “Conversion ID” and the place of “Conversion Level,” paste our previously collected values.
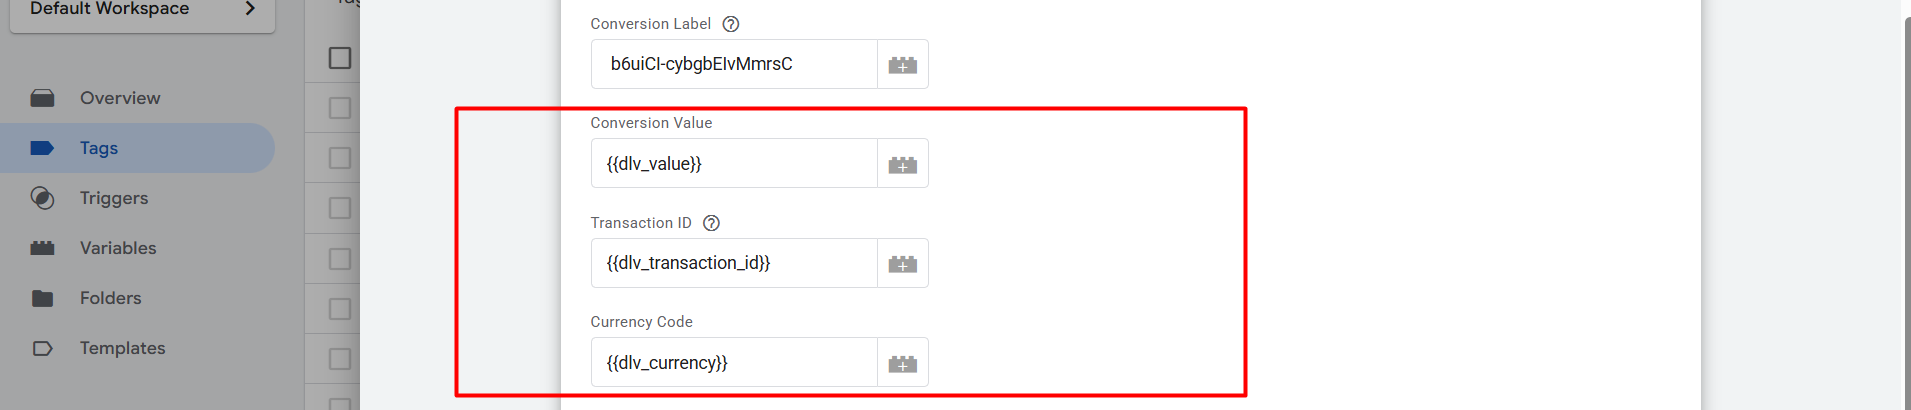
Now here in this new three-place, we confirm according to our data layer. The Clear Concept of GTM DataLayer.
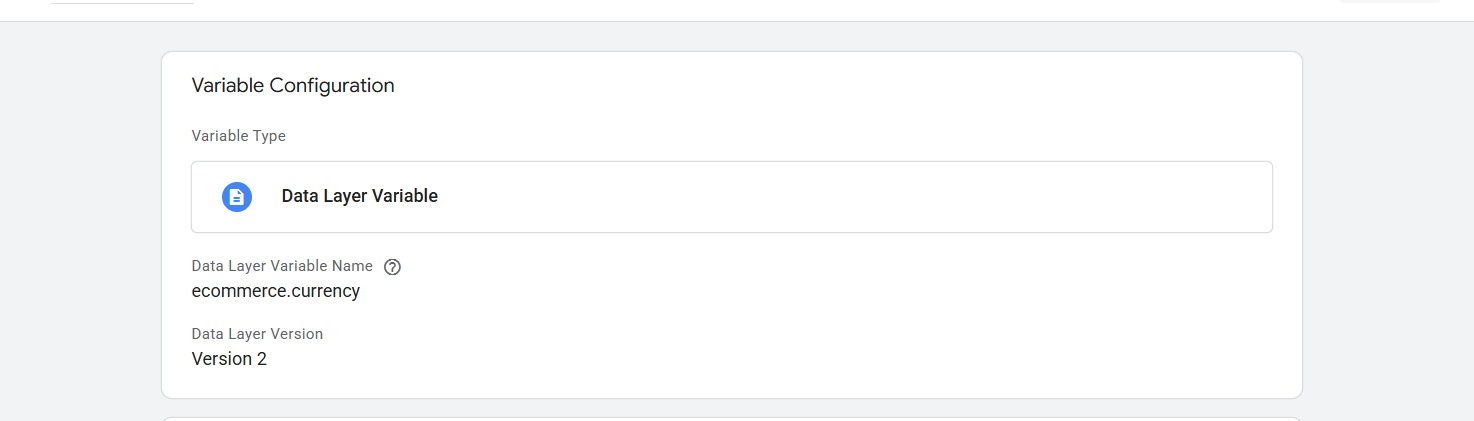
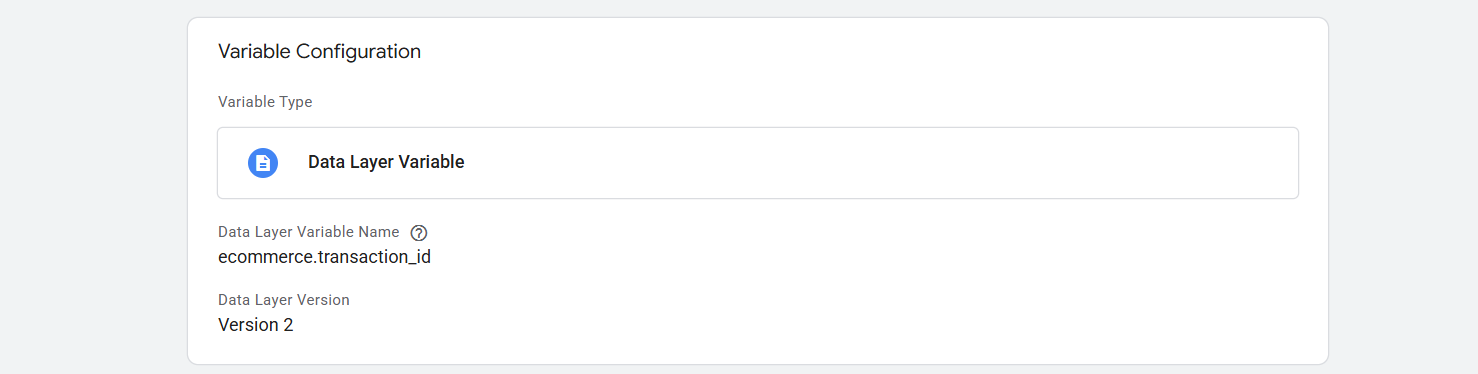
Through the first place, “Conversion Value,” we can send the price of our product, and with the second value, “Transaction ID,” we can send our unique transaction ID that we get every time after completing one purchase. Then the last one is “Currency.” With this section, we can send data about our currency dynamically.

To create this variable, we go to our “Variables” section and create a new variable under the “User-Defined Variables.”
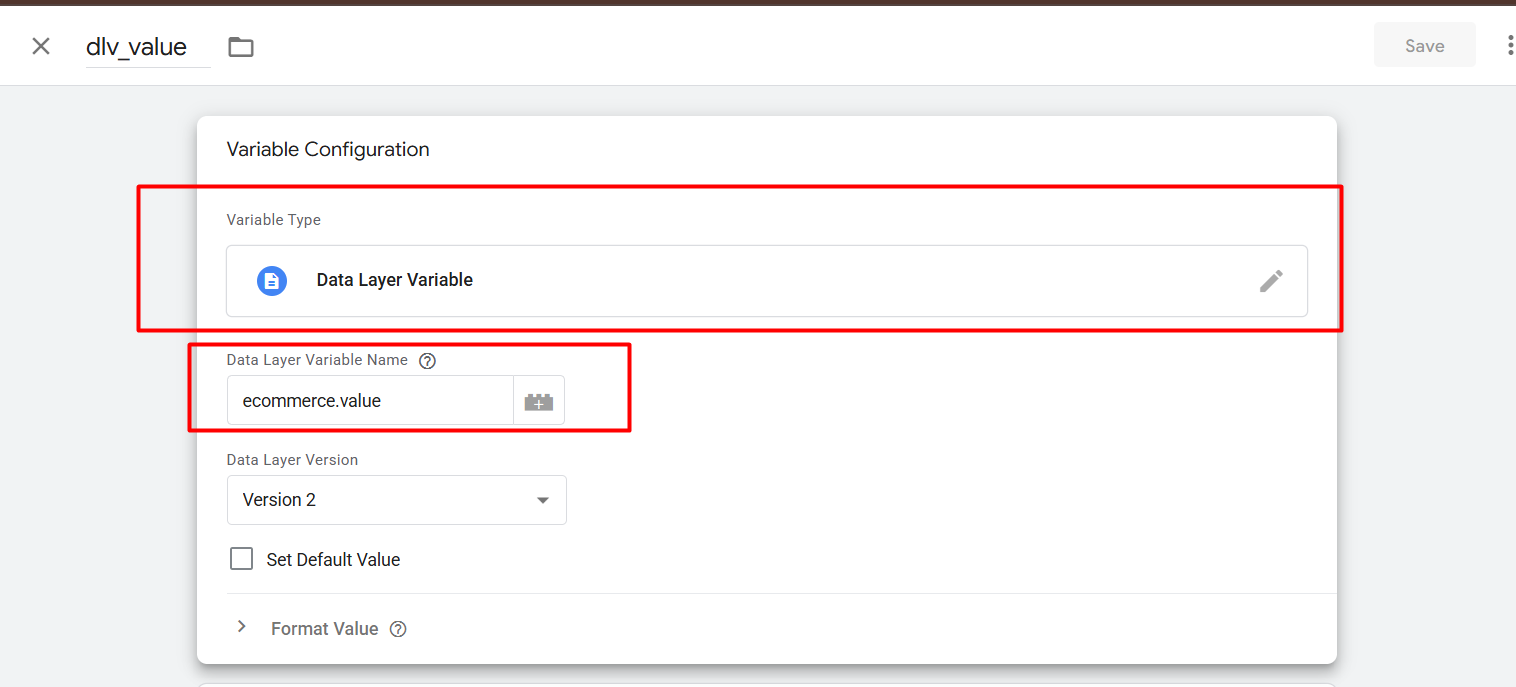
Here you can see our selected variable type is “Data Layer Variable.” And also you can see the variable name we used to collect the value.
Now done, let’s go for the next.
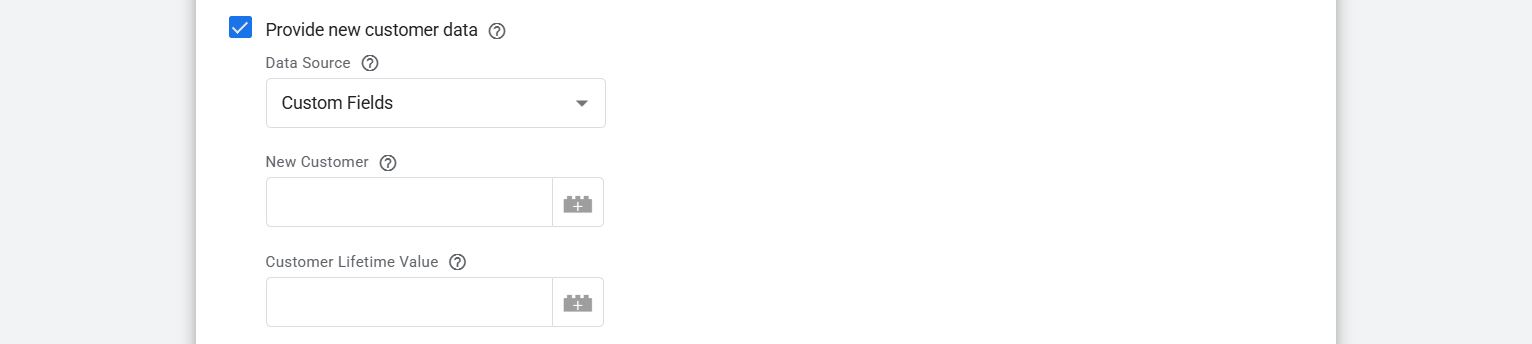
If you want to share this data also with Google, then you can follow these two articles.
1. Track Customer Type For Your Google Ads
2. Track Customer Life Time Value Using Google Tag Manager
Now it’s time to set up the trigger to track the “Purchase” events perfectly. Every time when someone completes a purchase, then we can see this type of interface in our data layer.
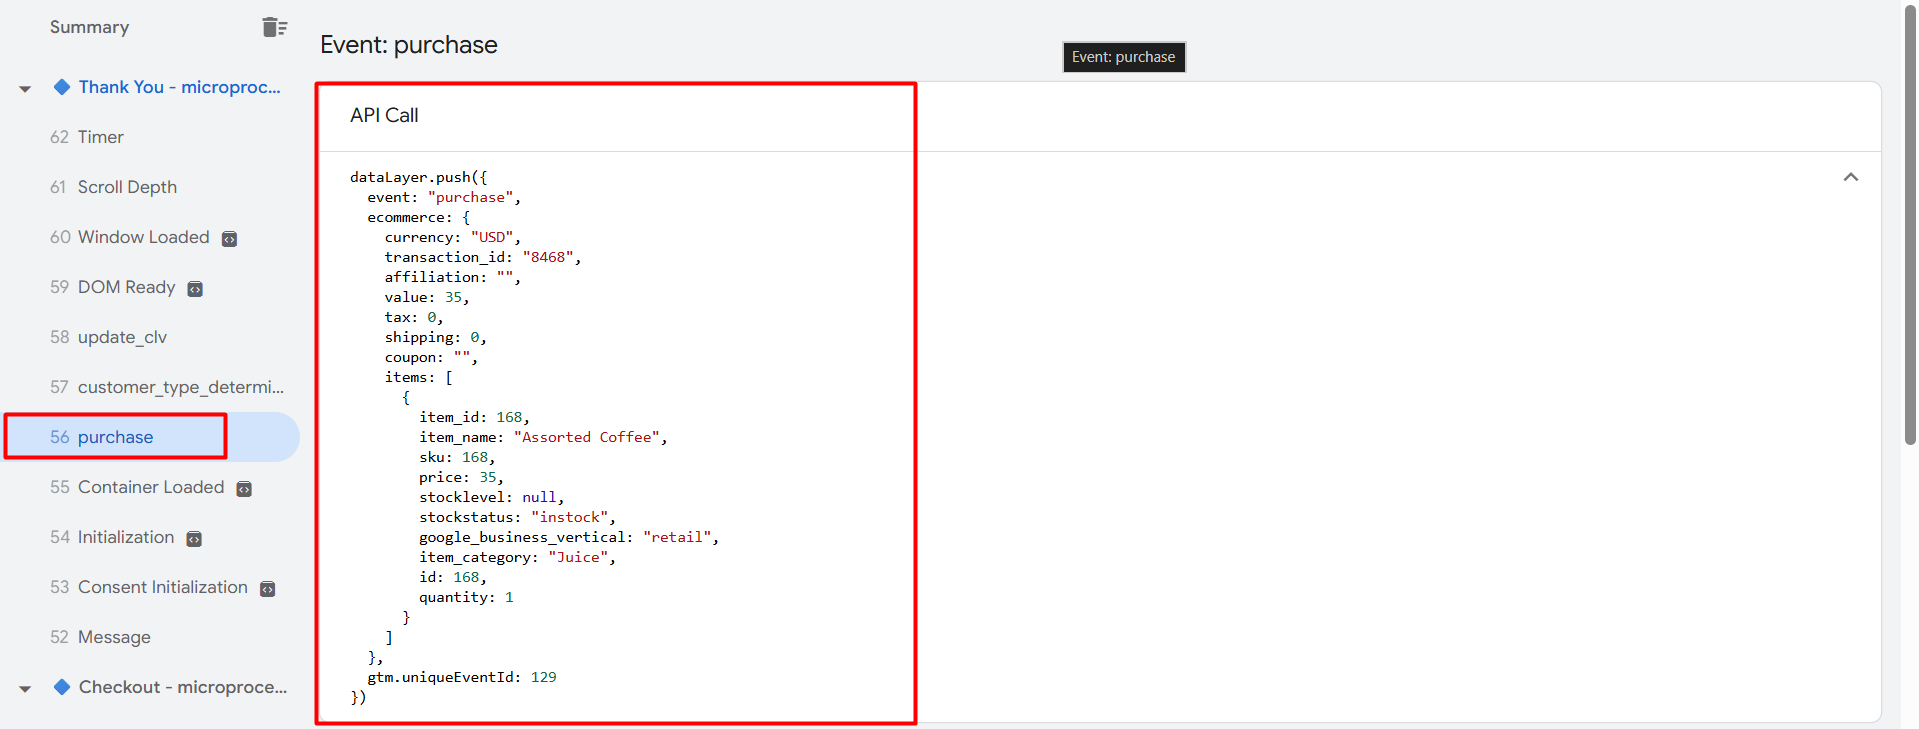
You can see something else or different types of interfaces in your data layer. So we have to capture these events through the “Custom Event” as your tag type. So to get the perfect name for you, you can follow your data layer.
Now scroll down and click on the trigger section and select “Custom Event” as your event type.
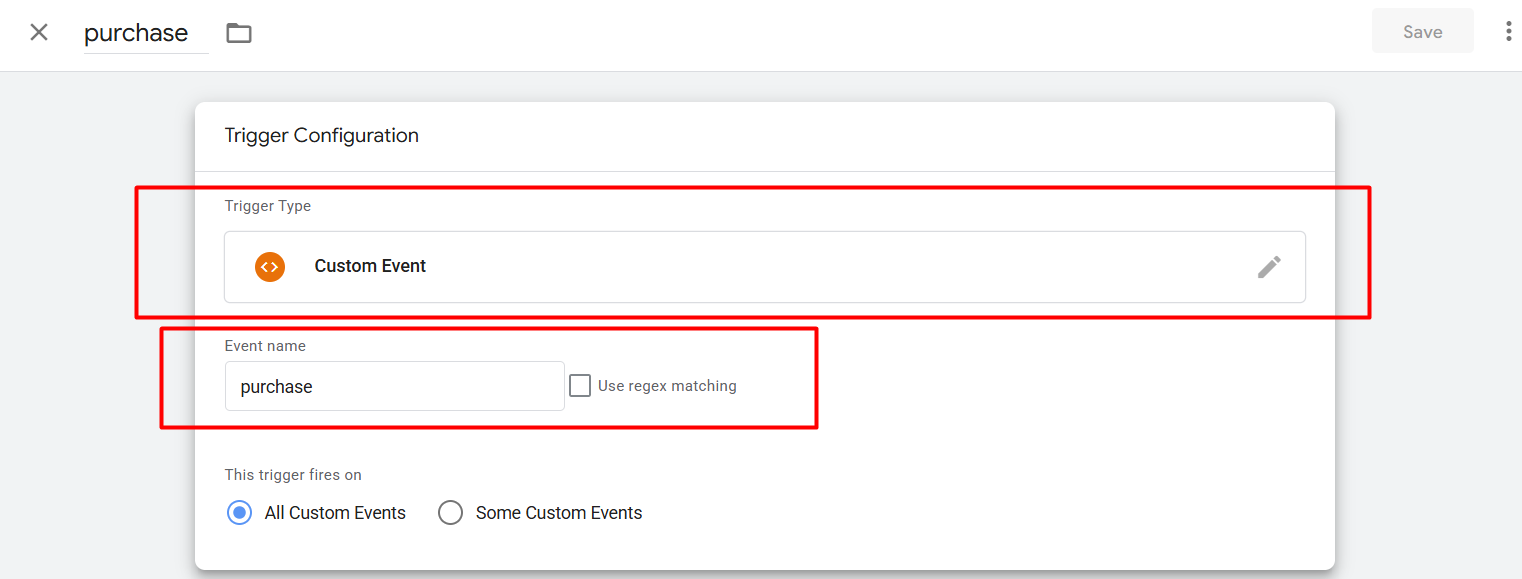
Now here you can see how we complete the trigger. Then save.
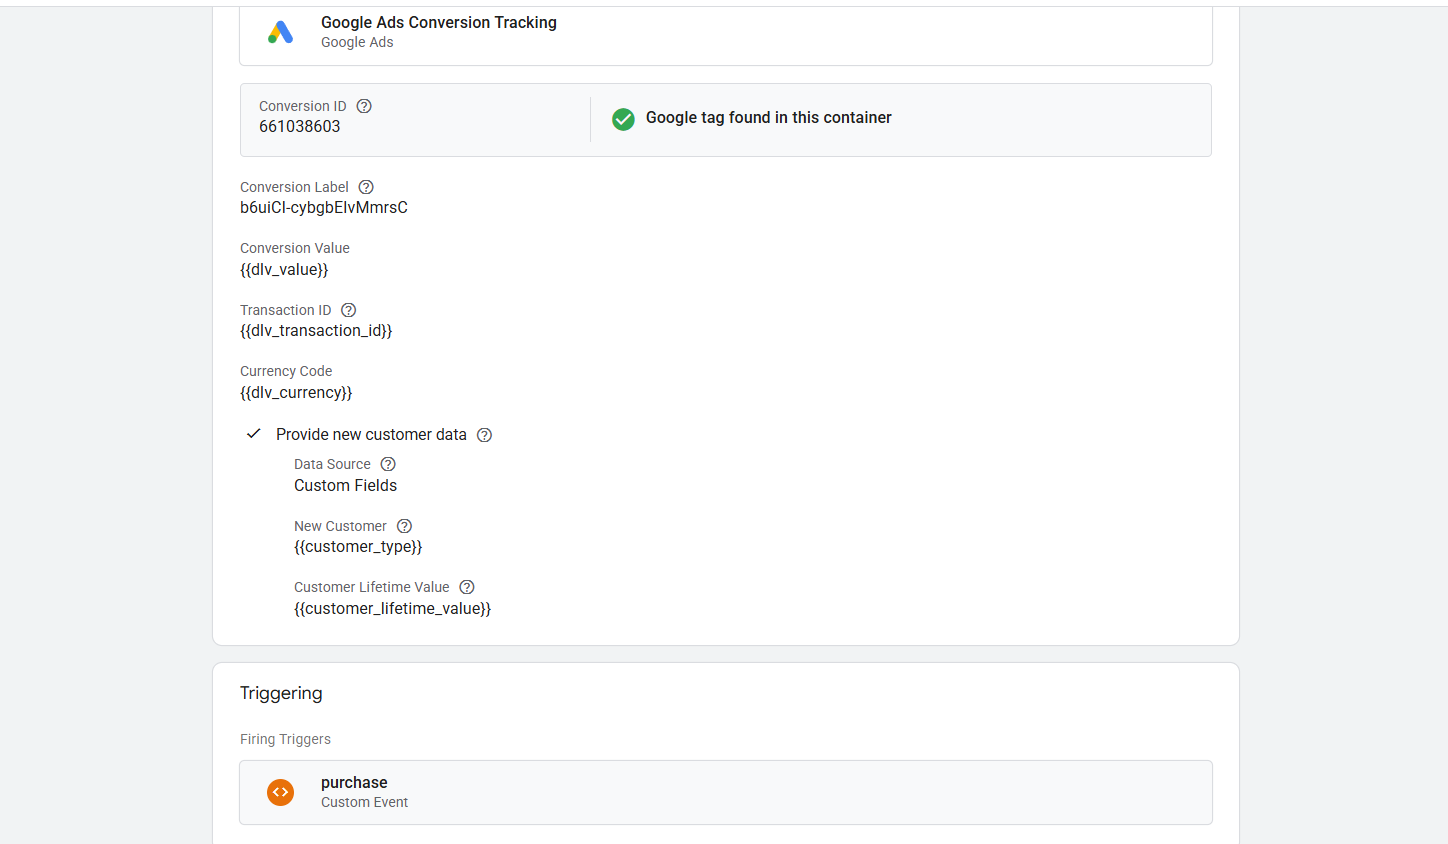
This is the final view after completing the tag to track the “Purchase” events for Google Ads.
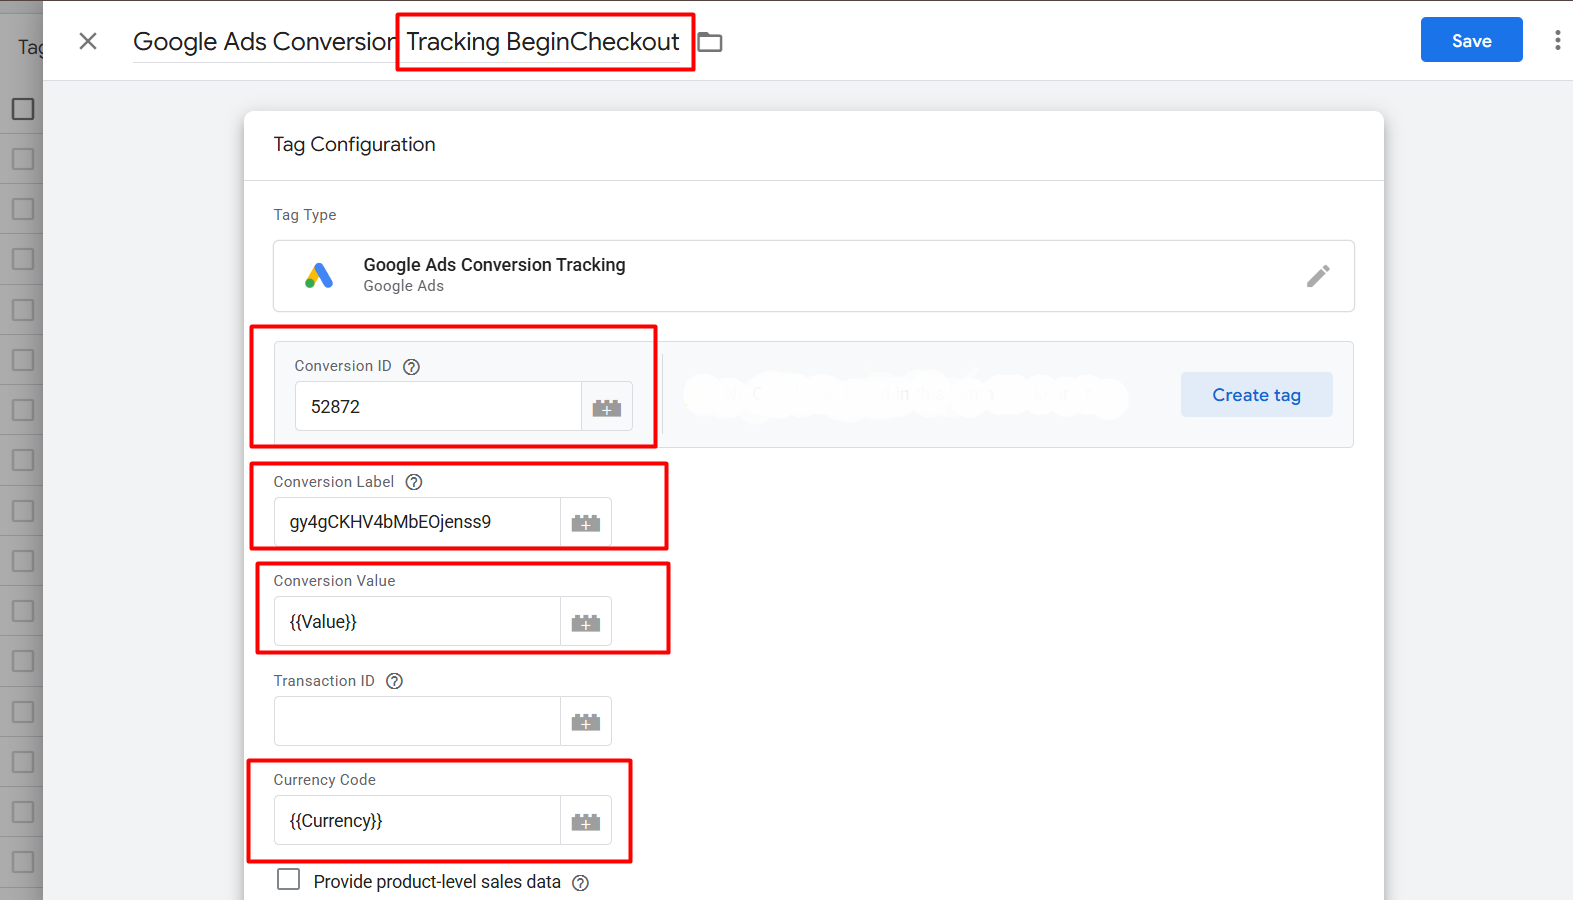
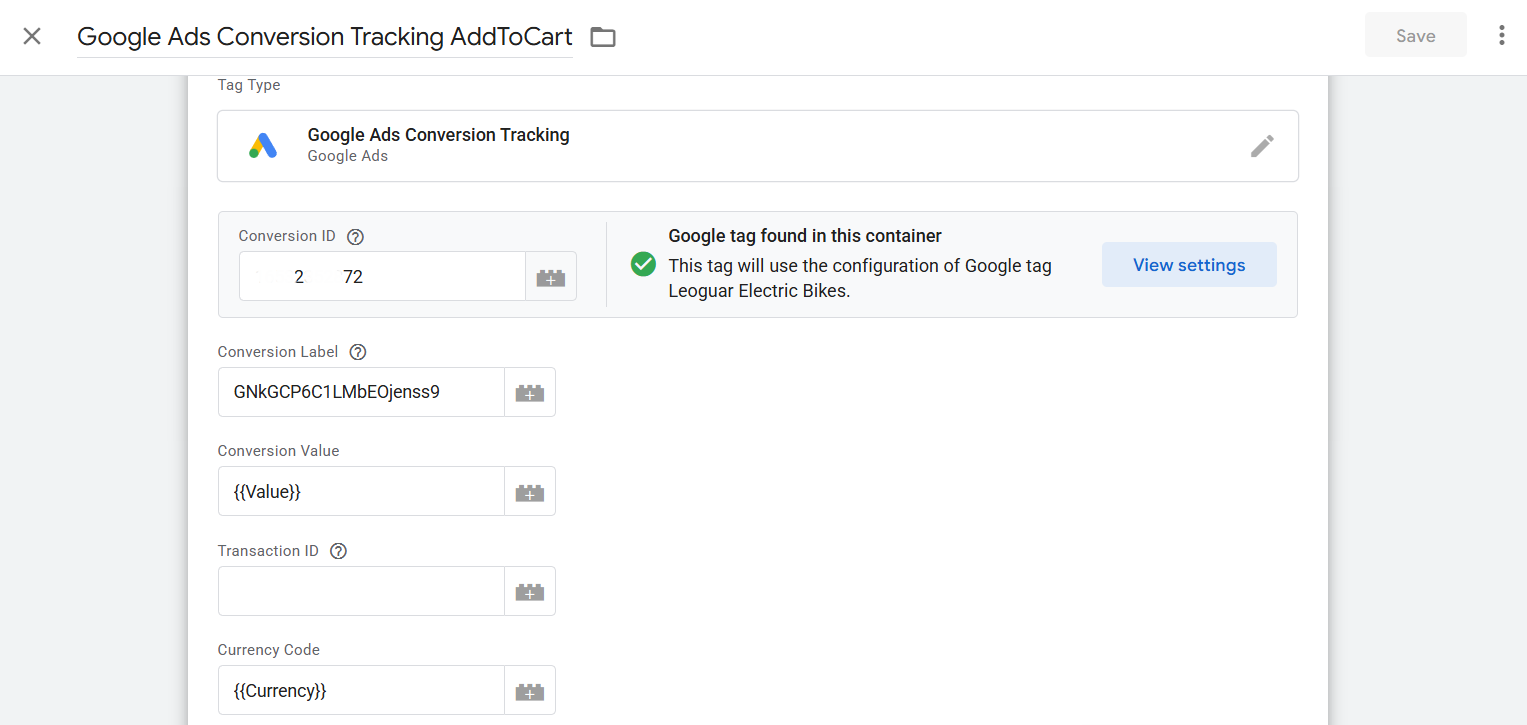
In the same way, you can complete the “Checkout” and “Add_To_Cart” and other events for your Google Ads.
But after the purchase for another e-commerce event, the “Transaction ID” and the “CLV” will be missing, but don’t worry, you can complete the tracking without them also.


With the steps outlined in the preceding visuals, you can see exactly how we implemented the remaining pieces of e-commerce tracking. Congratulations! By completing these critical configurations, you have successfully set up comprehensive and robust e-commerce tracking for your Google Ads campaigns.
Now that you’ve seen the full process, we’d love to hear your thoughts or any questions you might have. Feel free to share your ideas or any challenges you faced in the comments below!


