In today’s world, data is considered the most powerful asset of a country. Every nation, platform, and device strives to prove that they are the best at securing user data. This is where tracking platforms play a game-changing role. However, we face numerous challenges when it comes to data tracking. Even when we’re able to collect data, many sites remove it after a short period, leading to significant revenue losses. Let’s explore what first-party tracking is and how it can address these issues.
Client-side tracking vs. server-side tracking
Client-side tracking uses your browser to send data directly to analytics tools like Google Analytics, Facebook, or TikTok. It works by adding a tracking script (like Google Tag Manager) to your website, which sends user activity data to these platforms.
Server-side tracking, on the other hand, sends data to a cloud server before it’s distributed to tracking platforms. This method helps improve data accuracy, reduces the impact of ad blockers, and uses first-party cookies, which last longer and are more reliable. Server-side tracking also gives you more control over what data each platform gets, improving privacy and data governance.
Types of cookie
- First-Party Cookies: First-party cookies are stored directly by the website you visit. They help that website remember useful information, making it easier for you to navigate and return. For example, they can remember your shopping cart, login details (like your email and password), or your page preferences, so you don’t have to re-enter them each time you visit.
- Third-Party Cookies: Third-party cookies are placed in your browser by external websites or advertisers, like Facebook, Google, or TikTok. These cookies track your activity across different websites to show you targeted ads.
Examples:
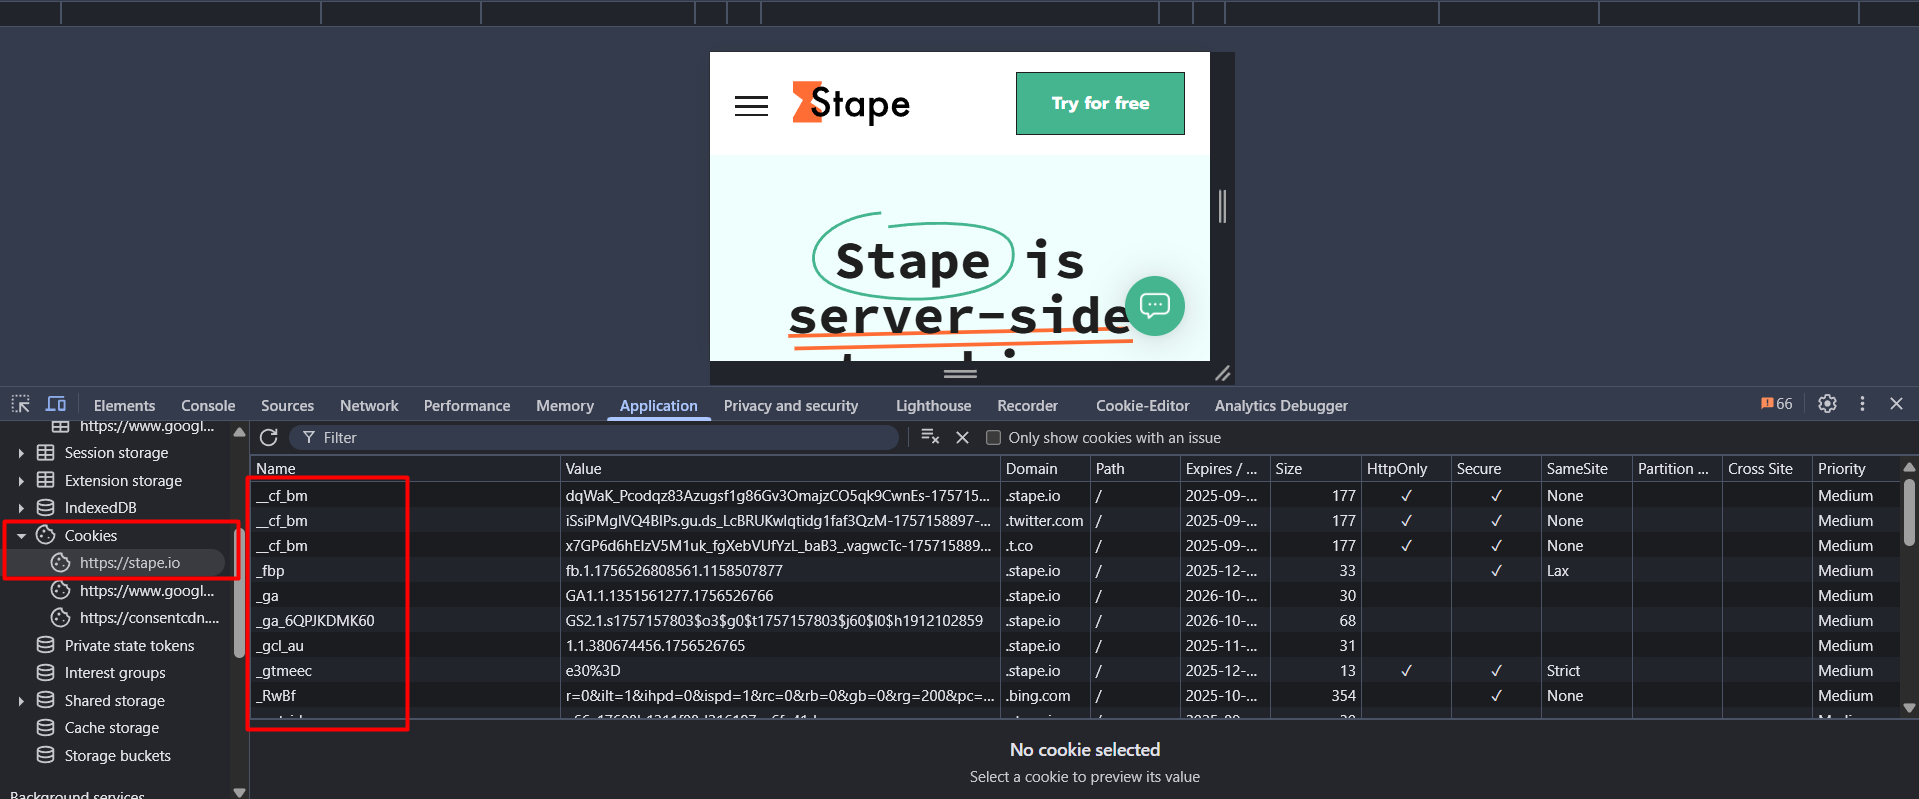
- Facebook: _fbp & _fbc (6-month duration)—Used for retargeting and ad attribution, helping Facebook show you ads based on your interests.
- Google Ads: _gclid (3-month duration)—Tracks your interactions with Google Ads to help advertisers measure the effectiveness of their campaigns. In the picture you can see.
Without cookies, tracking user activity becomes extremely challenging. Cookies are the only way for third-party platforms to recognize you when you visit again. Even with tools like Google Tag Manager (GTM), tracking becomes difficult because GTM itself is a third-party application.
In other words, without first-party cookies, it’s nearly impossible for advertisers and websites to remember or track your behavior, leading to missed opportunities for personalized experiences or targeted ads. That’s why it’s so important to understand how cookies work and why they play a key role in digital marketing and analytics.
Do you know why it’s impossible to drop cookies?!
- iOS is a major tech giant and is widely recognized for its strong focus on user privacy. Recent iOS updates have introduced stricter measures that block third-party cookies altogether. In addition, they significantly shorten the lifespan of any remaining cookies, reducing their duration to anywhere from 7 to 20 days, or sometimes even less. These changes have a substantial impact on how advertisers track and retarget users, making it harder for them to build long-term user profiles or deliver personalized ads.
- Ad blockers stop third-party cookies, preventing tracking and personalized ads, which enhances privacy but limits website analytics and custom content.
- Browser settings also do not allow storing third-party cookies.
We need to solve this problem, and the best solution right now is implementing server-side first-party tracking. The idea is to manage everything under our own domain hosting, making it appear as a true first-party interaction. By loading all tracking processes on our domain, we eliminate the risk of third-party blockers or restrictions, ensuring we can track our target data without interruptions.
While you can implement this on your website, it requires deep expertise in web development. Since we’re not experts in that field, we need to rely on platforms that offer server-side tracking solutions. One such platform is Stape, which provides a dedicated server to handle the data transaction process. This allows us to bypass technical challenges and focus on efficient, secure data tracking without the need for in-depth development knowledge.
Let’s create one Stape.io account
Before creating the stape.io, let’s first create a new server container in your Google Tag Manager. So go to the Google Tag Manager
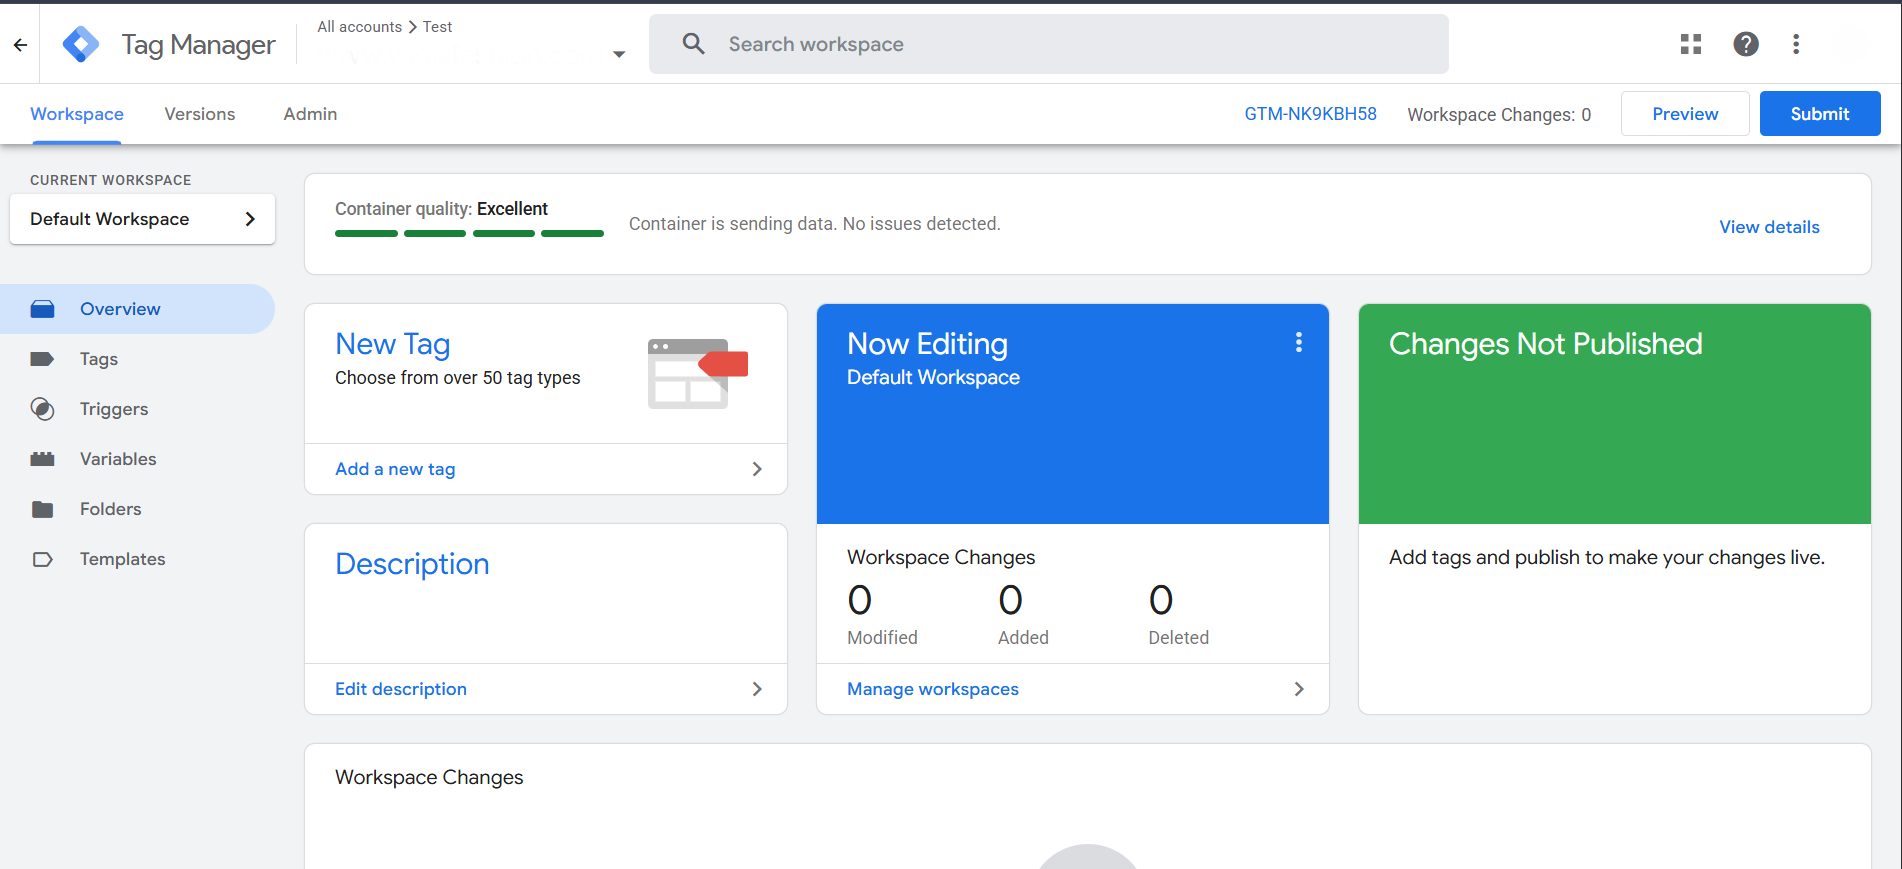
Click on the admin section because from there now we are going to create the server container.
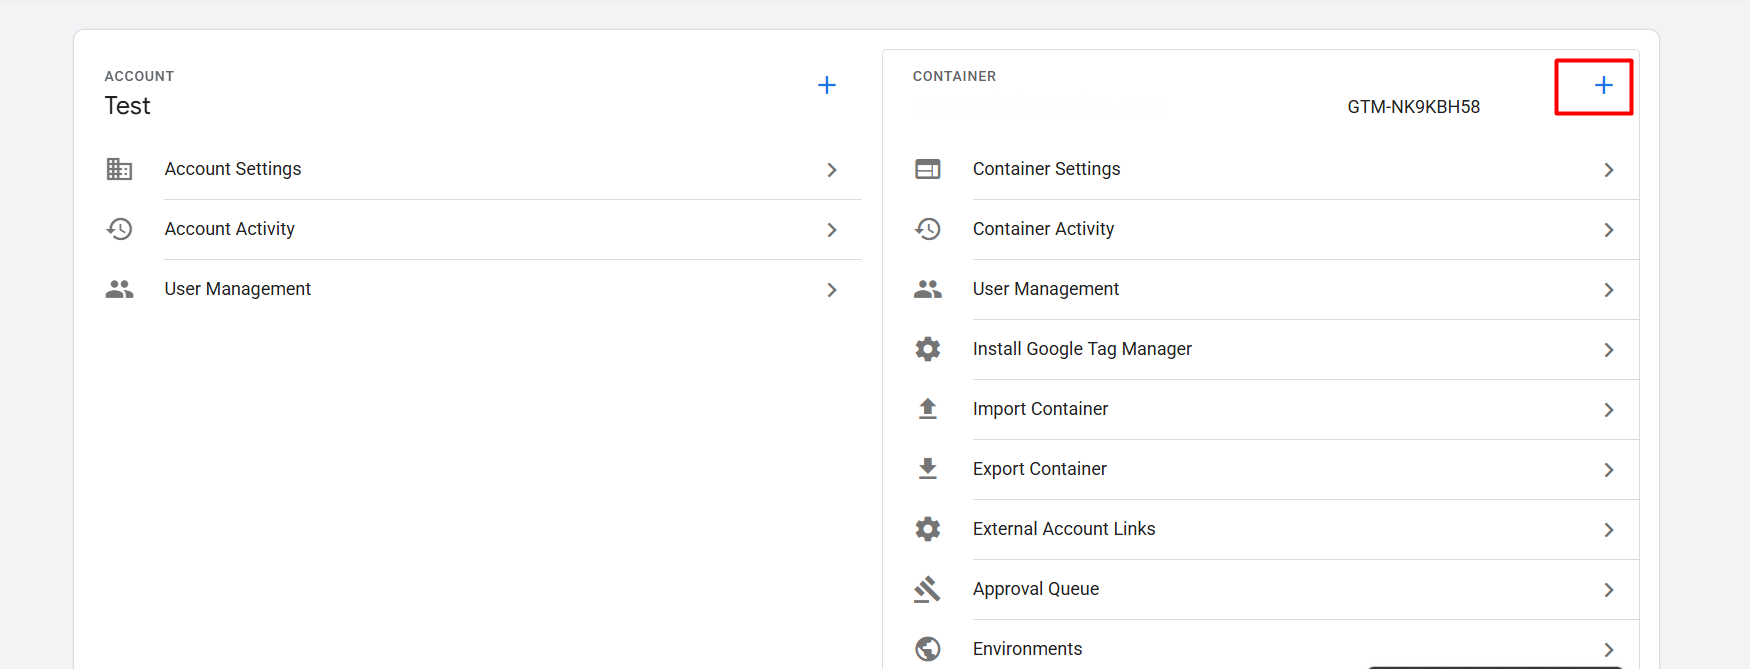
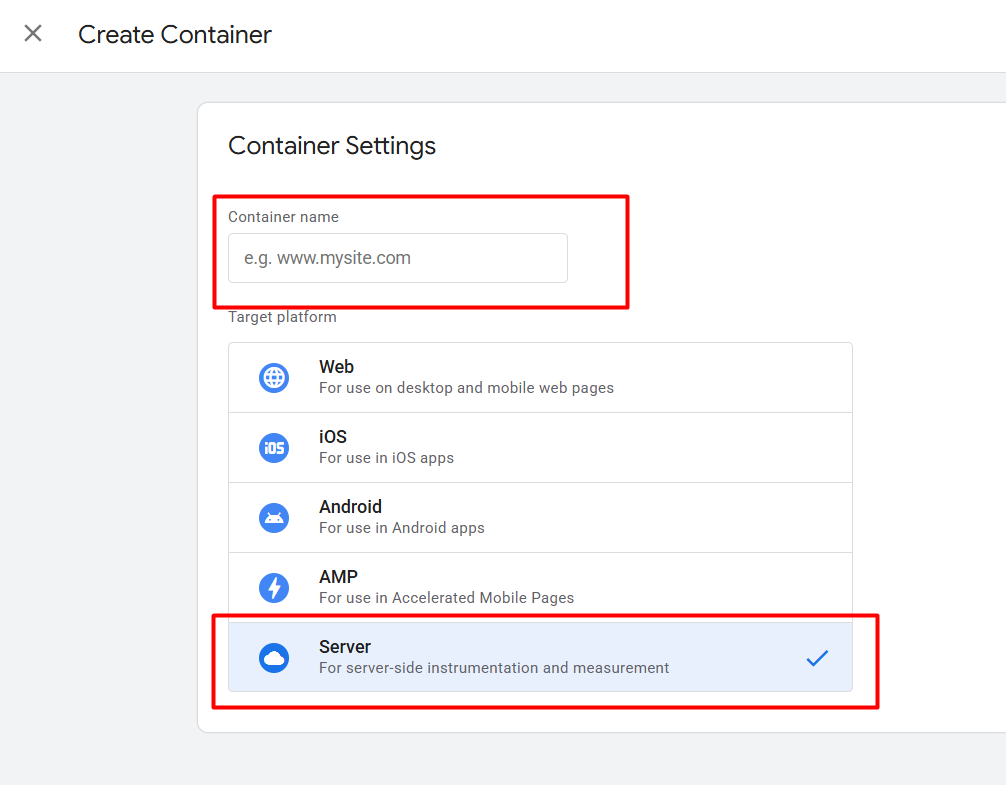
After clicking on the “+” icon here in the new page, place your container name and select the “Server” section.
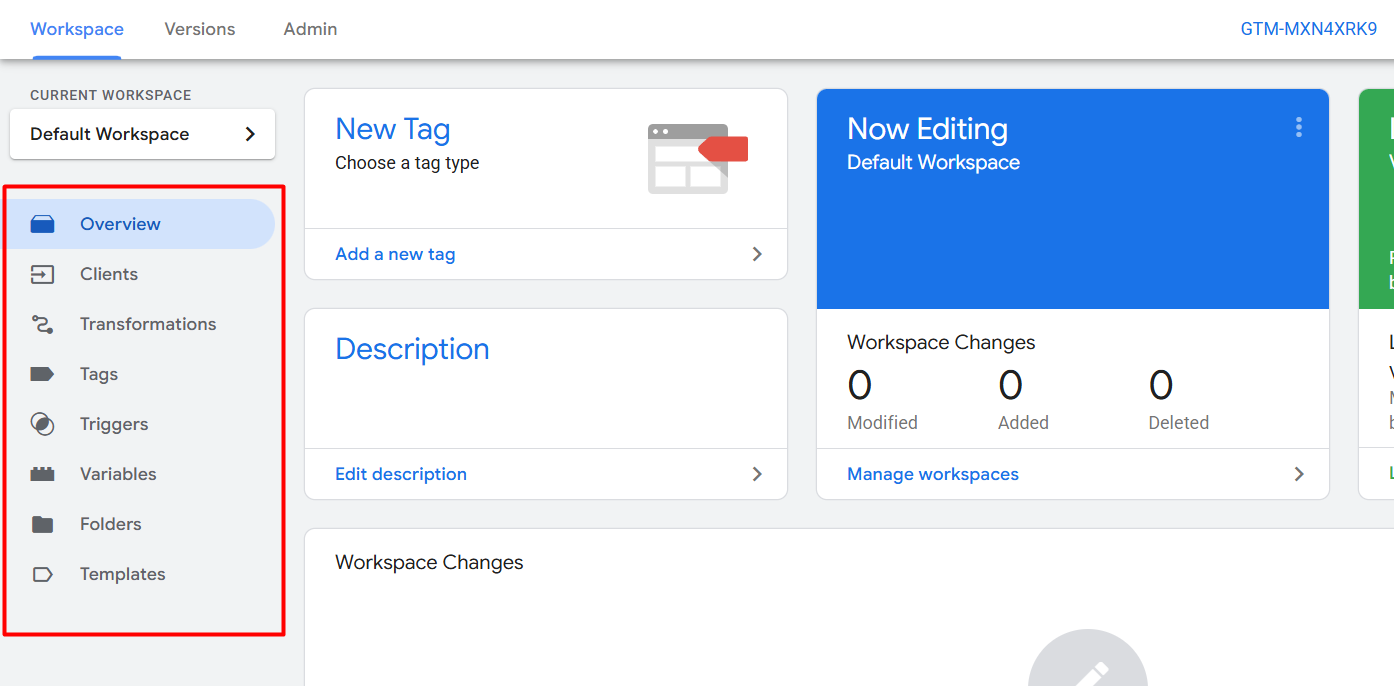
Your server is now ready. Now Go to Google and search stape.io.
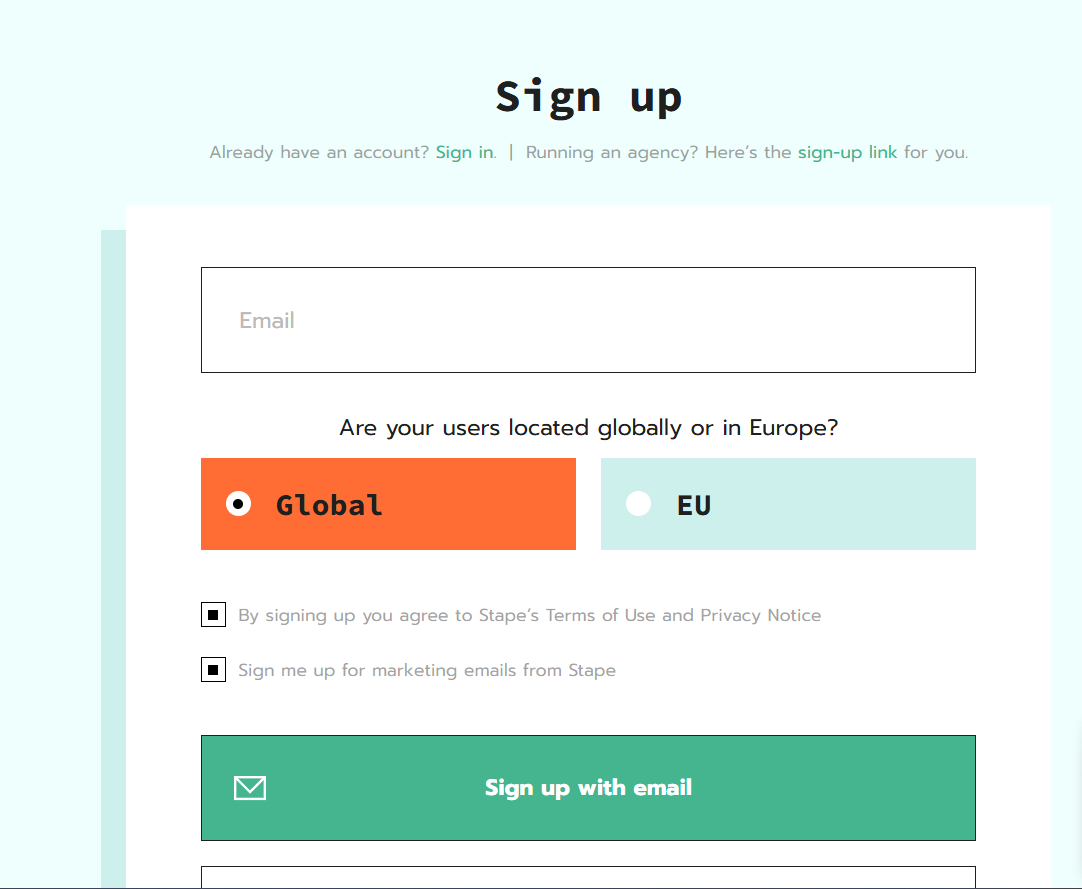
Here, select where your users are located!
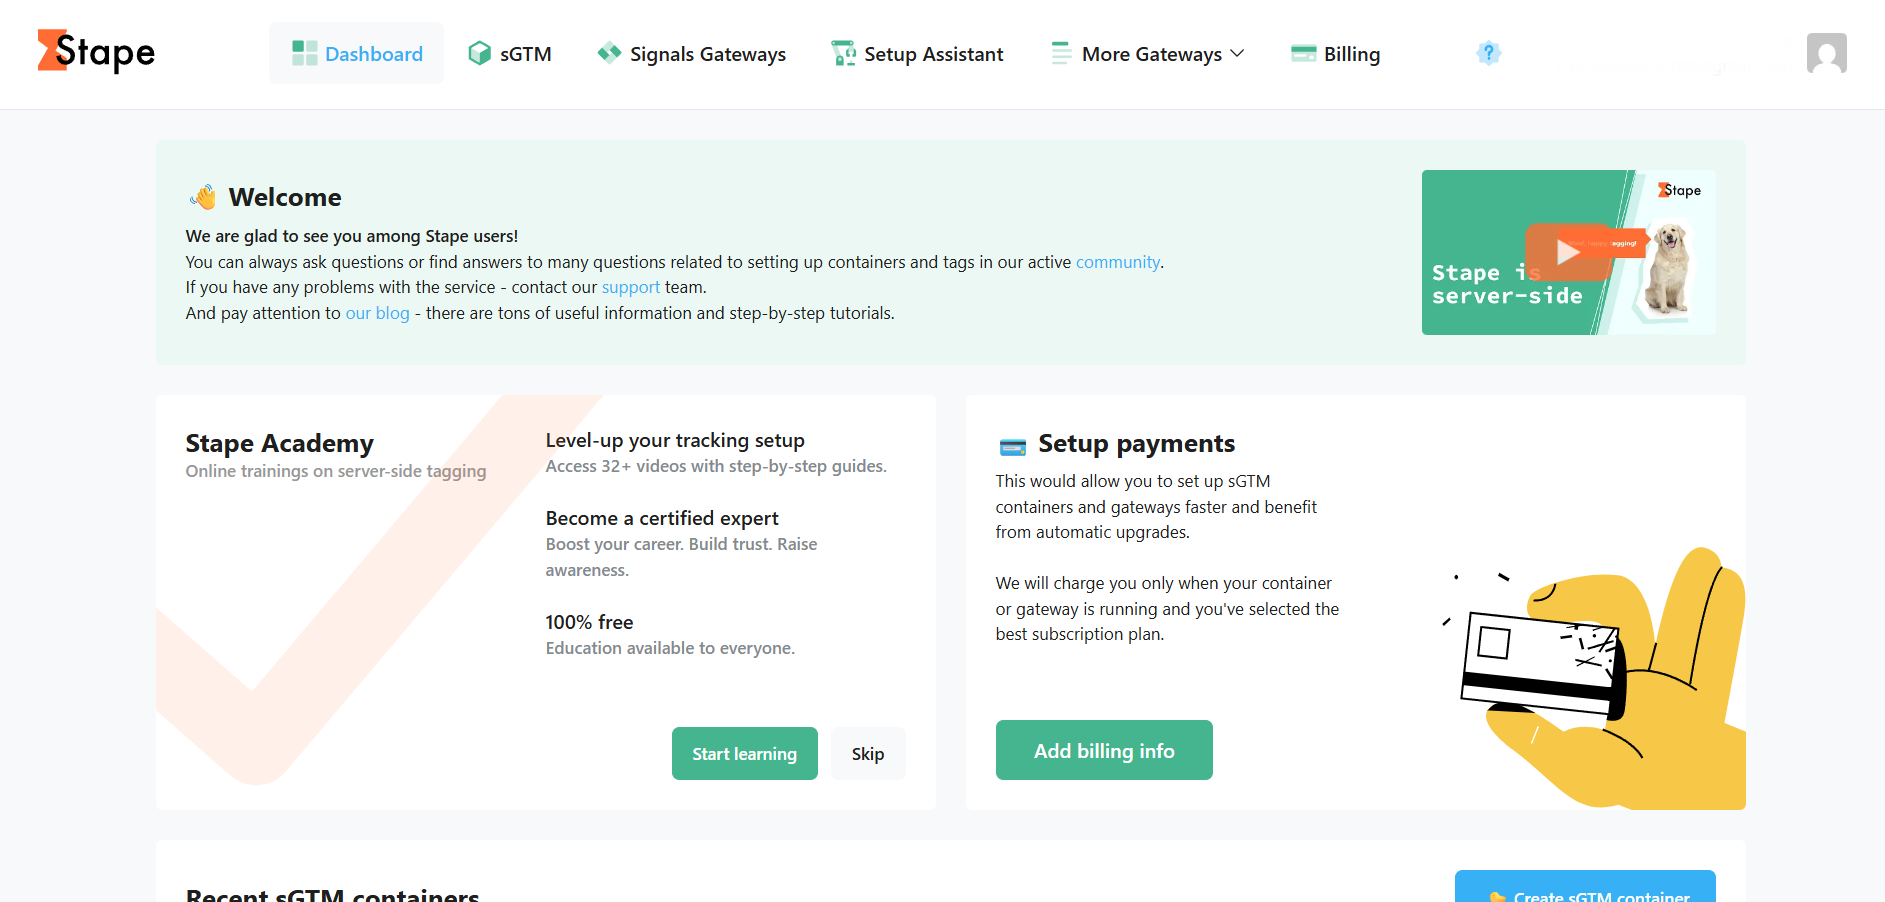
This is your final interface after the login.
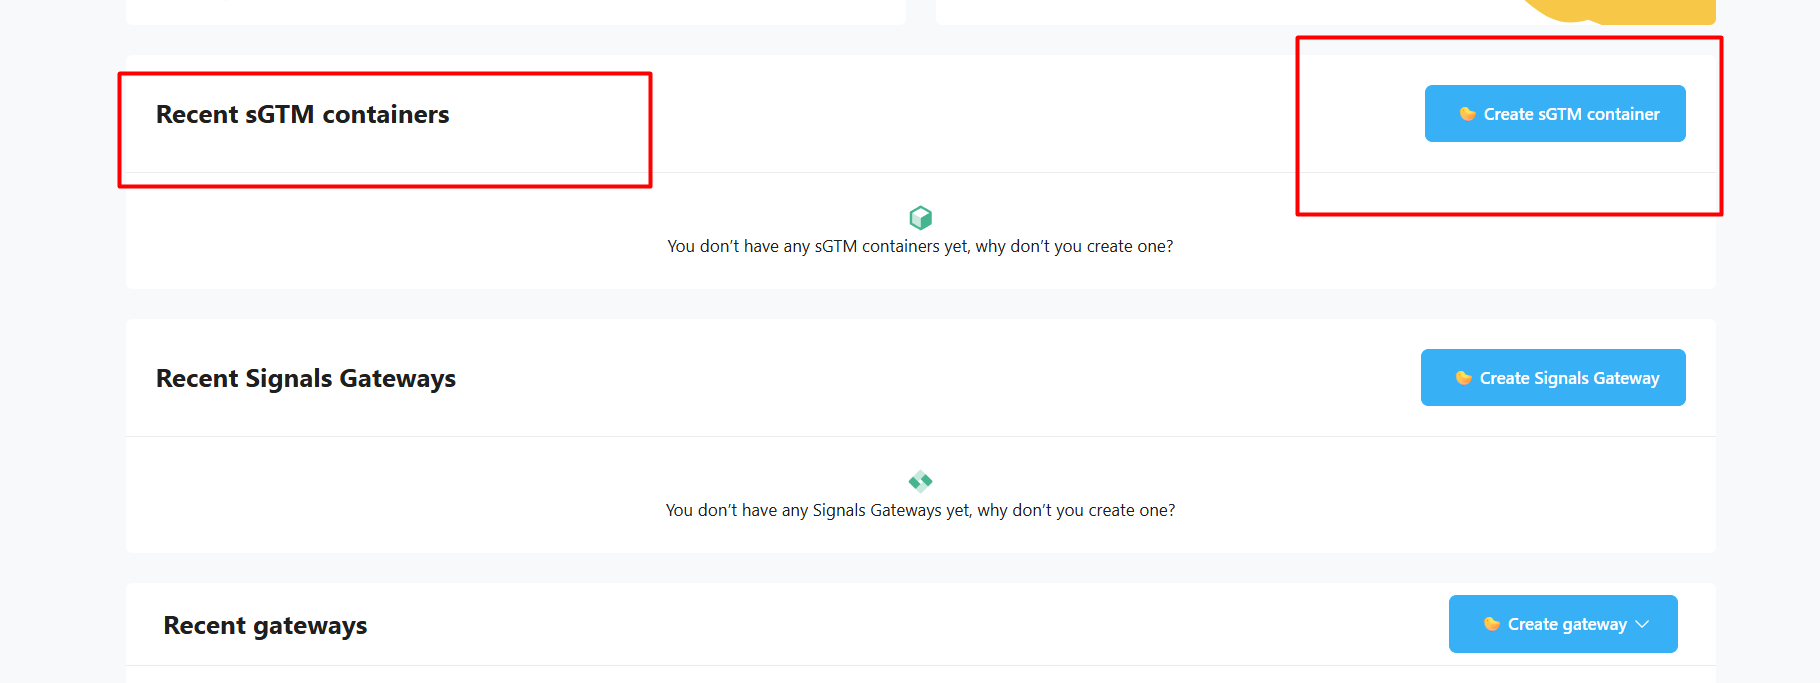
Scroll down, and you’ll find the ‘sGTM container.’ This container in Stape.io is key to setting up server-side tracking. It will handle the data collection and processing, enabling you to efficiently manage and send tracking information directly from your server to Google Tag Manager, without relying on client-side cookies. This ensures better data accuracy and bypasses issues like ad blockers or cookie restrictions. Click on it.
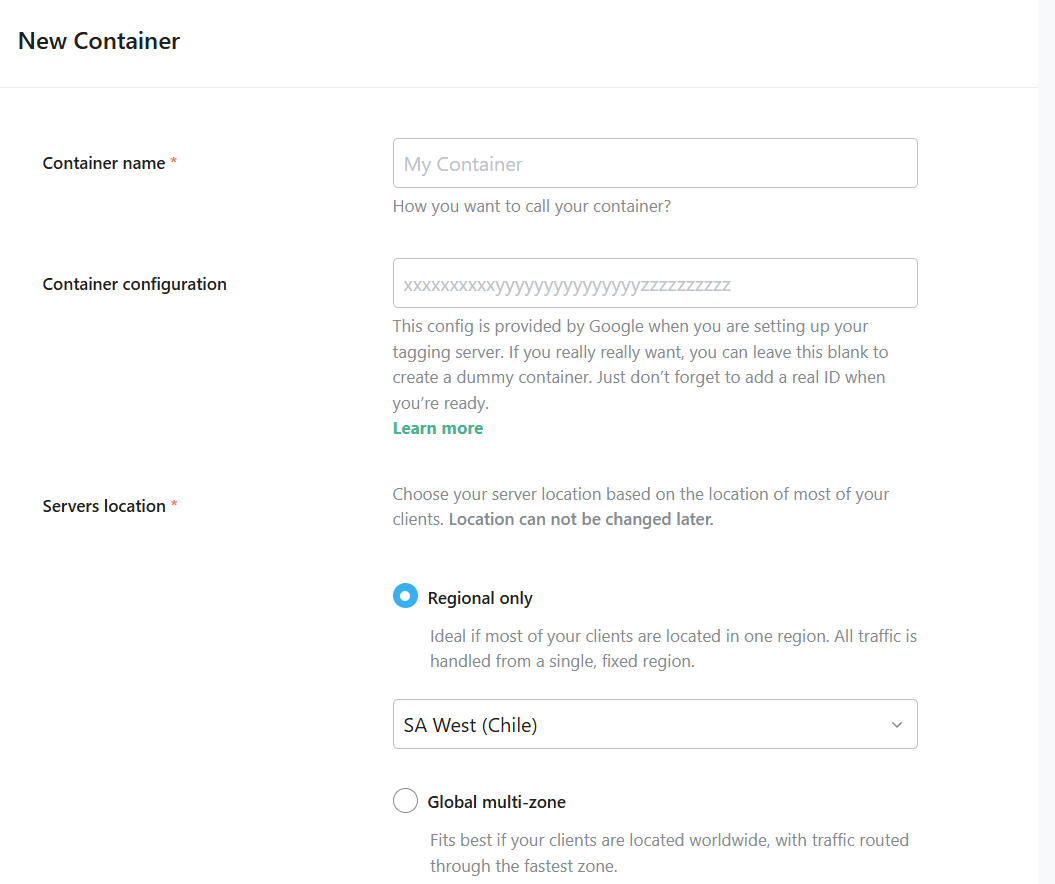
Here in the container name, please put a name as you want, and for the “server location,” please choose the server. But before choosing the server, you have to know where your clients are located; try to select the nearest server.
But if you want to select or if your clients are located worldwide, then you can select the “Global Multi Zone.” But the global multi-zone server location is available only for the business subscription plan or higher. Now for the “Container Configuration”
Now please go your Google Tag Manager again
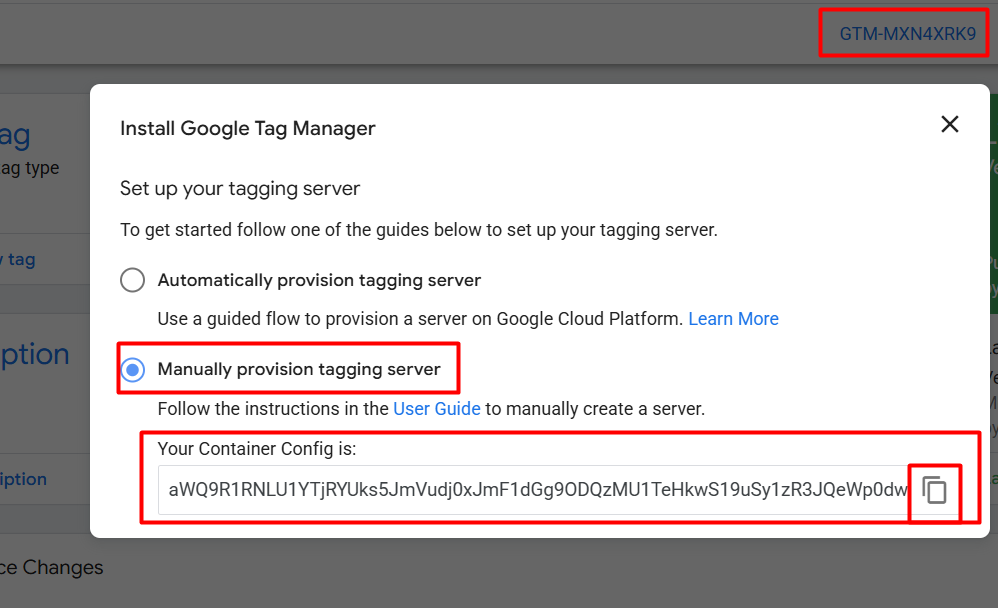
And select the “Manually Provision Tagging Server,” copy the code, and paste it in the place of “Container Configuration.” Now click on the “Create Container.”
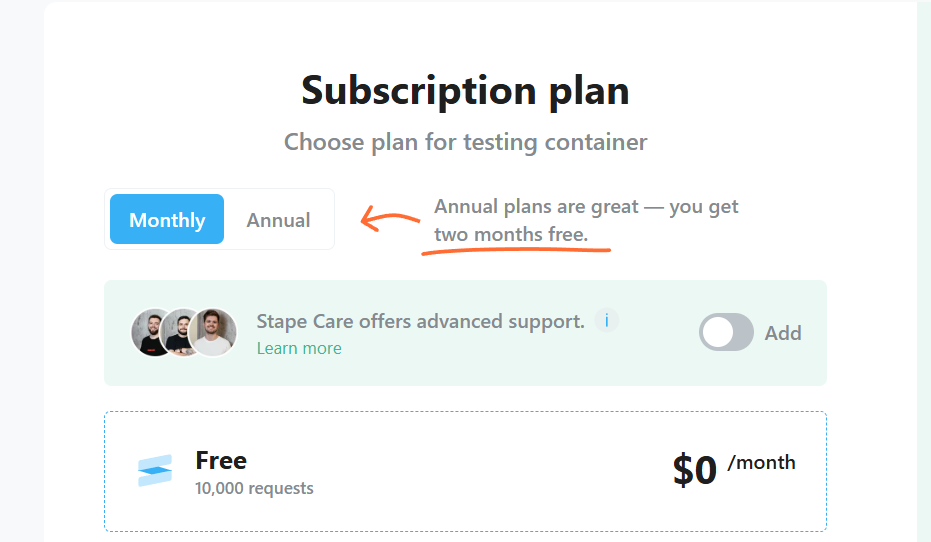
Although we’ll start with a free subscription, you should select a membership based on your requirements. You can make 10,000 free requests with the free plan. Every time a customer visits your website or engages with it—for example, by viewing a page or clicking on something—a “request” is recorded. Because each action is tracked as a distinct request, 10,000 requests can be consumed rapidly, particularly in cases of high traffic.
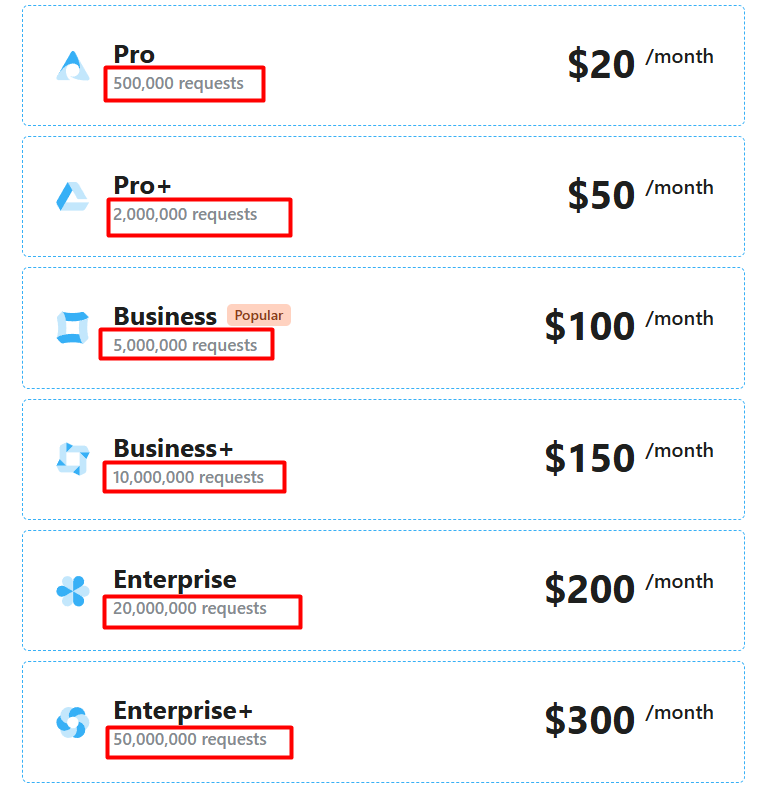
Here you can look at the other membership offers. After selecting your membership, click on the container creation button.
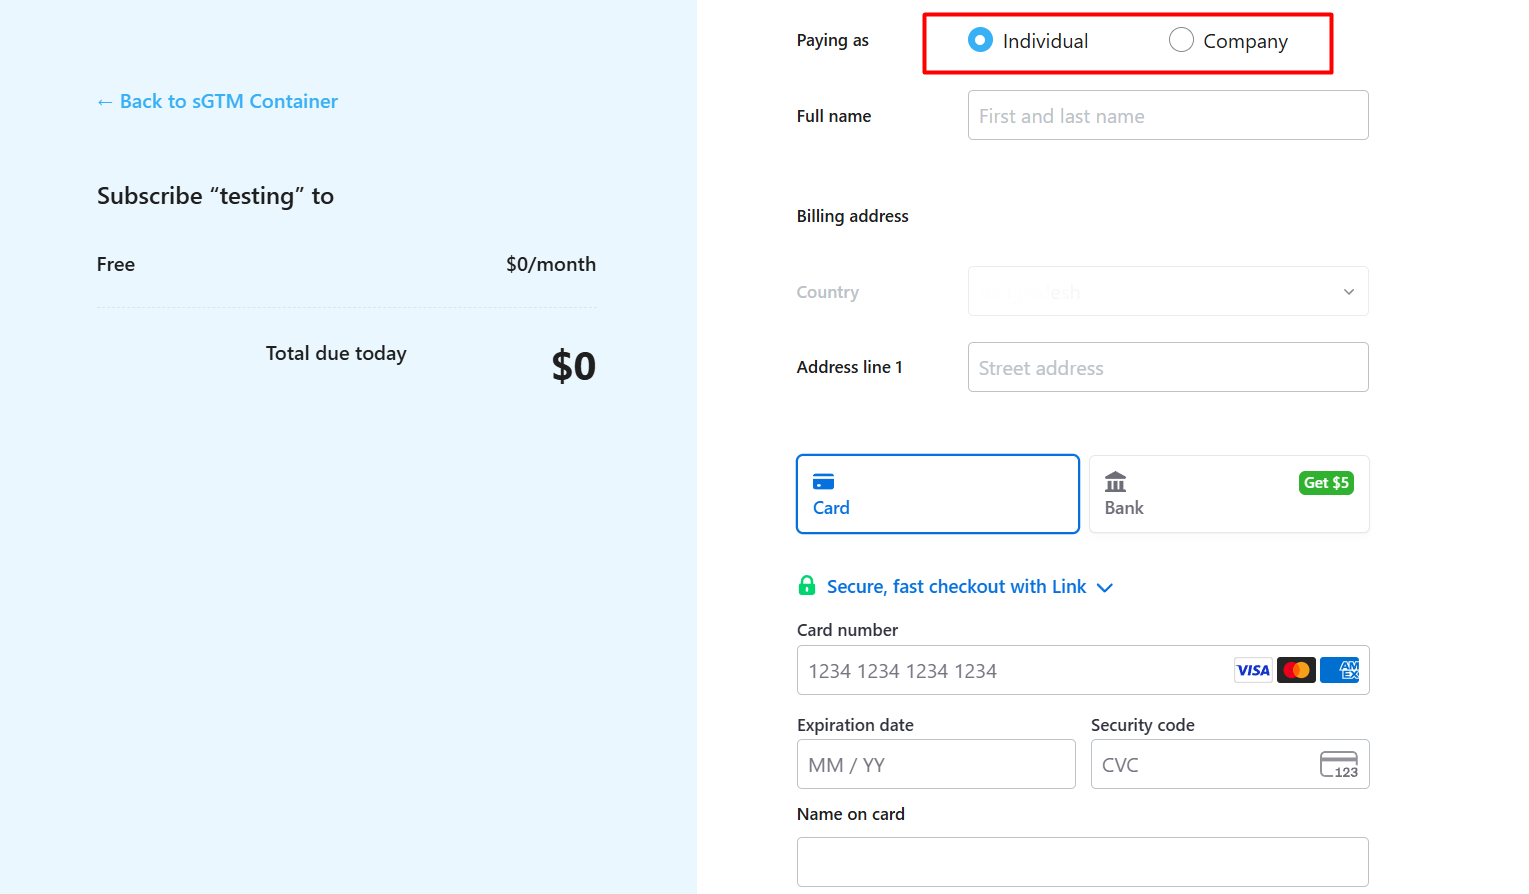
In the new page, first of all, you have to select your billing country. If you do that, then you will be on the page. Here in the first place, select the option that you are paying as an “Individual” or “Company,” then put your name and the rest of the info related to your card. So you can enter your container page.
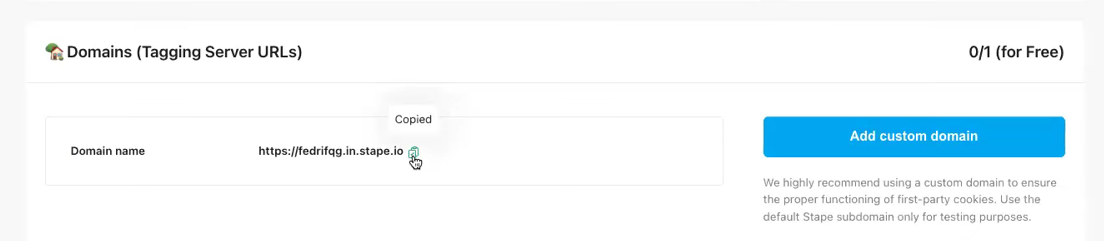
After entering the page, scroll down, and you’ll see this interface. We can proceed with this link for now, but once all events are set up correctly, it’s crucial to configure a custom domain. Without a custom domain, the setup will still function like a third-party service, meaning it won’t be recognized as a first-party interaction.
This is because, without your own domain, the tracking will still be linked to Stape’s domain, which could be subject to restrictions like cookie blocking or ad blockers. By using your own domain, you ensure your tracking remains fully under your control and appears as a true first-party system.”
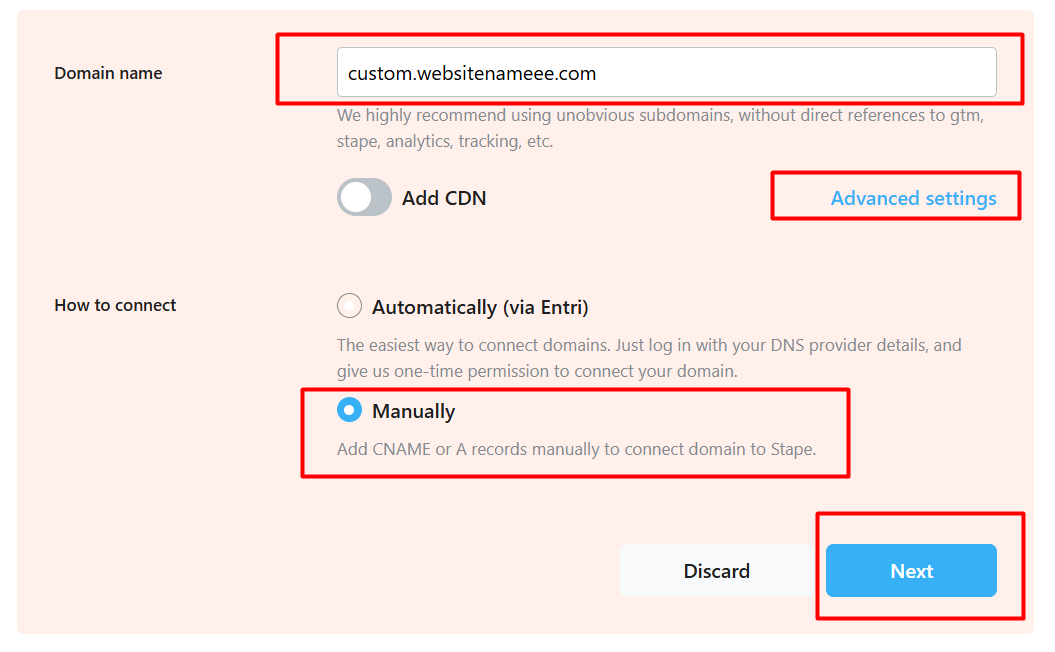
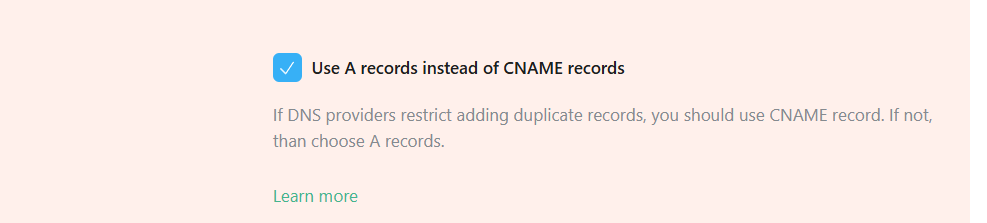
After clicking on ‘Add Custom Domain,’ you’ll see this option. While you could use the CNAME method, we’ll be using the ‘A Record’ instead. To access this option, click on ‘Advanced Settings.’
The reason we’re using ‘A Record’ instead of CNAME is that A Record directly points to an IP address, which allows better control and stability for our server-side setup, ensuring a smoother integration with Stape and more reliable performance.
After selecting the option you will get this type of value
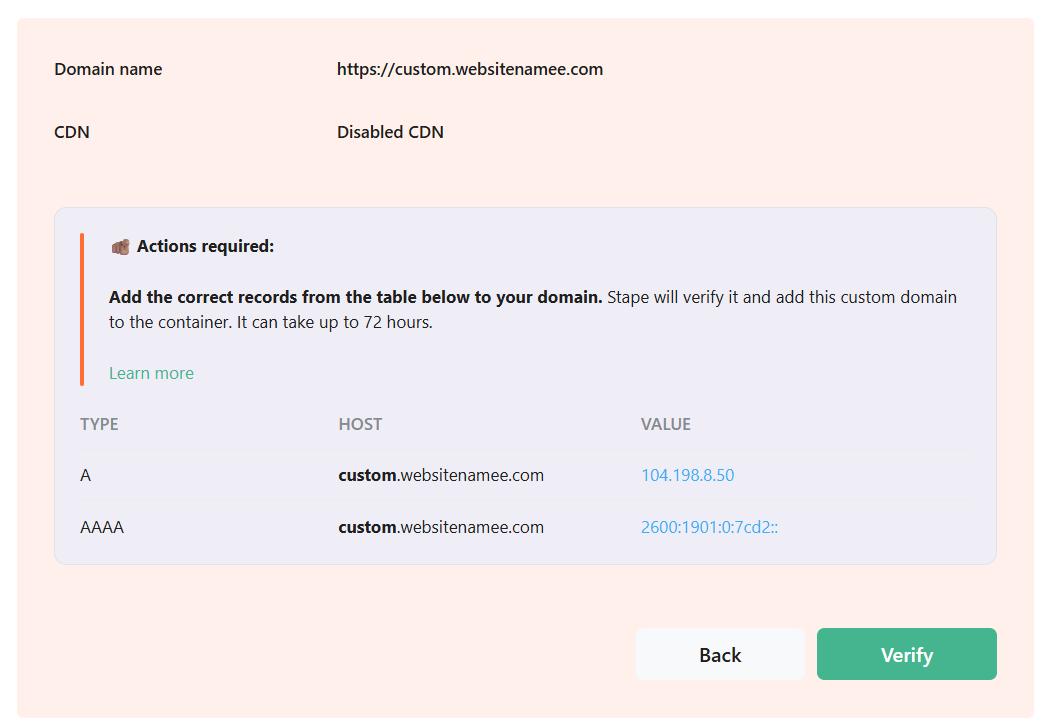
These are DNS (Domain Name System) records used to link a domain name (like custom.websitename.com) to its corresponding IP addresses, allowing users to reach your website. There are two types of records shown here:
- A Record
- Type: A
- Host: custom.websitenameee.com
- Value: 104.198.8.50
This record maps your domain to an IPv4 address (the standard 32-bit IP format like 104.198.8.50).
When someone types your domain into their browser, this record tells DNS servers:
“Send the user to server at 104.198.8.50.”
- AAAA Record
- Type: AAAA
- Host: custom.websitenameee.com
- Value: 2600:1901:0:7cd2::
This is the same as the A record but for IPv6 addresses (newer 128-bit IP format, like 2600:1901:0:7cd2::).
If a user’s ISP and device support IPv6, their connection will go through this address instead.
How they work together:
- A record (IPv4): Used when the client (browser, device, ISP) only supports IPv4.
- AAAA record (IPv6): Used when the client supports IPv6.
Having both ensures your domain is reachable worldwide, regardless of whether the user’s network uses IPv4 or IPv6
DNS will automatically decide which one to use depending on the requester’s environment.
With the help of your developer, now you can add these two things to your “DNS” record, and you’re done. After recording the two values, you have to go to stape.io, and you have to verify the new custom domain by clicking on the “Verify” button.
After verifying the custom domain, you will get this type of “https://custom.webanalyticsbd.com” URL. Now this is your main domain that you will use to complete the server-side tracking.

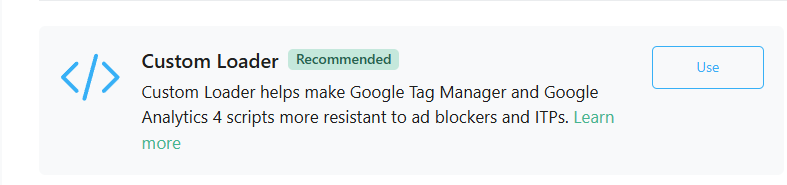
Custom Loader
The Custom Loader helps your Google Tag Manager (GTM) and Google Analytics 4 (GA4) scripts work properly, even if users have ad blockers or privacy settings (like Intelligent Tracking Prevention).
Benefits:
- Privacy compliance: It turns cookies into safer, first-party cookies.
- More reliable data: It ensures GTM and GA4 still work, even with ad blockers or privacy features blocking them.
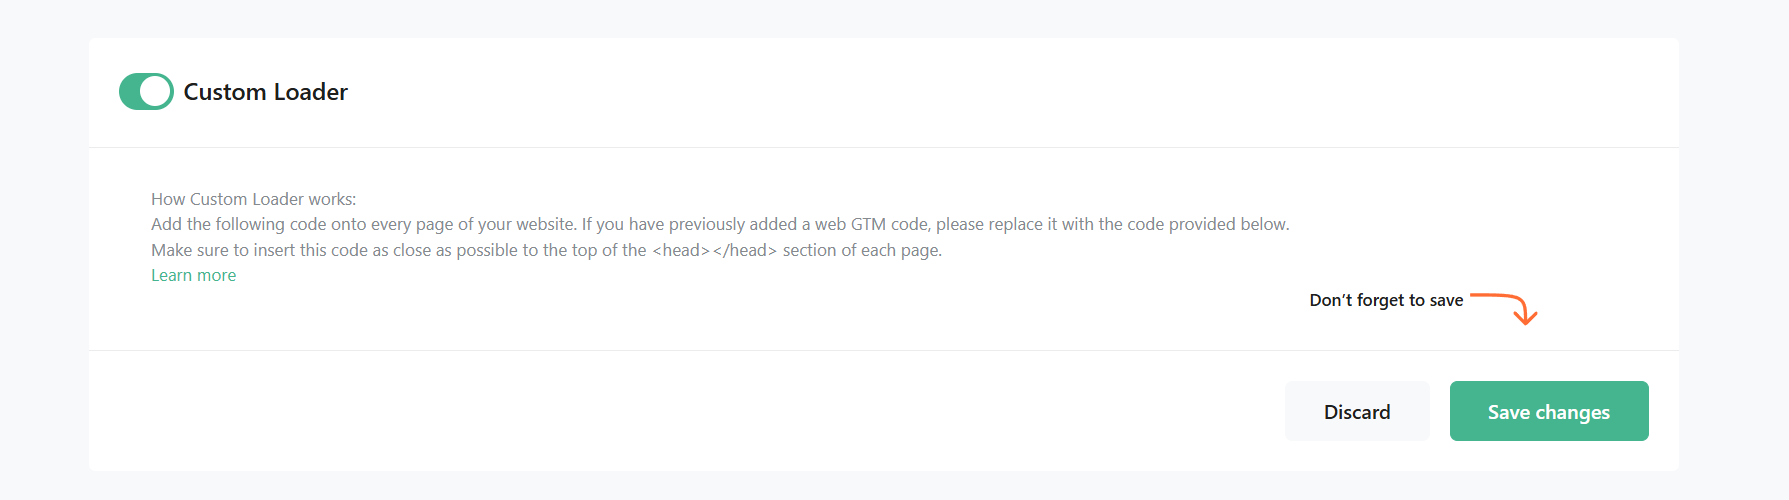
Let’s set up the custom loader.
First scroll up for the “Power-Ups” option.

Now we will work with this option. Click on the use button.
And enable the “Custom Loader” and “Save Change.”
Now in the first section, please select your domain name. In the next option, please place your GTM ID and open the “GA4 ad block bypass” and generate.
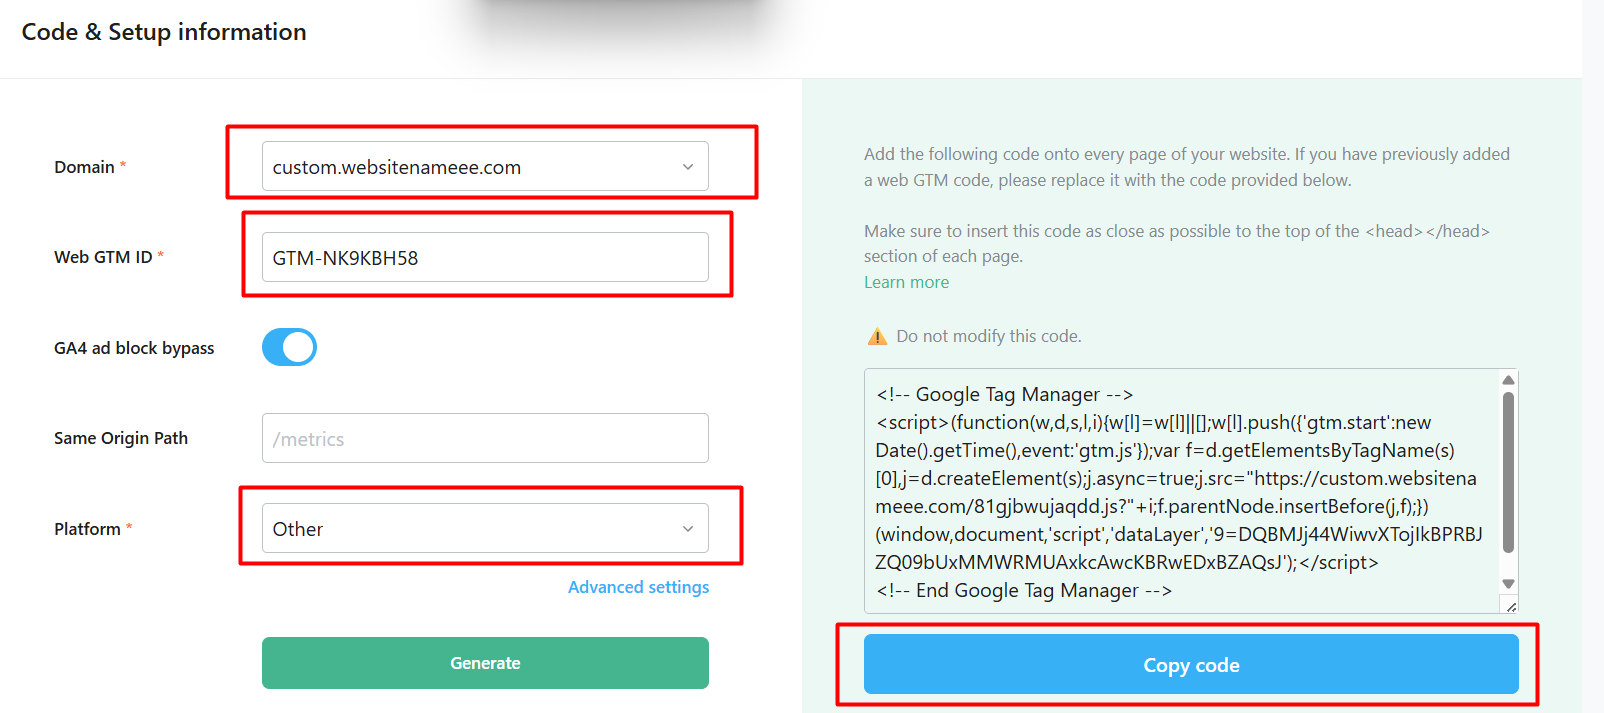
Now please copy this GTM code and add the code to your website backend, and make sure to insert this code as close as possible to the top of the <head></head> section of each page.
How is everything working here?!
The Web Container tracks user actions on your website (like page views or product views) and sends that data to the Server Container.
The Server Container, hosted on Stape.io, receives the data, processes it using the GA4 Client (for Google Analytics 4), and prepares it for other platforms like GA4, Facebook, Google Ads, and TikTok.
The GA4 Client handles all the data processing for Google Analytics 4 inside the server container.
Stape.io provides the necessary infrastructure to host the server container and manage the data flow.
Processed data is then sent to platforms like Facebook through the Conversion API for tracking purposes.
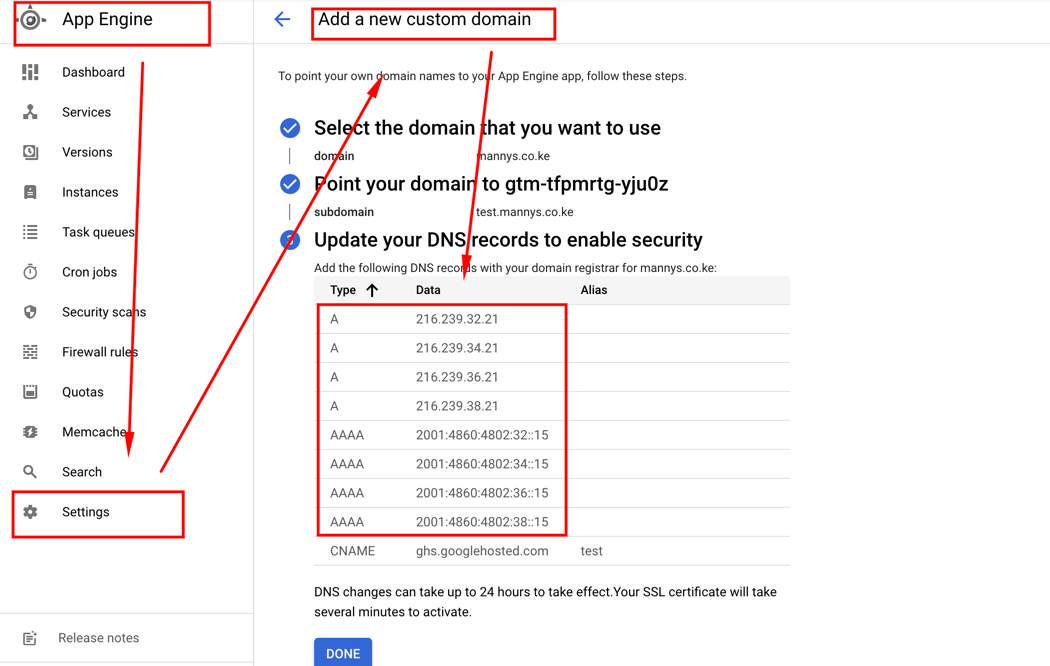
Custom Domain in Google Cloud Platform
Cookie Life Extender
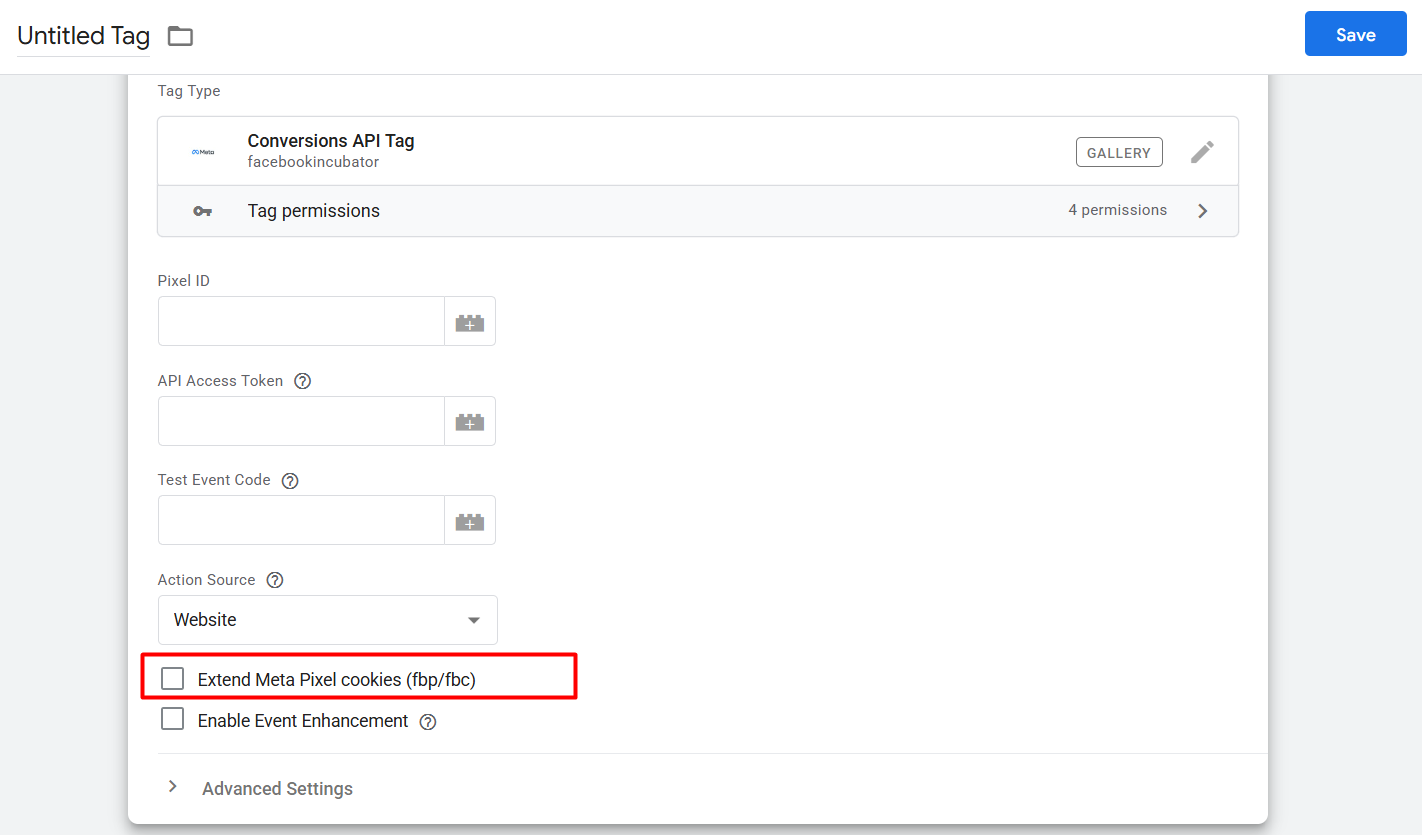
To increase cookie life to prevent IOS updates and ITP’s.
Here everything is now done. From here with this, you can continue your first-party conversion tracking for your every single platform


