Customer Lifetime Value (CLV) is the total revenue a business expects from a customer throughout their relationship. Instead of focusing only on one purchase, it looks at the long-term value a customer brings.
By sending CLV data to Google Ads, the system can identify and prioritize high-value customers. This allows campaigns to target people who are more likely to generate bigger profits over time.
The main benefit is smarter bidding, better audience targeting, and improved ROI. In short, CLV helps Google Ads optimize not just for more customers, but for the right customers who matter most.
So, let’s track this data! To calculate Customer Lifetime Value (CLV), the process is simple. First, we take the latest purchase_value. Then, we add it to the customer’s previous total value. If no previous value exists, the code will return the current purchase value as the starting point. After that, the updated Customer Lifetime Value is stored in local storage, ready to be used the next time that customer makes a purchase. This ensures accurate tracking of every customer’s long-term value.
Sounds helpful, right? Don’t worry—we’ve already prepared the code for you. It’s a universal solution, meaning you only need to copy and paste it, and the code will start working automatically. No extra hassle, just smooth CLV tracking for your business!
Let’s begin setting up Customer Lifetime Value (CLV)
At this stage, we need to set up the configuration starting from the Variables section. First, create a new user-defined variable within the Variables panel, and the variable type will be “Data Layer Variable.”
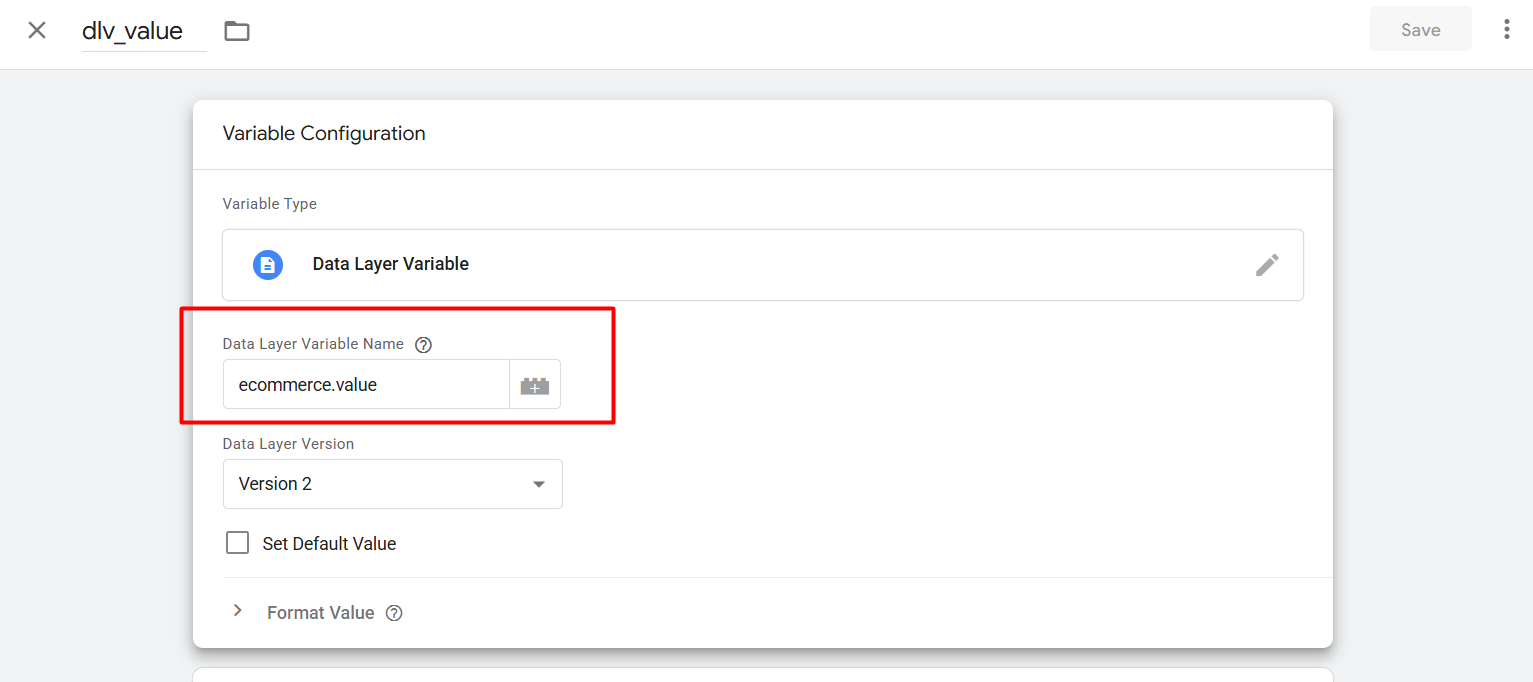
This variable will capture the ‘purchase_value’ from the purchase event after a customer completes a transaction. Your variable name may look different, but the main goal here is to track the most recent purchase value.
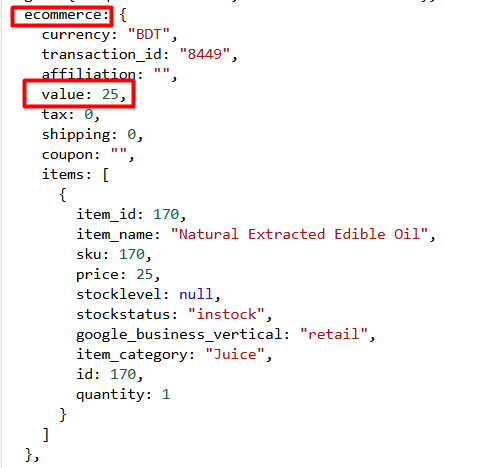
The purpose of this variable is to collect the purchase value, and it’s important not to forget the variable name, as we’ll need to use it in our upcoming custom code.
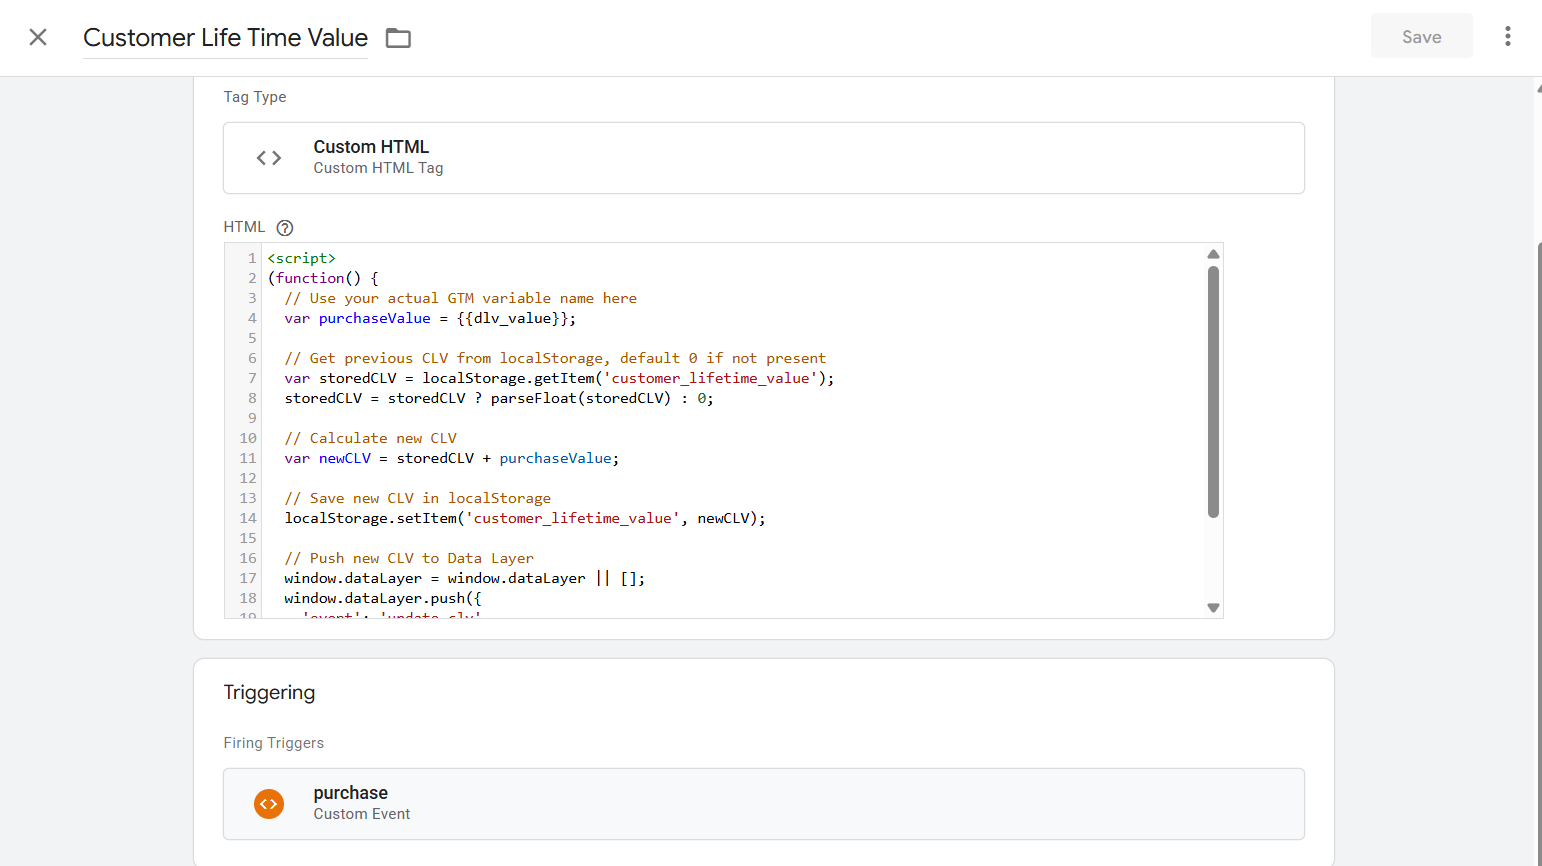
Now, let’s head over to the Tag section to set up a new tag. Simply click on ‘Tag,’ choose ‘Custom HTML’ as the tag type, and then copy and paste the code.
<script>

(function() {

  // Use your actual GTM variable name here

  var purchaseValue = {{dlv_value}};

  // Get previous CLV from localStorage, default 0 if not present

  var storedCLV = localStorage.getItem('customer_lifetime_value');

  storedCLV = storedCLV ? parseFloat(storedCLV) : 0;

  // Calculate new CLV

  var newCLV = storedCLV + purchaseValue;

  // Save new CLV in localStorage

  localStorage.setItem('customer_lifetime_value', newCLV);

  // Push new CLV to Data Layer

  window.dataLayer = window.dataLayer || [];

  window.dataLayer.push({

    'event': 'update_clv',

    'customer_lifetime_value': newCLV

  });

})();

</script>
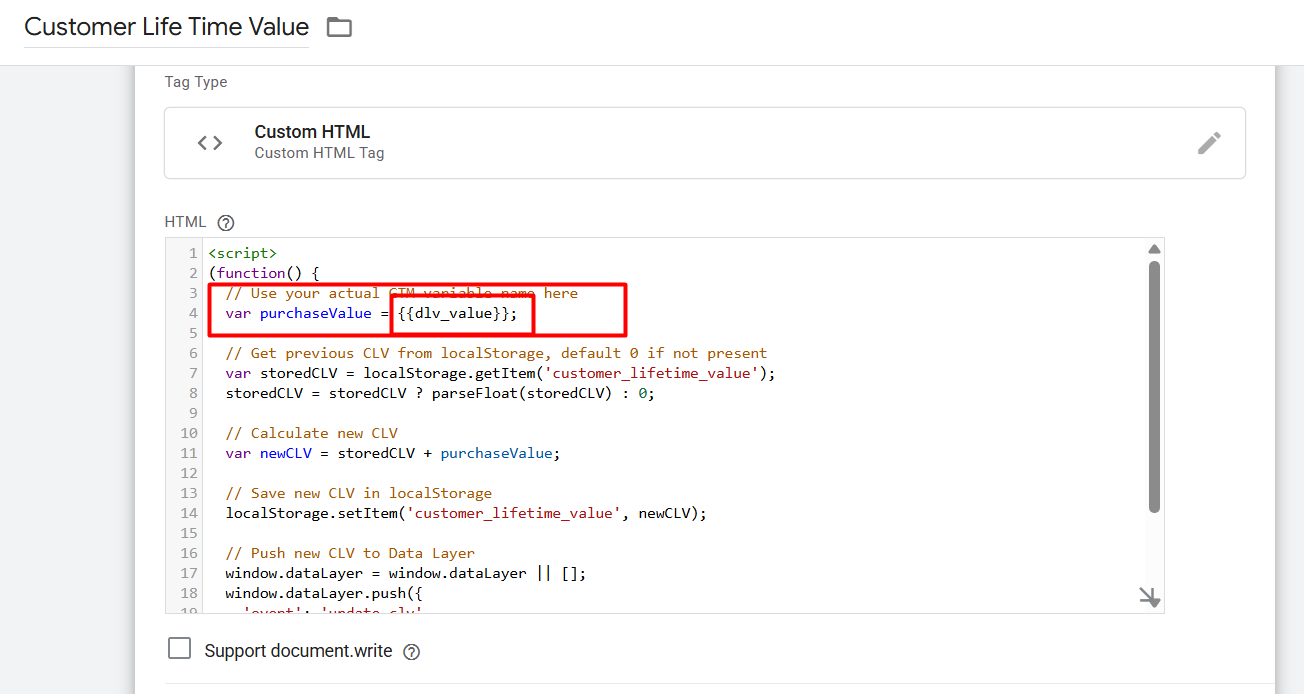
In the purchase value field, simply replace it with the variable name you created to capture the purchase data. This variable will ensure you always get the most recent ‘purchase_value.’
Now it’s time to set up the trigger. Since we’re tracking customer purchase values, the trigger should be the ‘Purchase’ event. This way, the tag will fire every time a purchase is completed, capturing the latest purchase value automatically.
And now your tracking is complete! This custom code will push a completely new event into your data layer, allowing you to capture every detail related to the purchase, including the Customer Lifetime Value (CLV).
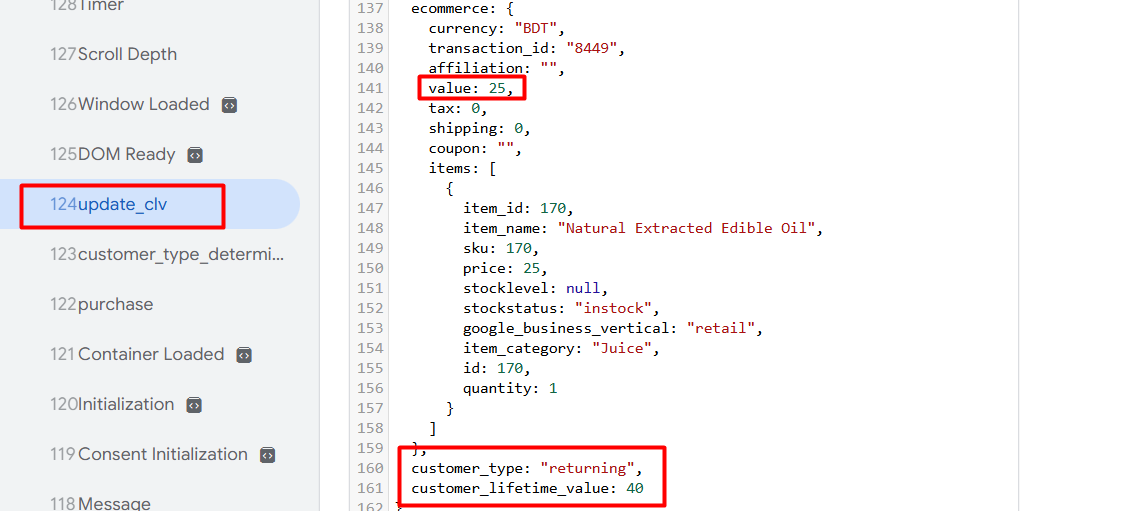
With this new event, you can now trigger your purchase events and send this data to Google Ads to achieve better results.
We’ve completed the setup perfectly, so you can start working with it right away. If you have any new ideas to share or any questions, we’re always here to help!


