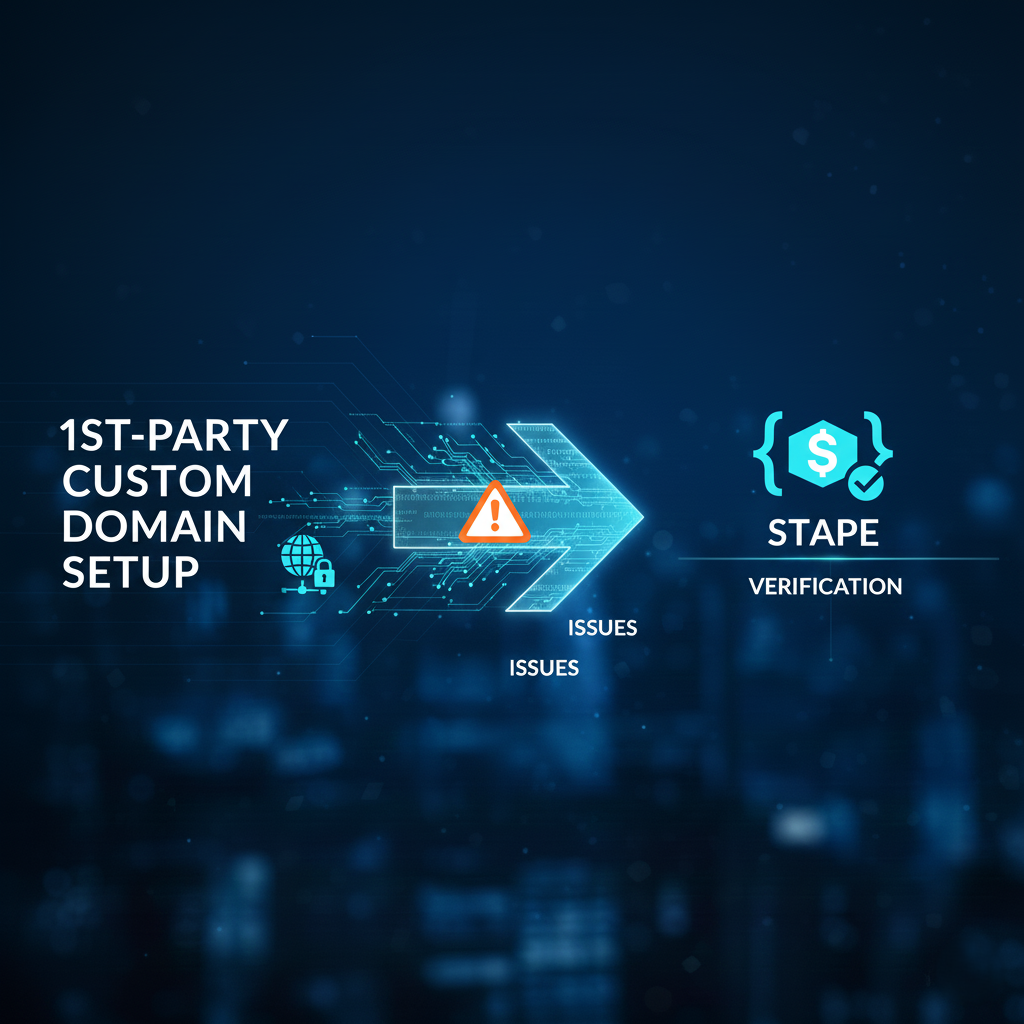
Today we will talk about one more important thing. Many advertisers use the Facebook Conversion API and set up first-party domain tracking. For example, when we create an account on Stape.io, it provides us with a custom link that is often used for server-side tracking.
But for more data accuracy, we want to complete the first-party domain tracking or subdomain setup. So today we will explain from A to Z how, if you complete your setup, your data will transfer to the server perfectly.
But sometimes we face one problem, and this is that our domain and the hosting are not from the same platform. It’s like we buy the domain from Namecheap and the hosting from Hostinger. So at this point also, how you can do it, we will talk about it today.
Solve the problem and set up the subdomain
But at first, if you don’t know about the first-party cookies and tracking, then you can read this article. Also, if you don’t know how to create the Stripe account, you can read this article. First-Party Tracking by Google Tag Manager.
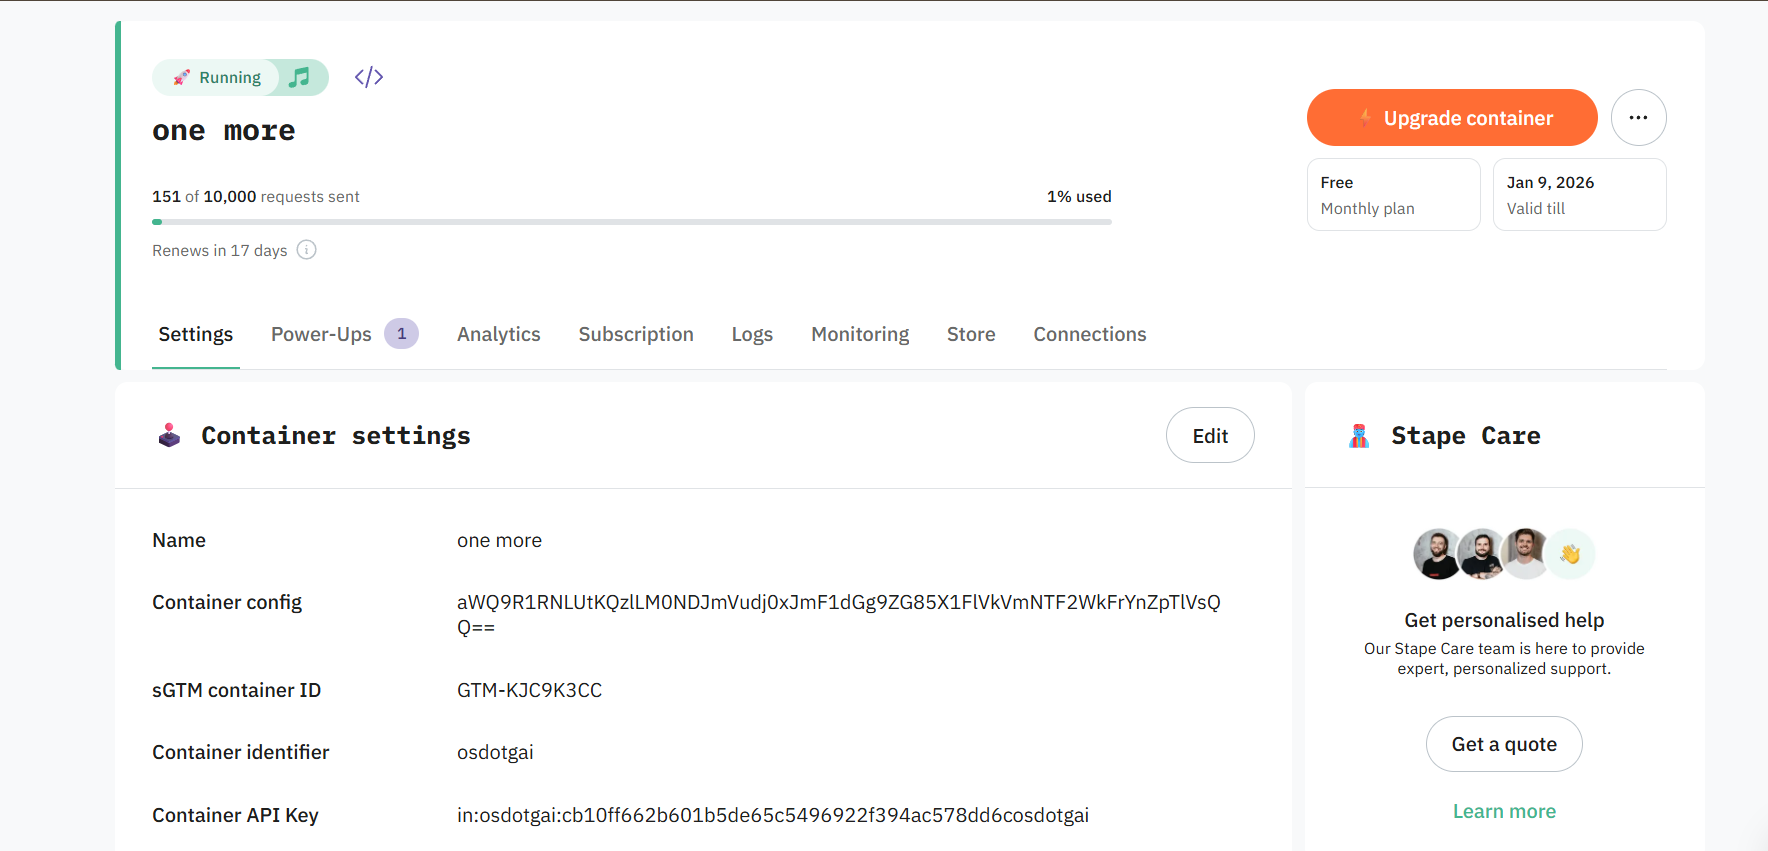
After completing the container, this is how our view will be. To create or set up the new domain, you have to scroll down.
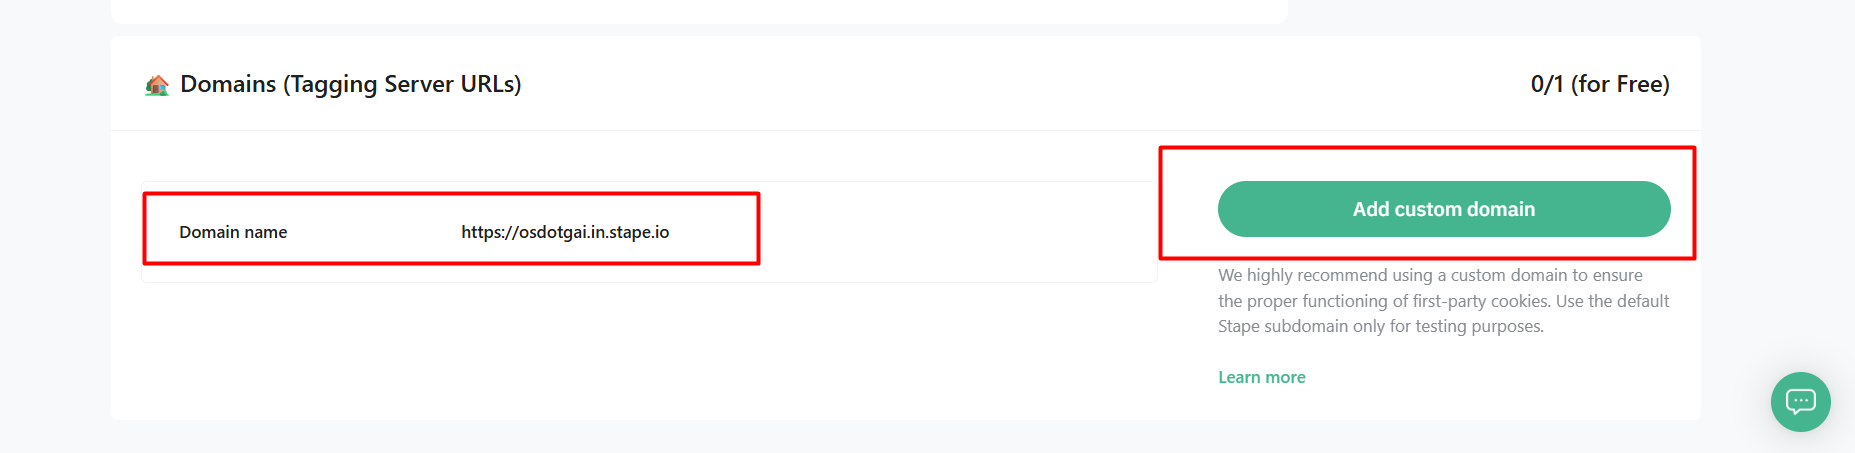
Here you can see we already have one domain. At the time we are using this, but for more data accuracy we have to change this domain. So click on “Add custom domain.”
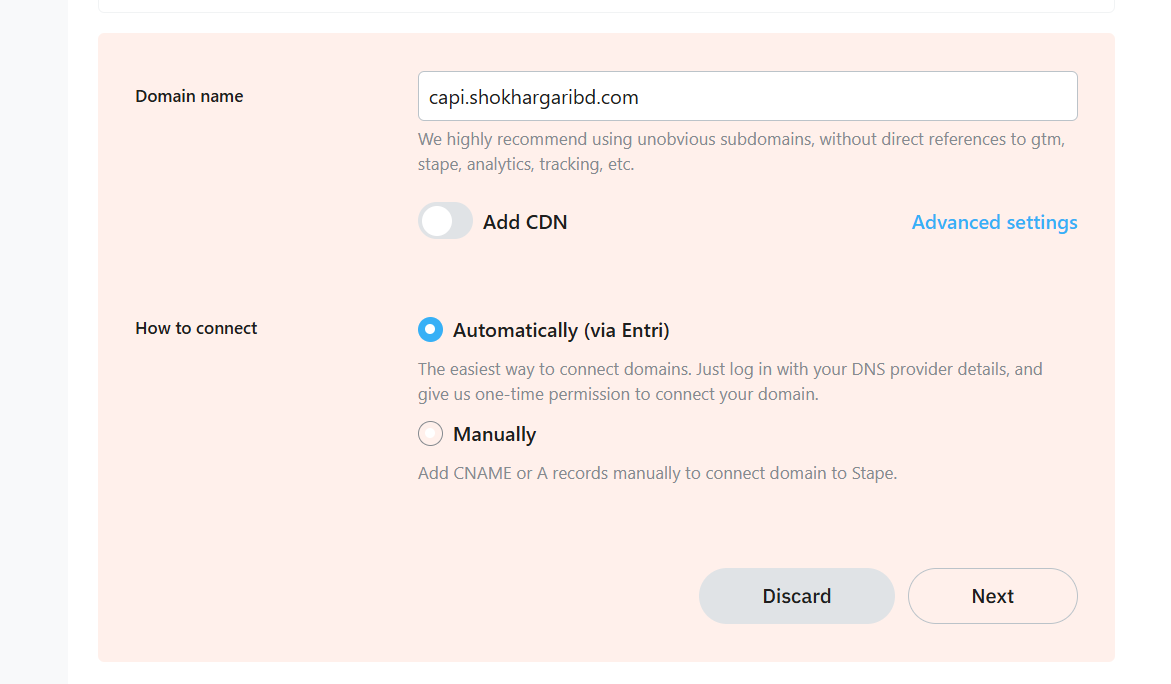
After clicking on the button, you can see how we set up the domain name. In the place of “capi,” you can write down anything and then write down your domain name. Now from here select the “Add CDN.”

From here, select every option we did, and then let’s go for the next.
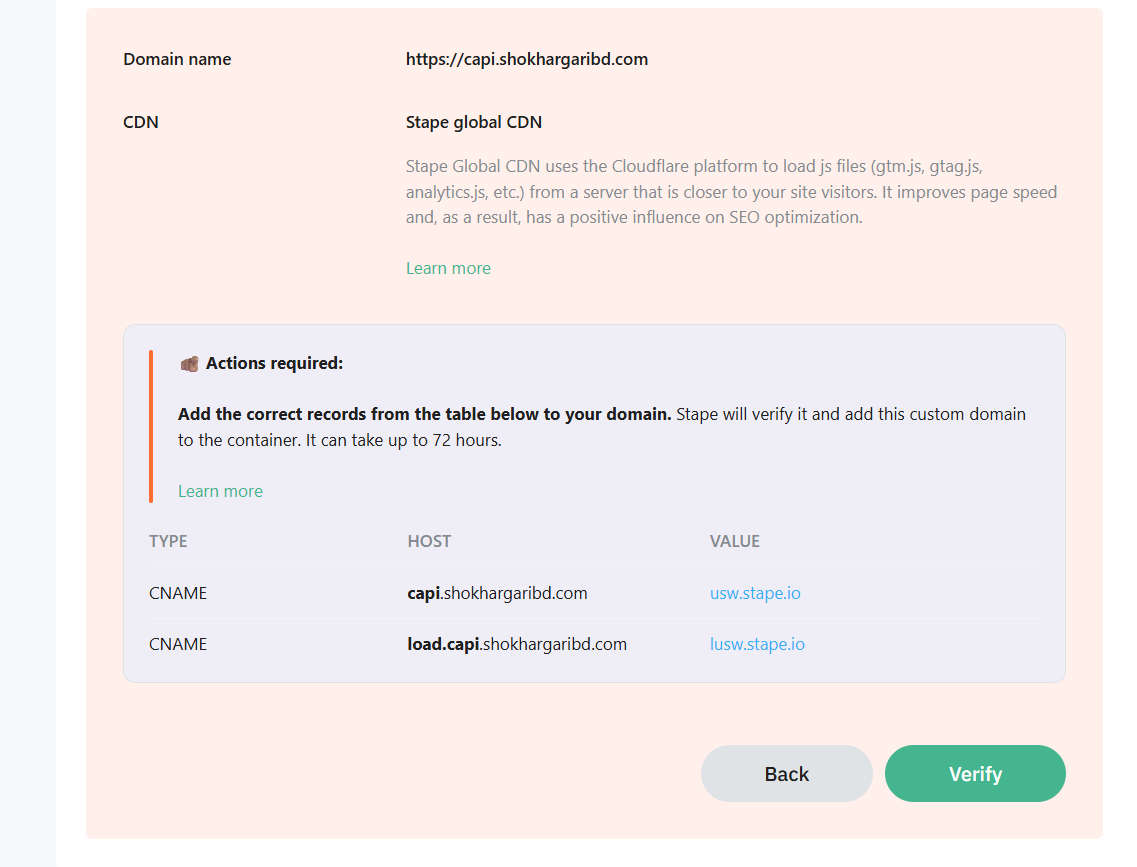
Here you can see we got two new CNAME records. We have to add this value in our DNS.
First Problem solution
We already talked about the problem. What will we do if our domain and hosting are not from the same place? Don’t worry. Here the solution is you have to add these two records in the place from where you take the hosting for your website.
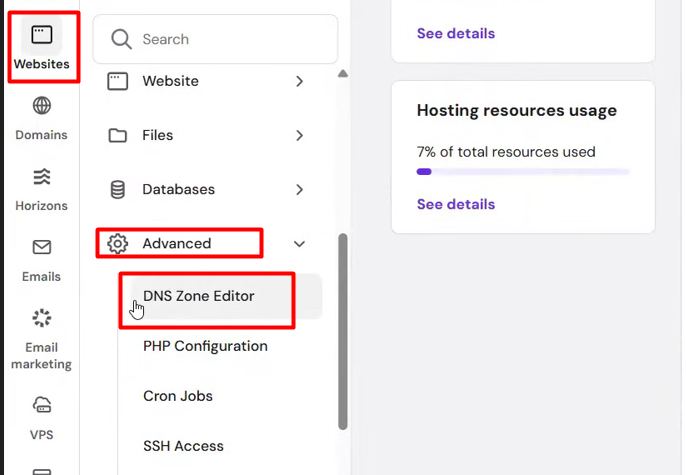
If you are taking your hosting service from Hostinger, then go to the advanced settings of your Hostinger to get the DNS setting.
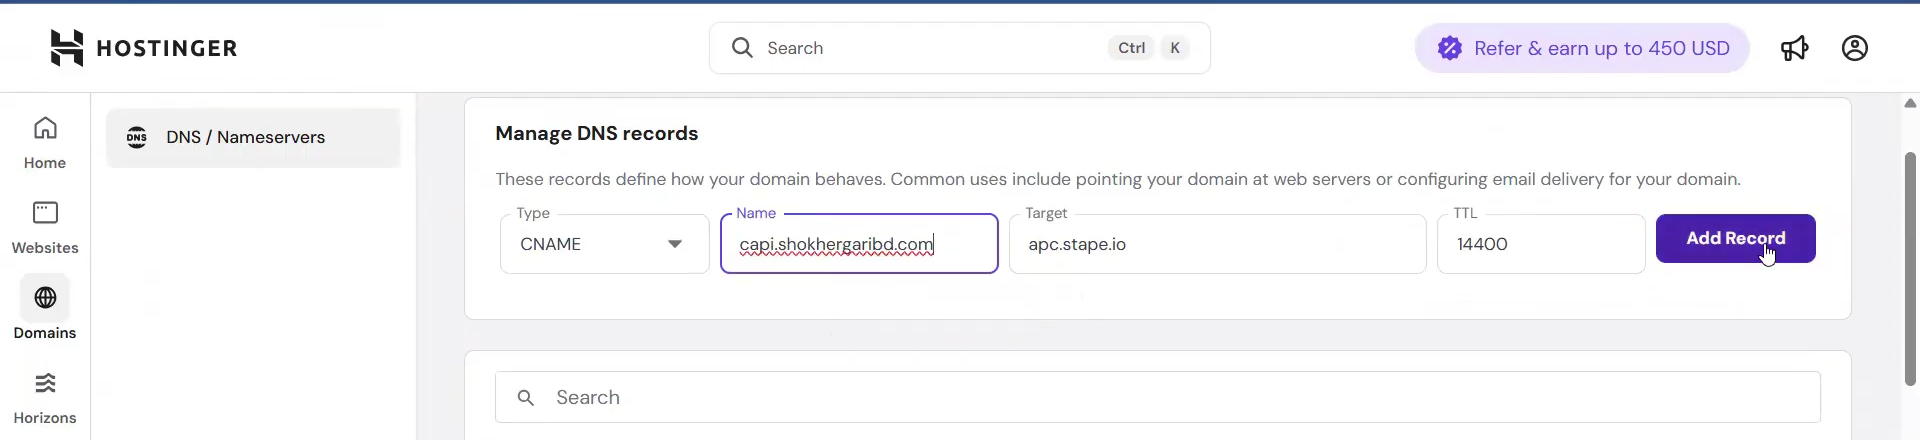
And, in the same way, place value in the record. At first select your record type, then place the name and target and collect it from the Stape. Target means the value you got in your stape. Leave the TTL in the same way.
Don’t forget to add both your records here in the DNS in the same way. Otherwise it will not work for you as well as you want.
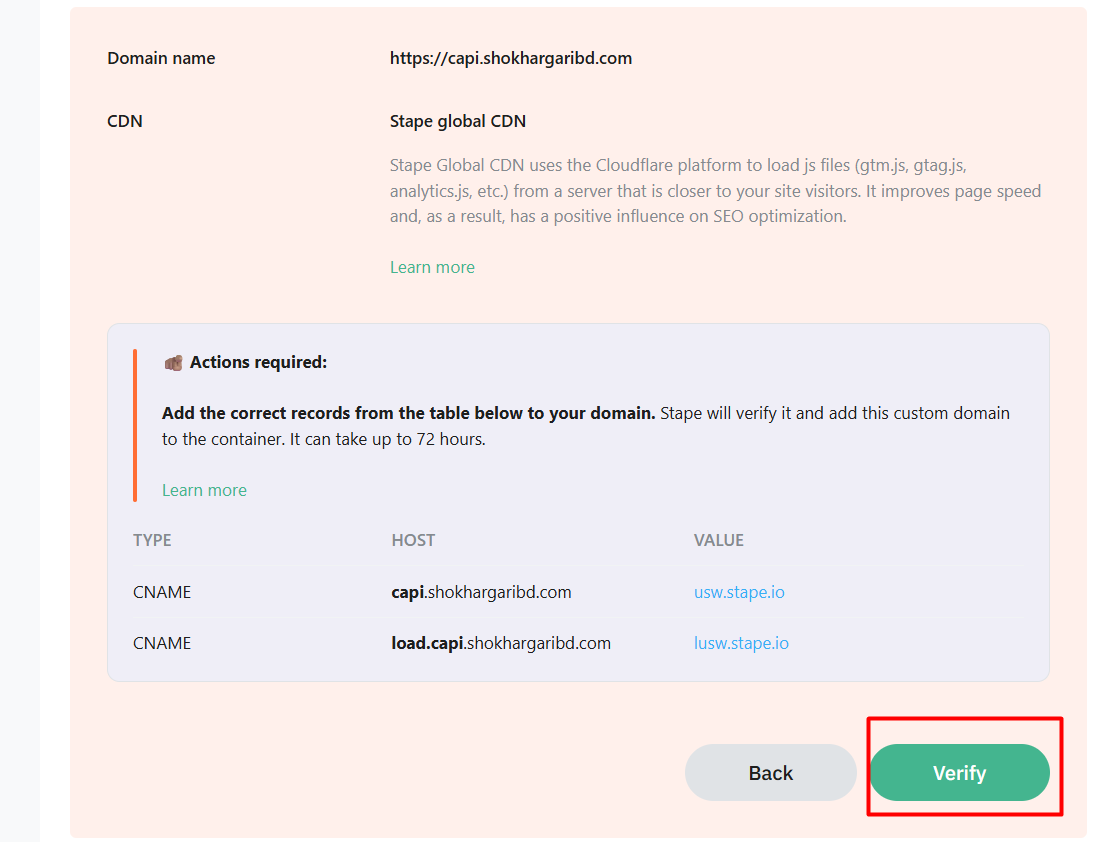
Now verify the records. Well done. Now let’s go to see some more problems, and let’s solve them.
The domain isn’t verified
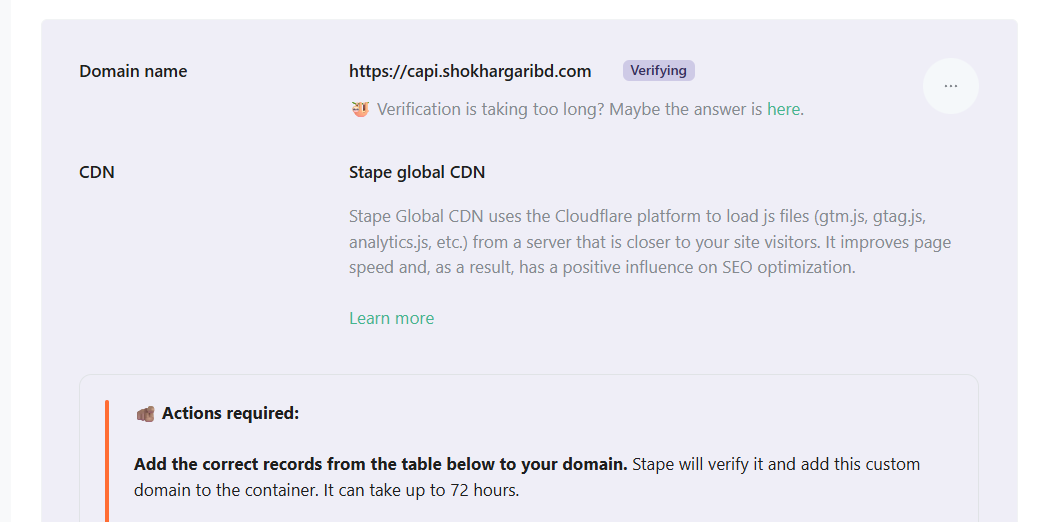
Now see, it’s verifying. But a lot of times we see that our domain isn’t verified, and also sometimes we think it will be great if our domain is verified in 5 min. So to get the verified domain, copy the new domain and go to your browser and try to run the link. Again and again, do it in the way your server will get some hits and the subdomain will be verified.
If it’s still not verified even after 72 hours, then delete everything and create it again. Because there can be a chance to make a mistake in the DNS record setup. Because if you make any mistake in the time of the update record, then your setup will be wrong.
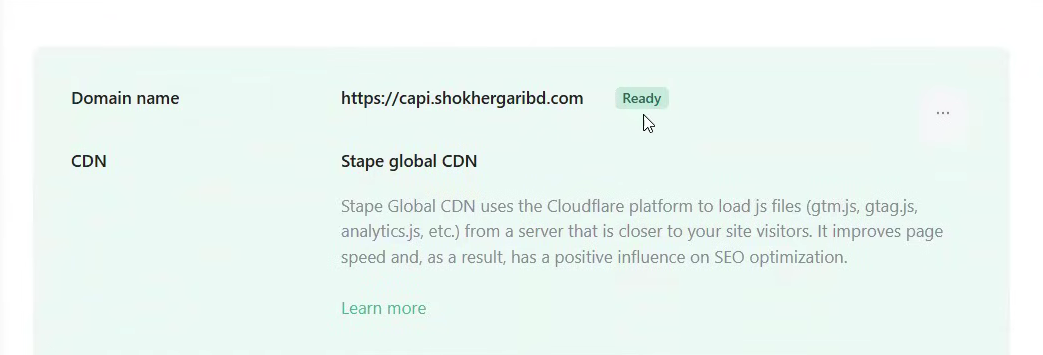
Here you can see how fast we complete the verification of our domain. Now just copy the new domain and replace it everywhere.
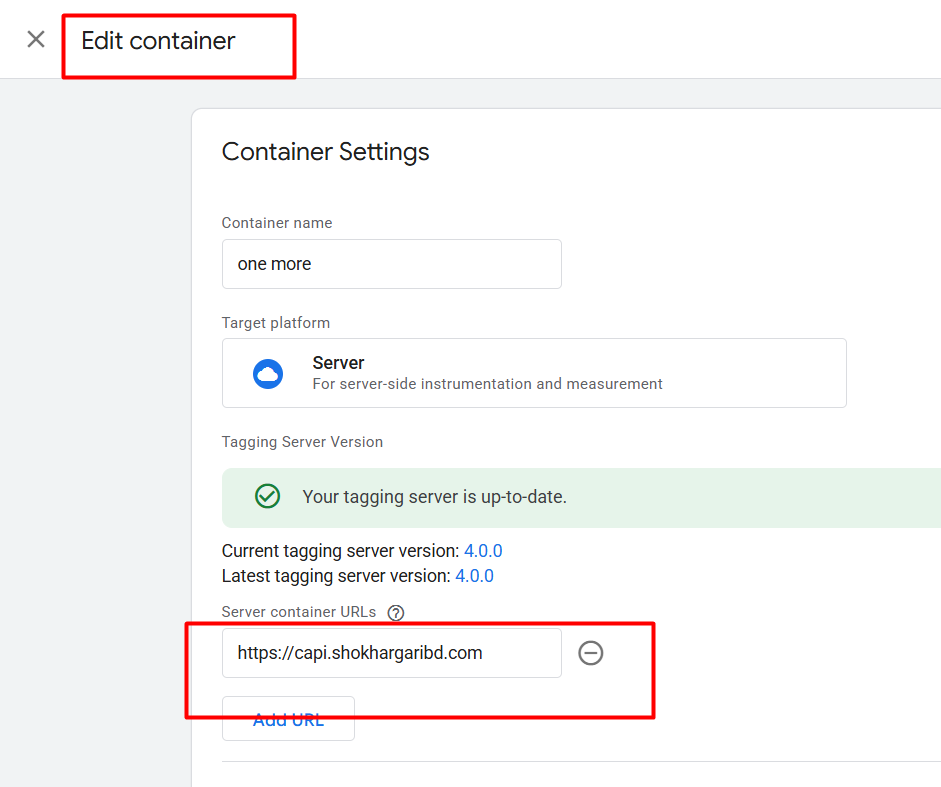
First go to your server container admin section in the GTM and change the domain to our new domain in the way. So enjoy the first-party tracking, and don’t forget to let us know if you want to share anything with us.


