
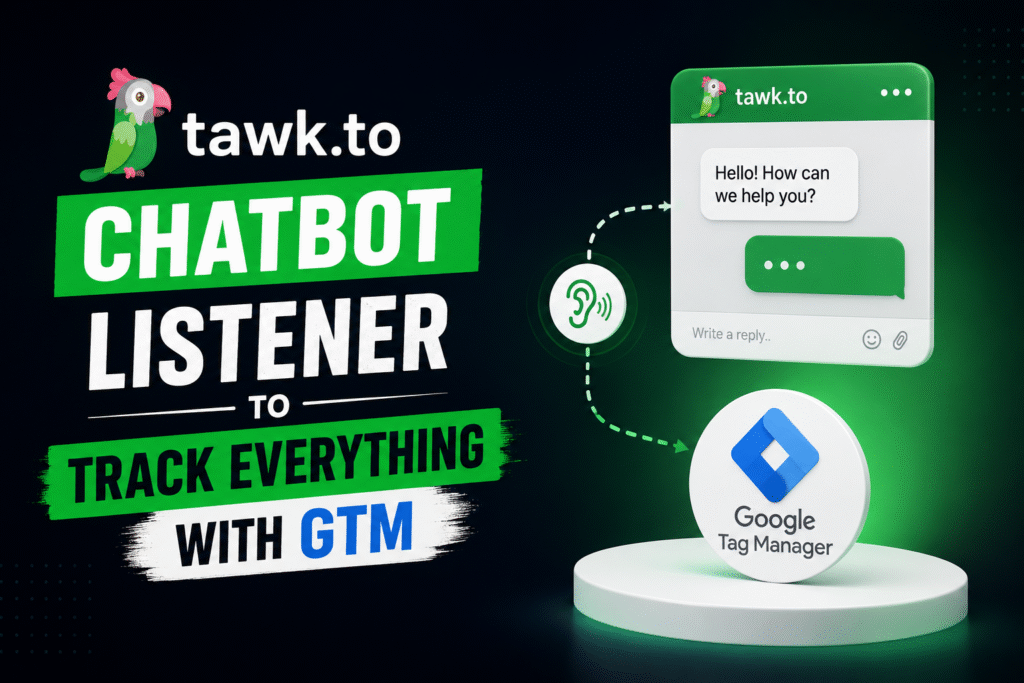
Tawk.to is currently one of the popular chatbot platforms. Every day, countless more and more new business owners are using this chatbot to expand their business and make it easier to communicate with users or the customers.
However, it is very important to keep one thing in your mind: that is, every business runs different types of marketing plans or advertisements to expand their work. In this case, it becomes really necessary for us to know some important data or information, which we send to different ad platforms. For example:
* How many users are we getting through our marketing campaigns?
* What percentage of them are interacting with our chatbot?
* How do visitors from different marketing platforms (e.g. Facebook, Google Ads) behave?
To understand these issues correctly, it is very necessary to track the user activity of our chatbot and send that data to other platforms, including **GA4 (Google Analytics 4)**. Through this, we can understand whether our marketing budget is being spent in the right place or not and how the customers are experiencing it.
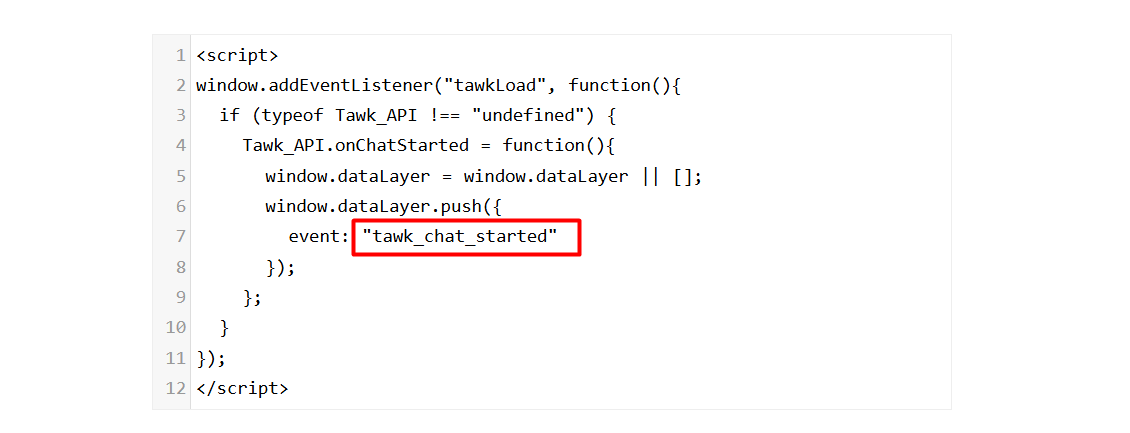
However, here one limitation is that the listener code provided by Tawk.to’s official site usually only provides data for just one event, and that is “chat_started.”
But in reality, we need many more types of data. Because a user can perform many types of activities or tasks in this chatbot.
If we cannot track every important activity of the user, then there will be big gaps during analysis or review. That is, we will not get a complete picture of how exactly users are interacting with the chatbot.
Overcome the listener limitations
So to overcome the limitations of the official listener, we have brought you a more advanced custom listener. Using this listener, you can track almost all important activities or events of the chatbot.
Through this, you can easily track the following events:
- tawk_chat_started: When someone starts a chat.
- tawk_chat_completed: The moment the chat ends.
- tawk_prechat_submitted: When someone submits information before starting a chat.
- tawk_offline_form_submitted: When an offline form is filled out.
- tawk_widget_minimized: When someone minimizes the chat box.
- tawk_widget_maximized: When someone maximizes the chat box.
- tawk_visitor_sent_msg: When a visitor sends a message.
- tawk_agent_sent_msg: When the chat agent gives a reply.
- tawk_satisfaction_rating: When the user gives a rating.
- tawk_file_shared: When a file is shared.
Let’s start the setup tawk.to listener setup
To set up the listener, first you have to enter your Google Tag Manager. Then go to your tag section because we have to create one more new tag from there.
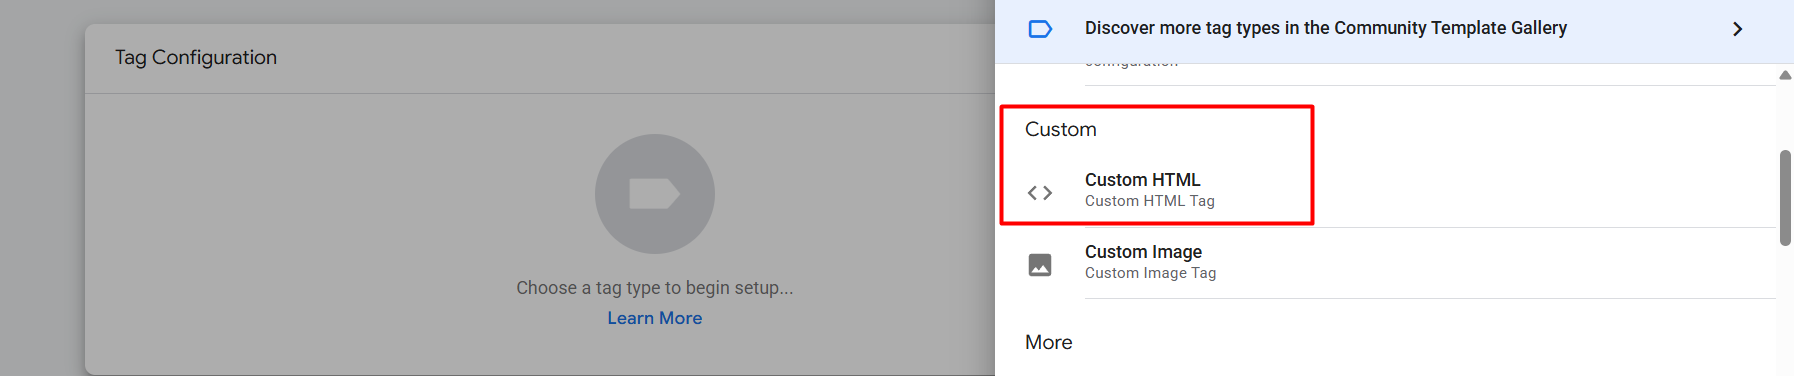
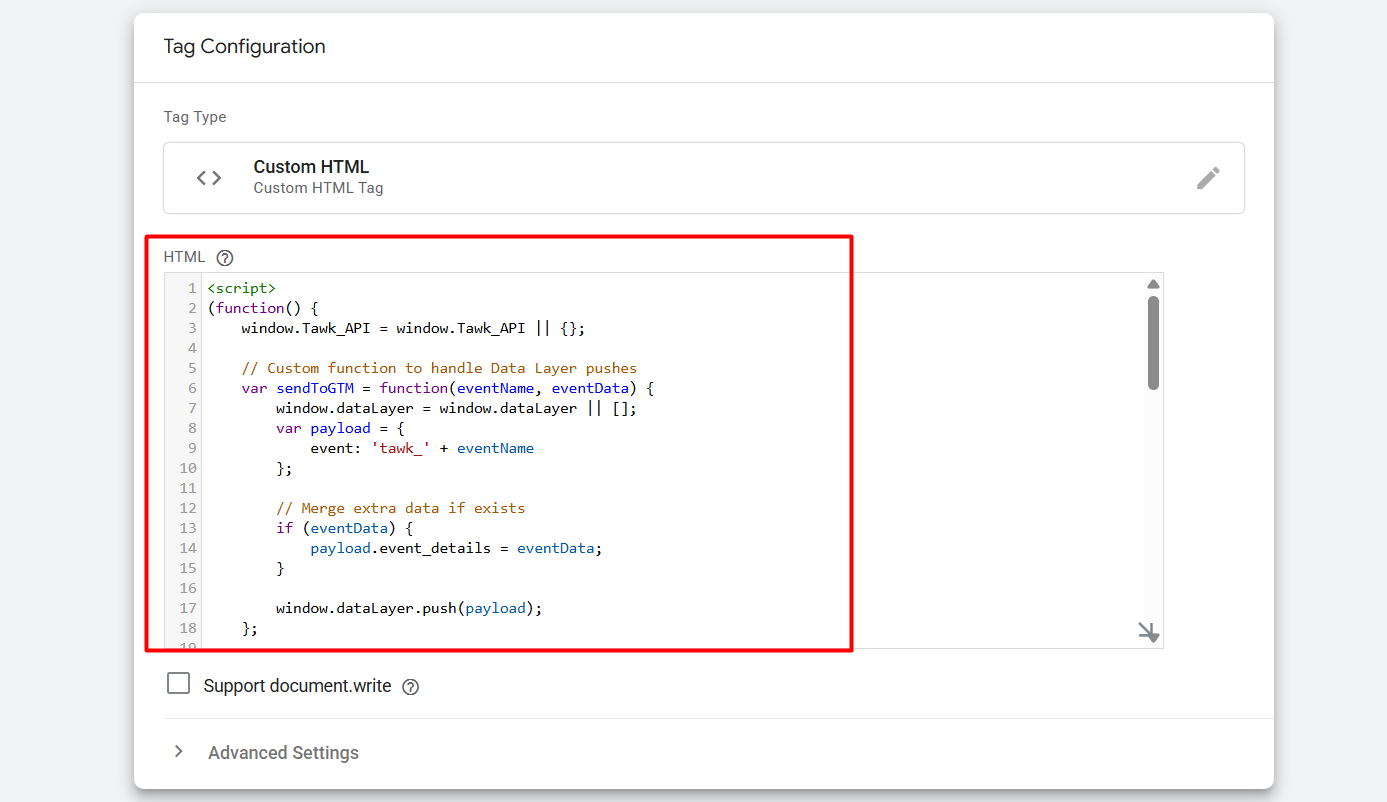
As your new tag type, select “Custom HTML.” Copy the code.
<script>

(function() {

    window.Tawk_API = window.Tawk_API || {};


    // Custom function to handle Data Layer pushes

    var sendToGTM = function(eventName, eventData) {

        window.dataLayer = window.dataLayer || [];

        var payload = {

            event: 'tawk_' + eventName

        };


        // Merge extra data if exists

        if (eventData) {

            payload.event_details = eventData;

        }


        window.dataLayer.push(payload);

    };

    // Chat Events

    Tawk_API.onChatStarted = function() {

        sendToGTM('chat_started', { status: 'User began conversation' });

    };

    Tawk_API.onChatEnded = function() {

        sendToGTM('chat_completed', { status: 'User ended conversation' });

    };

    // Form Submissions

    Tawk_API.onPrechatSubmit = function(data) {

        sendToGTM('prechat_submitted', data);

    };

    Tawk_API.onOfflineSubmit = function(data) {

        sendToGTM('offline_form_submitted', data);

    };

    // Widget Interaction

    Tawk_API.onChatMinimized = function() {

        sendToGTM('widget_minimized');

    };

    Tawk_API.onChatMaximized = function() {

        sendToGTM('widget_maximized');

    };

    // Message Tracking

    Tawk_API.onChatMessageVisitor = function(message) {

        sendToGTM('visitor_sent_msg', { type: 'visitor' });

    };

    Tawk_API.onChatMessageAgent = function(message) {

        sendToGTM('agent_sent_msg', { type: 'agent' });

    };

    // Rating & Files

    Tawk_API.onChatSatisfaction = function(rating) {

        sendToGTM('satisfaction_rating', { score: rating });

    };

    Tawk_API.onFileUpload = function(fileInfo) {

        sendToGTM('file_shared', fileInfo);

    };

})();

</script>
And paste it here in the “Custom HTML” box.
Now it’s time to set up the trigger. As your trigger type, select “All Page.”
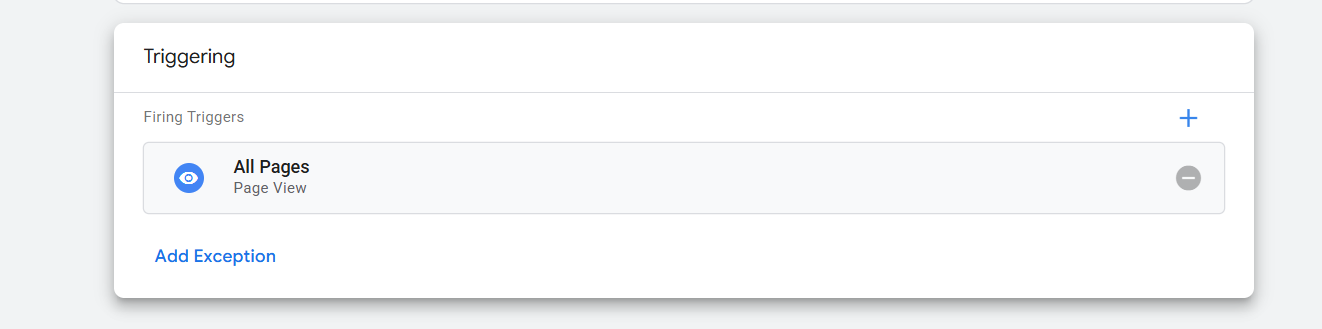
Now with a name, save the tag. Great, your listener is now ready to work. Let’s check it through the GTM preview.
Preview for Tawk.to event
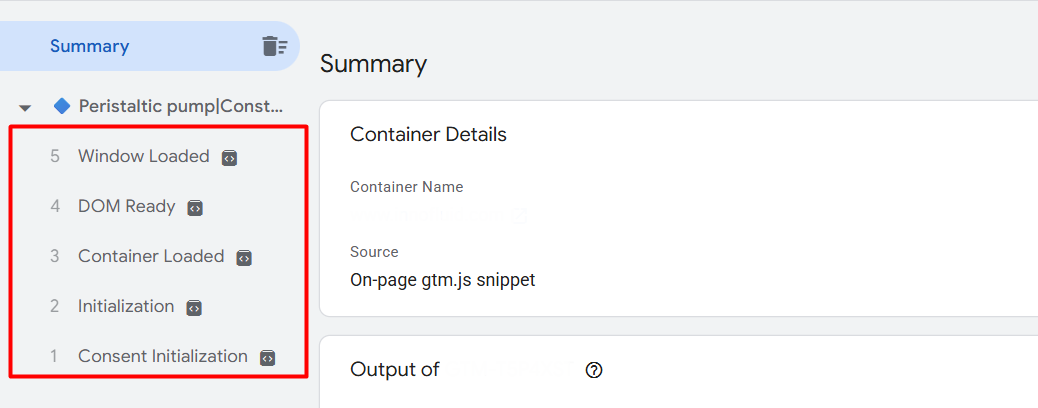
Now we are in the preview section from our GTM. Here you can see zero events in the name of tawk. Let’s open the chatbot and see what will happen then.
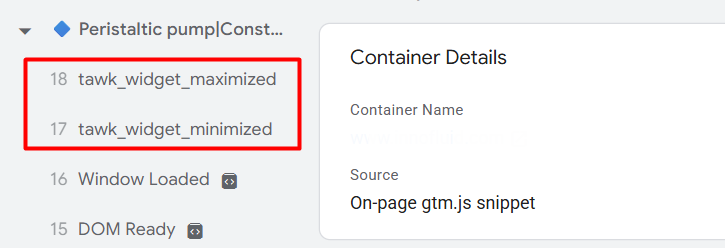
Look here in the picture. On our website, we opened the chatbot and then closed it. Here you can see two different events in the name of “tawk_widget_maximize” & “tawk_widget_minimized”. These two events made for our two different actions.
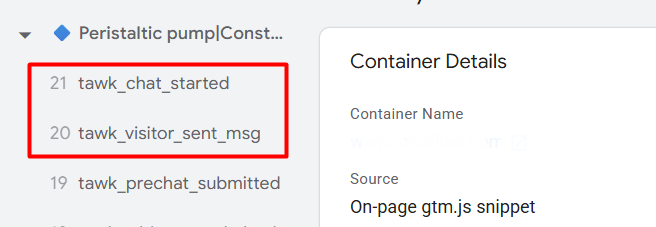
Here you can see some more events. One event is for when our visitor sent a message, and the other one is when the chat was started on the chatbot.
As you can see, using this listener, a separate custom event is automatically pushed to the DataLayer for each different task. The biggest advantage of this is that now you can select specific data according to your needs and send it to different platforms (such as Google Ads, Facebook Pixel).
Using this detailed data, you can do very precise analysis in GA4 (Google Analytics 4). For example, you will get a complete picture of what kind of users are starting a chat or how many are finally submitting a form. Which will help a lot in making marketing decisions for your business.
Send Data Tawk.to to GA4
Now if you want to send your data to your GA4, you can do it so easily. But yes, first you have to complete the connection between your website and your GA4 through Google Tag Manager.
To do it, first go to your Google Tag Manager and find out the measurement ID under the data stream section in your admin.
After getting the measurement, come back to your tag section in GTM and create one new tag. Here as your tag type select “Google Tag”.
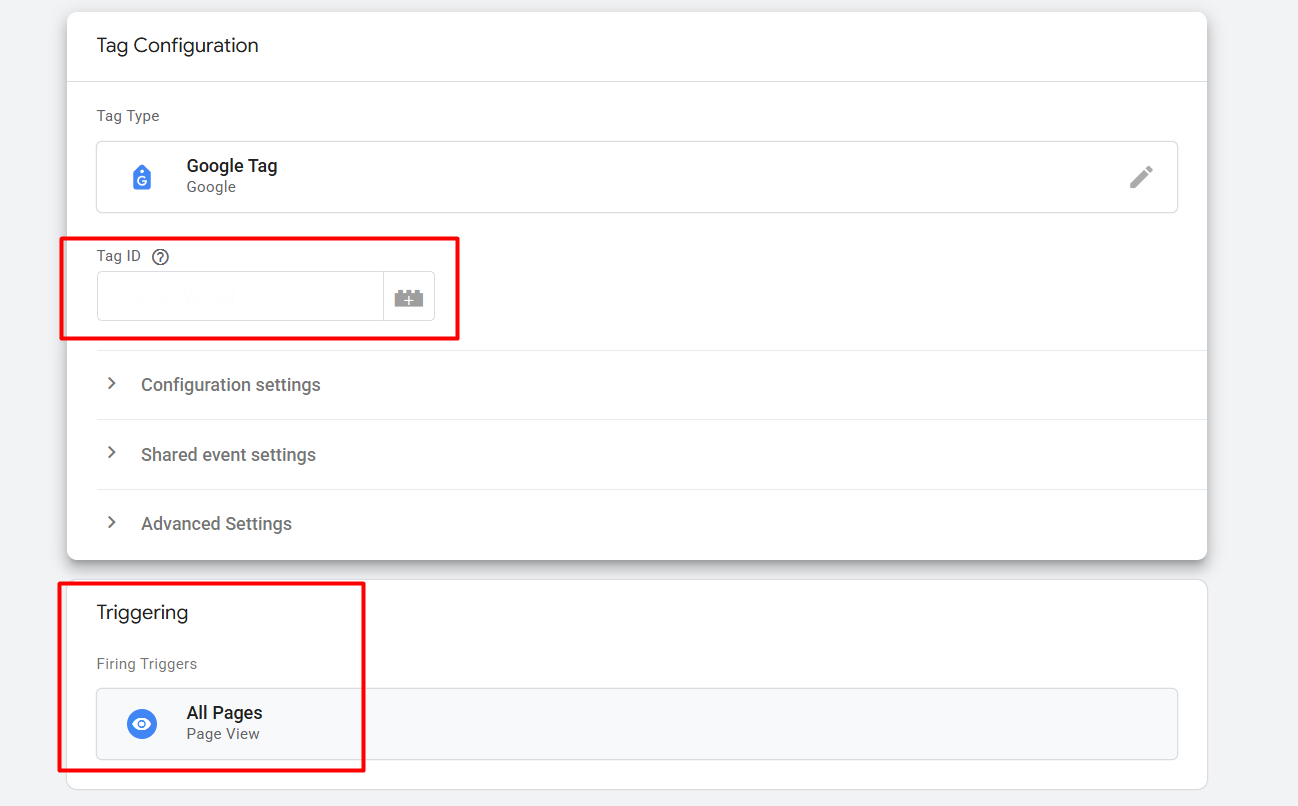
After selecting the tag type in the tag ID section, place your GA4 measurement ID. Then in the trigger section, select all pages as your trigger type. Great, the connection between your website and your GA4 through GTM is now created.
Now it’s time to create one more new tag to capture your events for your GA4. To do it again, enter your tag section to create one more new tag here.

Here you can see which one we selected for our work.
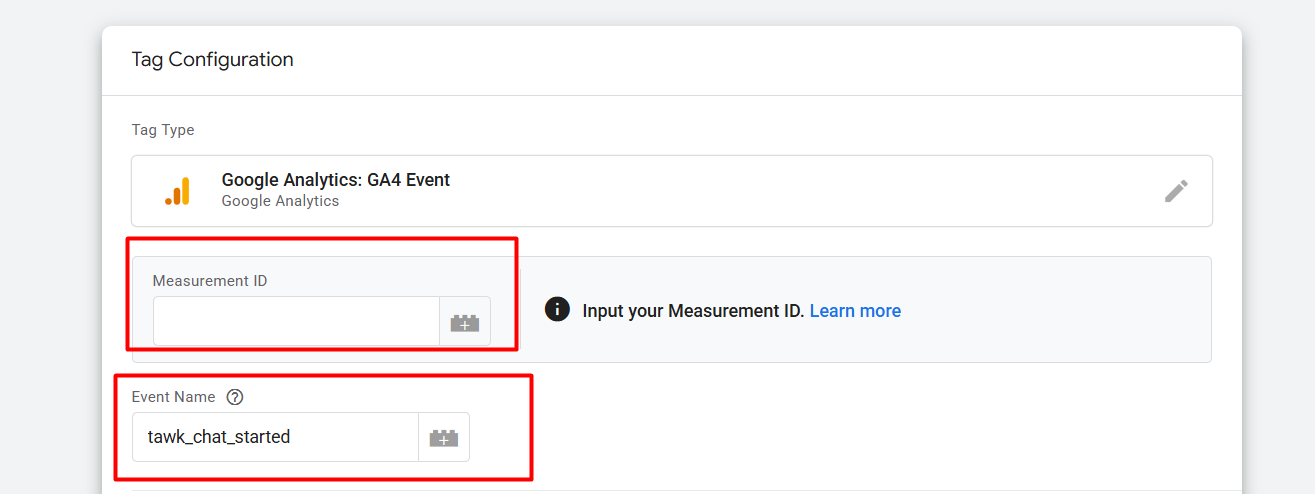
Now here in the first position again, place the same measurement ID. In the second option write down the event name. Now it’s time to set up a trigger. As your trigger type, select “Custom Event.”
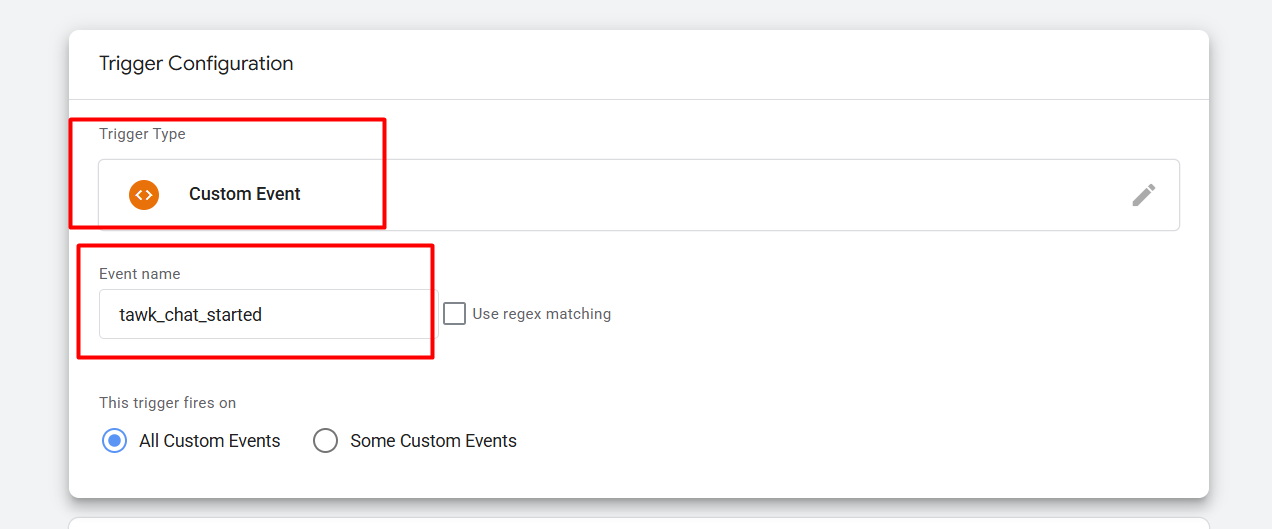
Here you can, as our trigger type, select “Custom Event,” and then in the event name, we collect the custom event name from the datalayer as per our need. We already showed you some events, how they are coming in our data layer after any specific action. So collect the targeted event’s name and track your targeted action with this “custom event” trigger type. Great! Now with a wonderful name, save your setting.
So
Accurate data tracking is the key to growing your business. Hopefully, using this custom listener, you can now accurately track every important activity of your Tawk.to chatbot. When you have enough data, then with that you can make more effective marketing decisions and increase the ROI (Return on Investment) of your ad campaigns manifold.
By the way, if you have any questions about Tawk.to and GTM or GA4 setup, feel free to let us know in the comment box. May your data-driven business journey be more successful!


