
LinkedIn is one of the most powerful social media platforms for professionals. People from different industries join LinkedIn with diverse intentions, such as networking, learning, and business growth. That’s why, if your goal is to connect with professionals, LinkedIn should be one of your top choices.
If you are running advertising campaigns to target professionals from specific industries, LinkedIn becomes even more valuable. Professionals from almost every sector actively use this platform to share knowledge, insights, and opportunities, making it ideal for B2B and professional-focused campaigns.
When running a campaign, conversion tracking plays a crucial role. It helps you understand how many conversions your campaign generates and how well it is performing overall.
Properly implementing conversion tracking is also essential for campaign optimisation. When LinkedIn receives accurate conversion data, it can analyse user behaviour and identify which traffic types perform best. Based on these signals, LinkedIn’s algorithm will optimise your campaign for better results.
That’s why, if you want LinkedIn to effectively optimise your campaigns and improve performance, correctly setting up conversion tracking is essential. From my experience, failing to set up conversion tracking can result in a 30% to 40% reduction in your ad budget.
So today, in this article, we will show you how you can complete the journey through Google Tag Manager. Currently, GTM is a fantastic solution for tracking anything on any platform. If you used GTM to finish your tasks, you can easily check and maintain them. So let’s start the process.
LinkedIn Conversion tracking way
At first we have to log in to our LinkedIn account. But yes, don’t forget to access the page before starting the work.

After logging in to your account, find the “Advertise” section in the LinkedIn header. Now click on the section to enter.
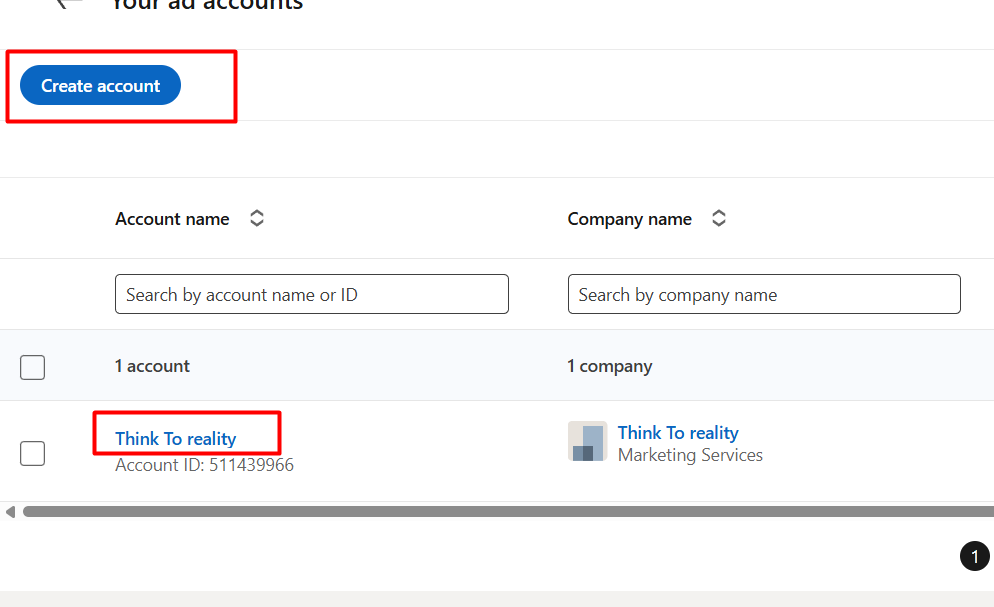
To complete the tracking, click on your ad account. But if you don’t have it, then first create one. To create an account, click on the “Create account” button.
Account Creation
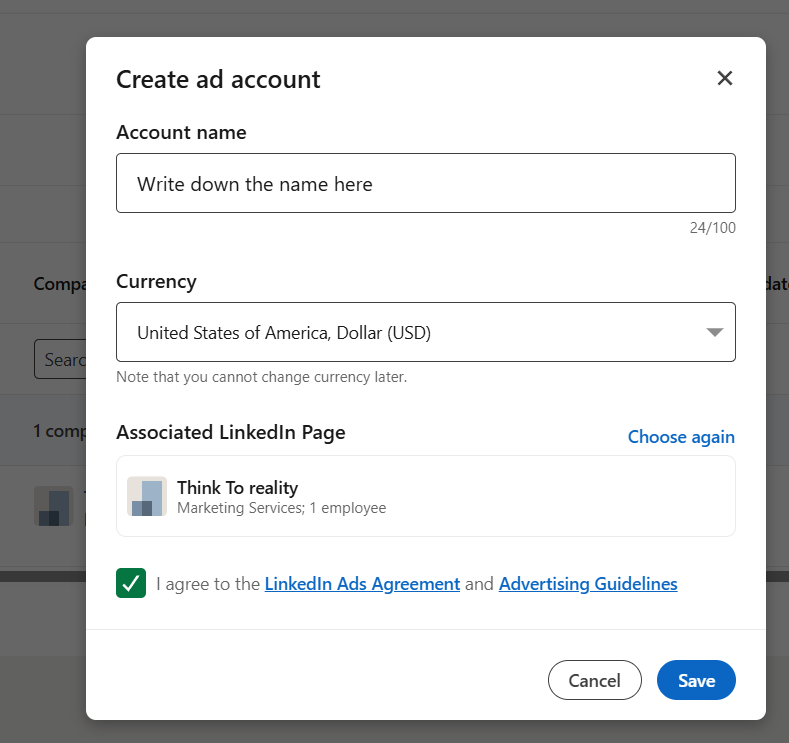
After clicking on the button, write down the name in the first box. In the second position, select your currency. Choose your page and save it in the third and final position.
Collect the partner ID
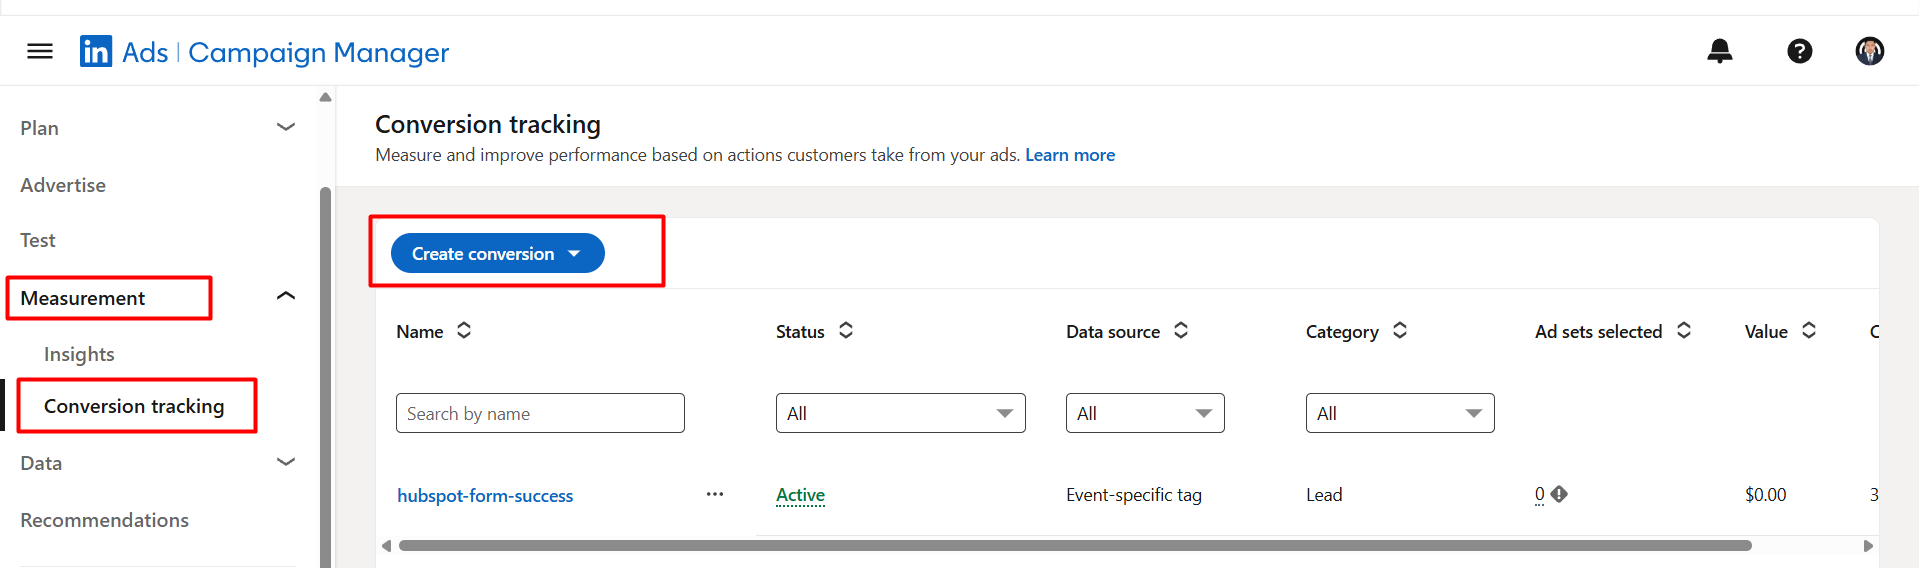
After entering the account, now it’s time to set up the conversion tracking. So to do it, first click on the “Measurement” section. Then you will get two different options.
- Insights.
- Conversion Tracking.
Here, the first option is to view the insights from the campaign, and the second option is to determine where we will create the conversion based on our target. So now click on the create conversion button.
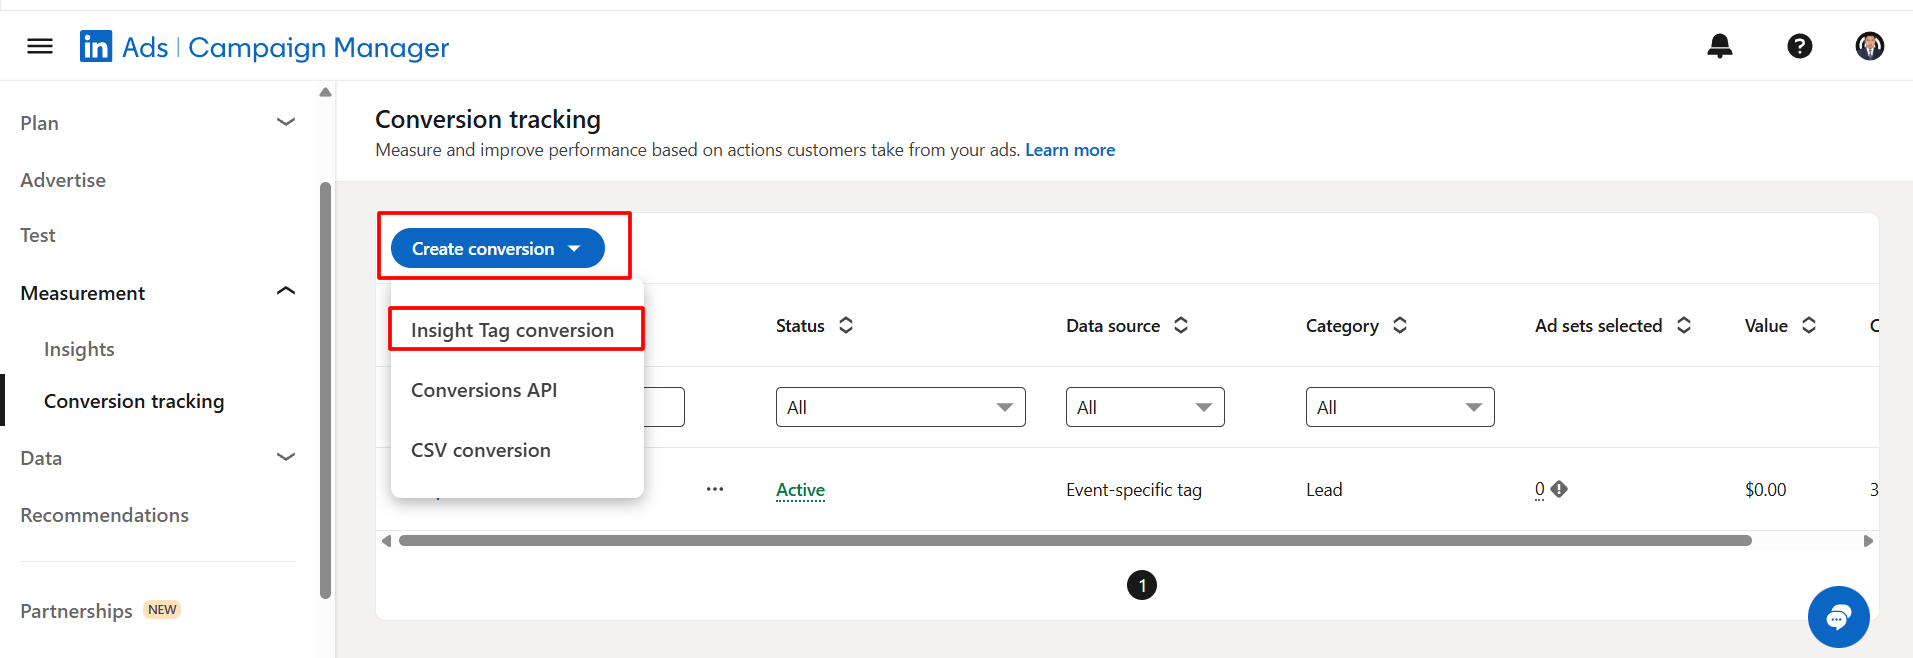
Hereafter, click on the first button, and we get three different options. From here, we need to use the first option. This preference is due to the fact that our data is being transmitted through browser-side tracking. The second one is used when sending data from the server.
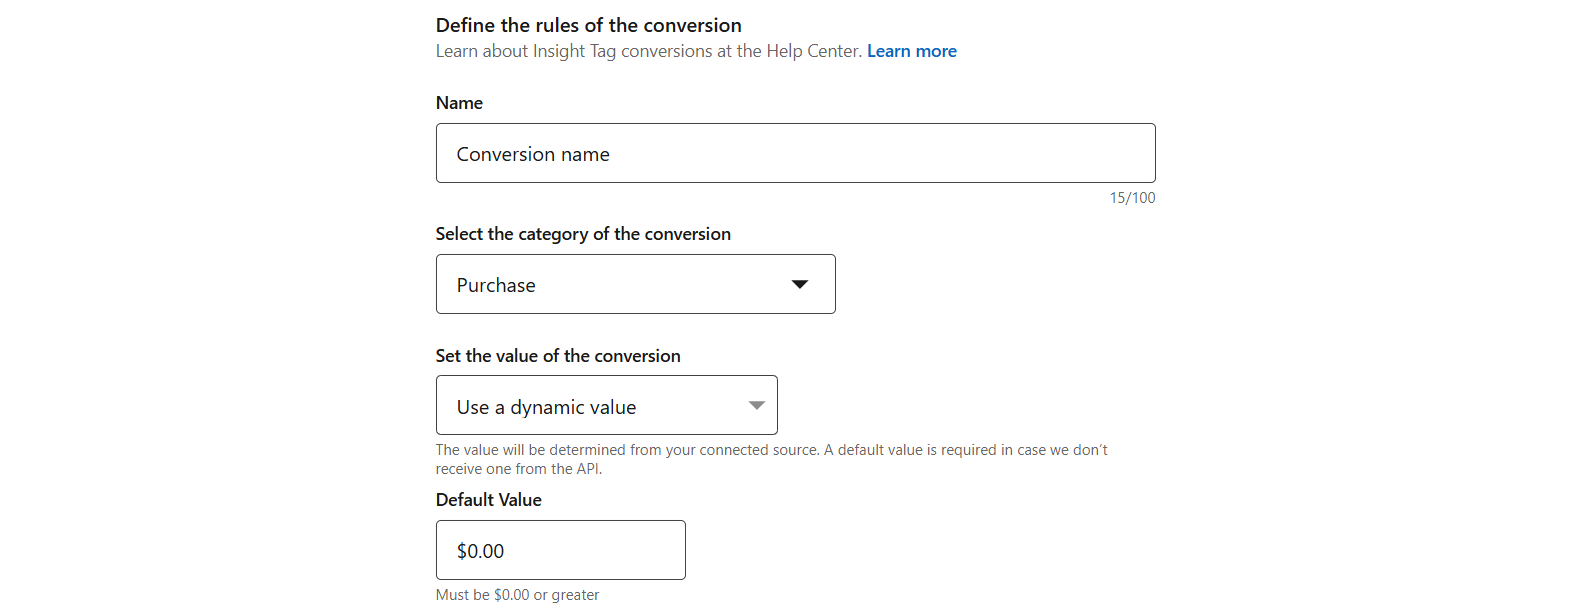
Now here in the first position, you have to set up a name for this conversion. In the second position, select the category of the conversion. In the picture, you can see that we select “purchase” as our conversion category. Every time someone completes a purchase, our setup will track it.
Now, you can set the default value, and for the other settings, you can leave them as they are. Now go for the next step.
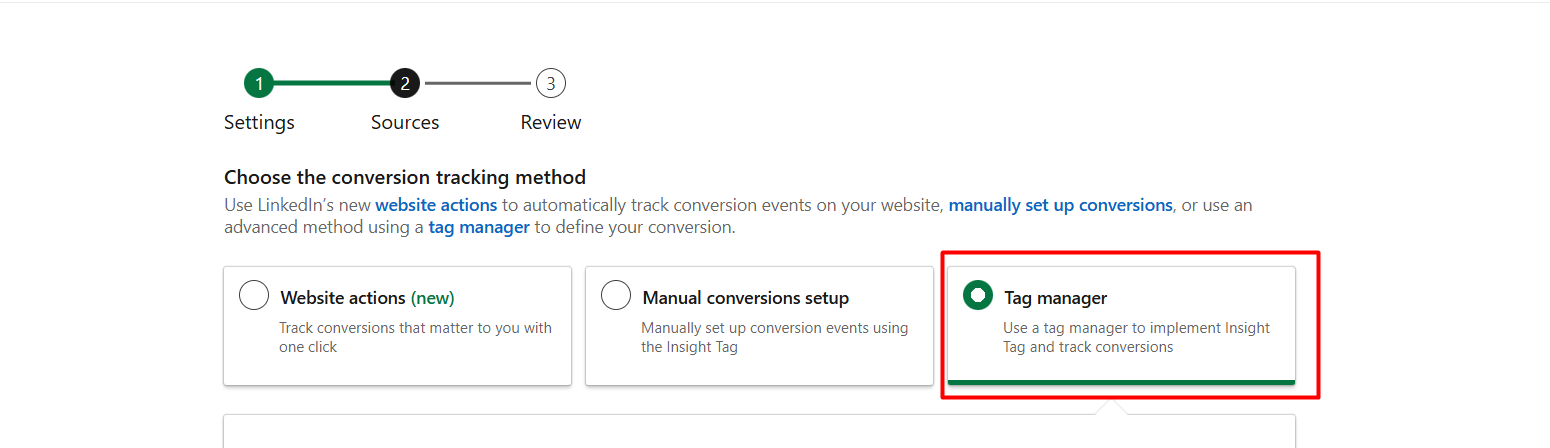
Now at the position, select the third option. We will go through the tag manager.
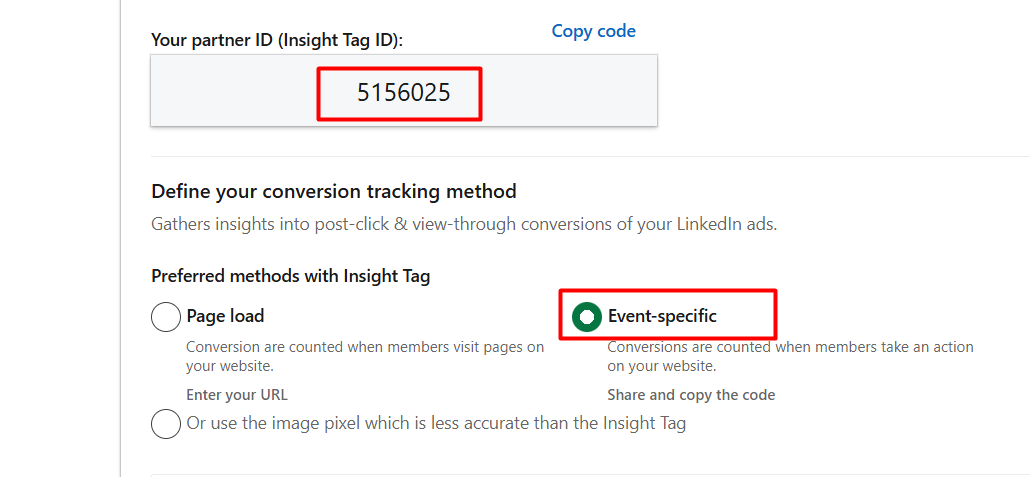
Now don’t forget to copy the partner ID code, and after that select “Event-specific”.

After selecting the option, you will get one more code. These two codes are important, so don’t forget to copy them. Proceed to the next option to complete the conversion creation.
Set up the LinkedIn conversion Through GTM
With the two codes now, let’s go to the Google Tag Manager. To start the work, first we have to add a template. So click on the templates section in your GTM.

Here in the tag templates section, you have to find out the new templates for LinkedIn.
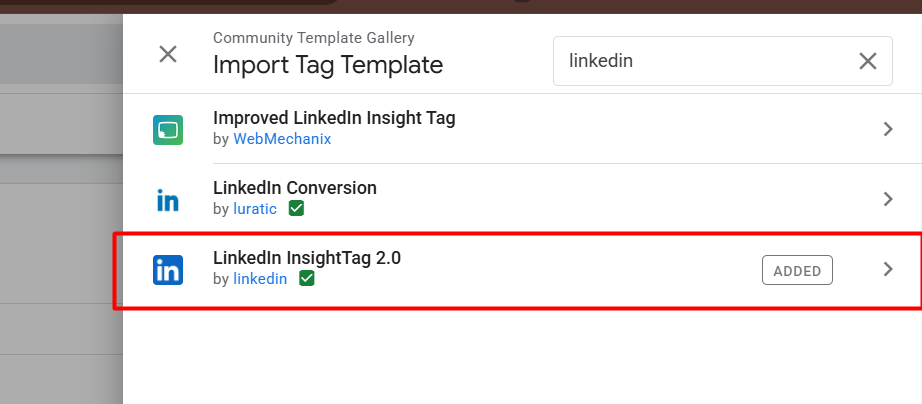
Please add this template to your gallery and then return to the tag section to create a new tag.

At this position, under your tag type, select the ‘LinkedIn Insight Tag 2.0’.’
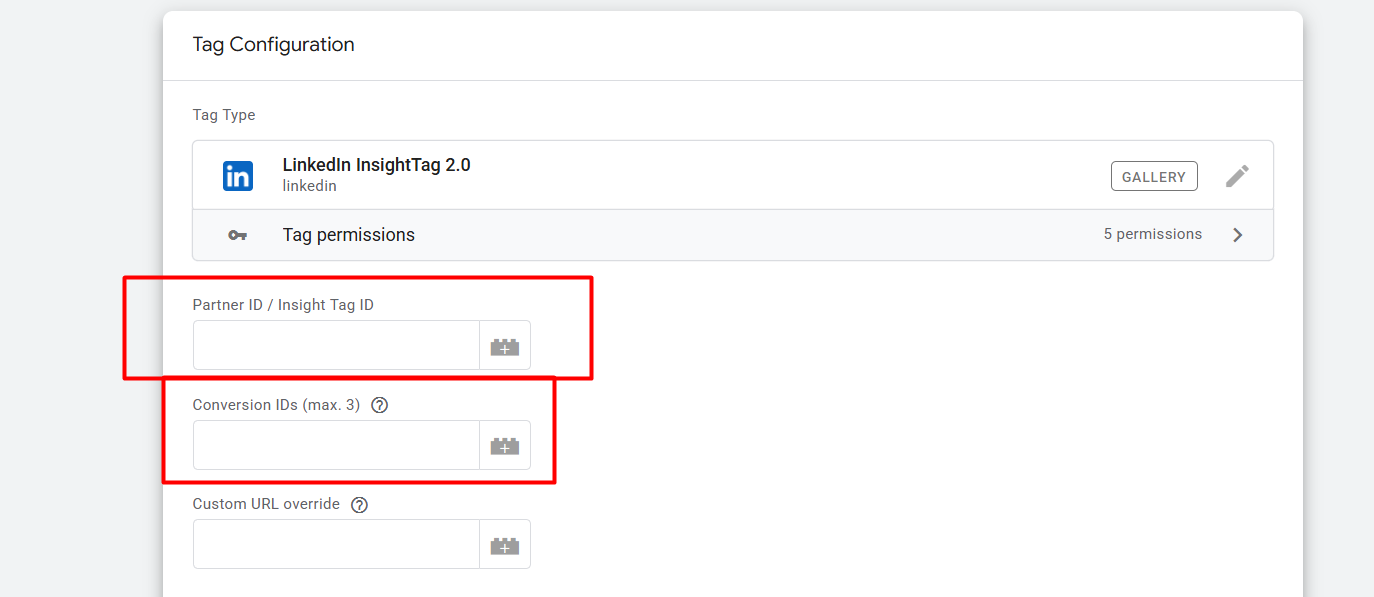
First, paste the copied partner ID in the first position. Then, place your second copied ID in the second position, and you’re done. Next, we need to set up the trigger.
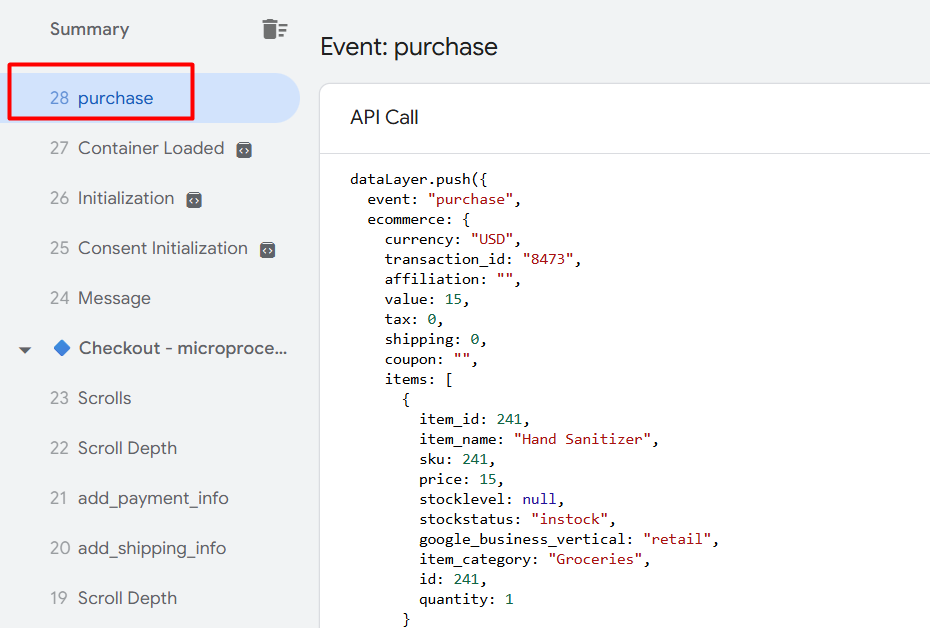
After each purchase is completed in the data layer, an event named “purchase” will be triggered.
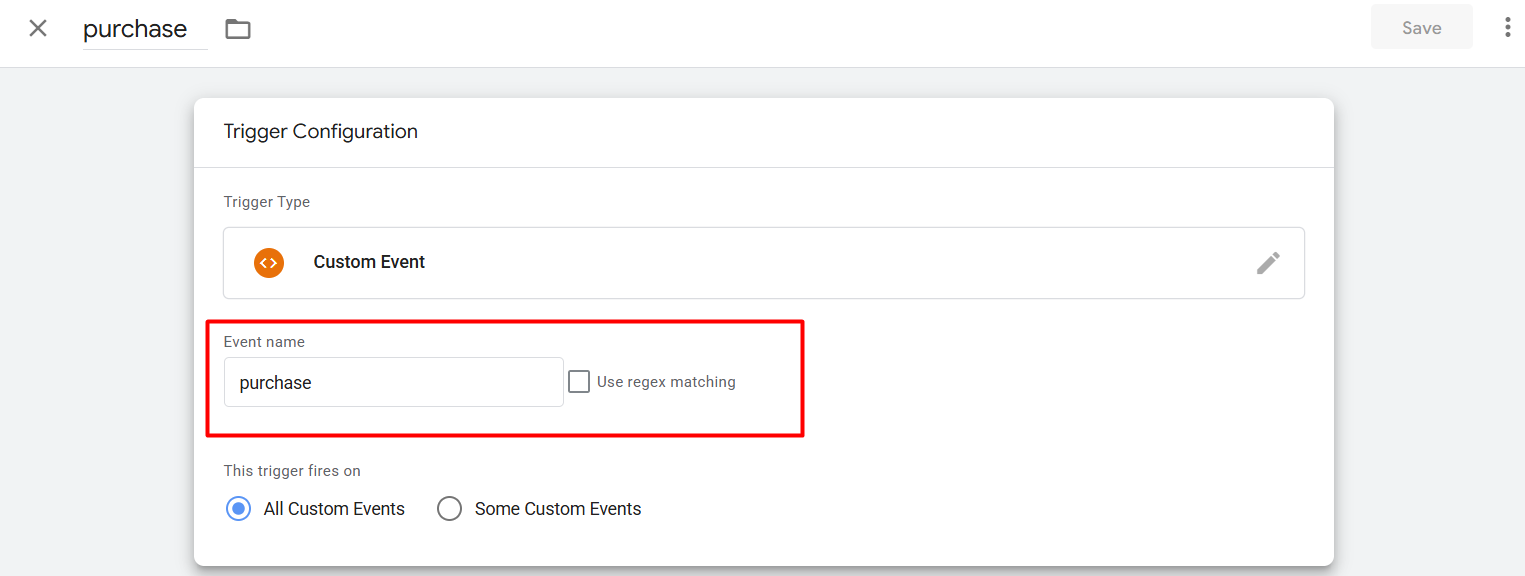
So now, as your trigger type, select “Custom event.”. To fill in the event name, copy it from the data layer and paste it here.
Please save it, and your conversion tracking will be complete. In the same way, you can complete your conversion tracking for your targeted event.
Feel free to share your thoughts with us if you have any additional questions. We’re always here to listen and assist you.


