
In our previous article, we had already explained how to install GA4 on our website. After installing GA4 on your website, it’s crucial to discuss the key actions you should take immediately.
But if you didn’t read our previous article, then you can complete it first. GA4
To finish your GA4 setup correctly, you must do it for all your GA4 accounts. Today, in this article, we will explain about seven different important settings:
- Enhanced Measurement.
- Manage automatic event detection.
- Google Signal and data collection.
- Data retention increases the timing.
- Filter out the internal traffic.
- Connect accounts.
- User identity – Reporting options.
Enhanced Measurement GA4 Settings
Our first setting is about enhanced measurement. At the beginning, we should start working on it. To set up the enhanced measurement, first go to your GA4 settings, and then enter your data streams.
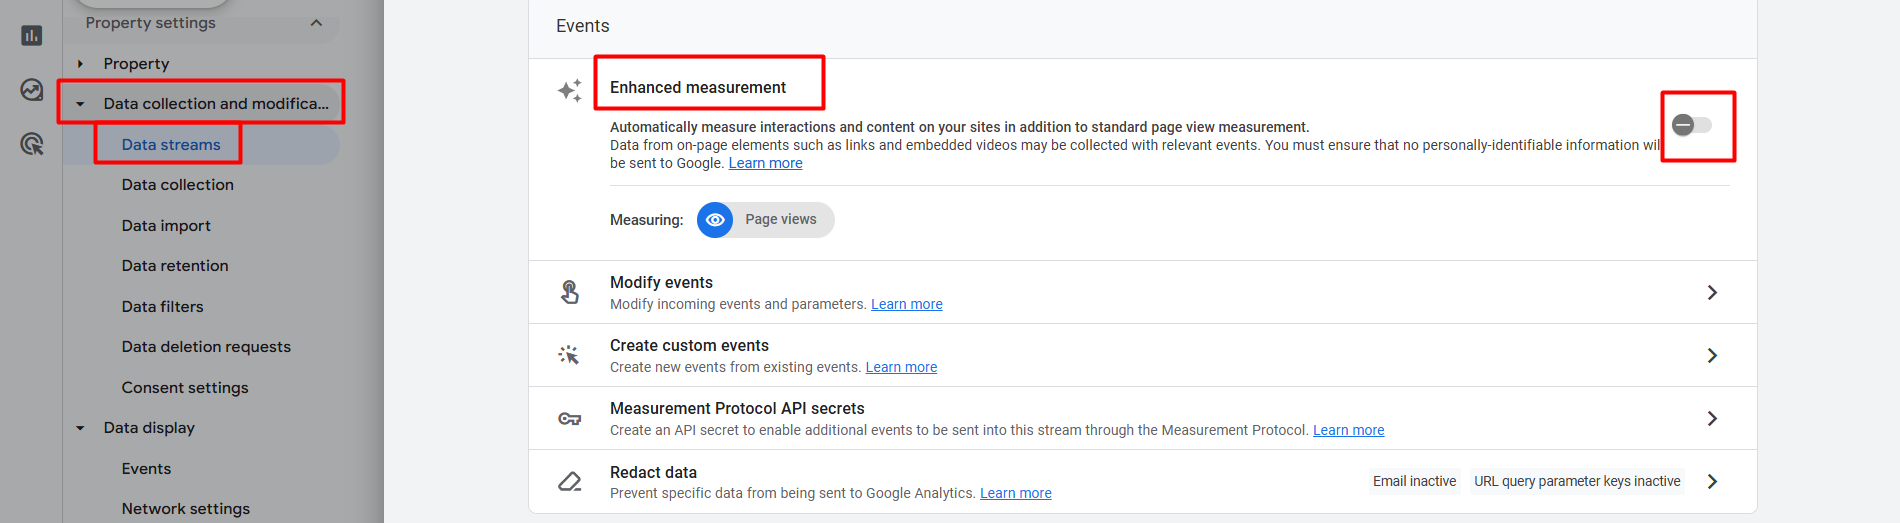
From here on, you have to turn off this setting. We will manually handle all important events through the GTM.
Manage automatic event detection GA4 Settings
Automatic event detection is also related to the enhanced measurement. We don’t want to set up or take any automatically created events from GA4.
Because we are digital marketers, we will complete the total process according to the GTM and create the custom event as per our need for GA4. That’s also why we have to turn off this setting.
To set up the settings as per our needs, you have to enter your data streams again. Then, scroll down from there.

Now click on “Configure tag settings” to get the next one.

After clicking on “Configure tag settings”, you will get your targeted settings, “Manage automatic event detection”. Click on it to proceed to the next step.
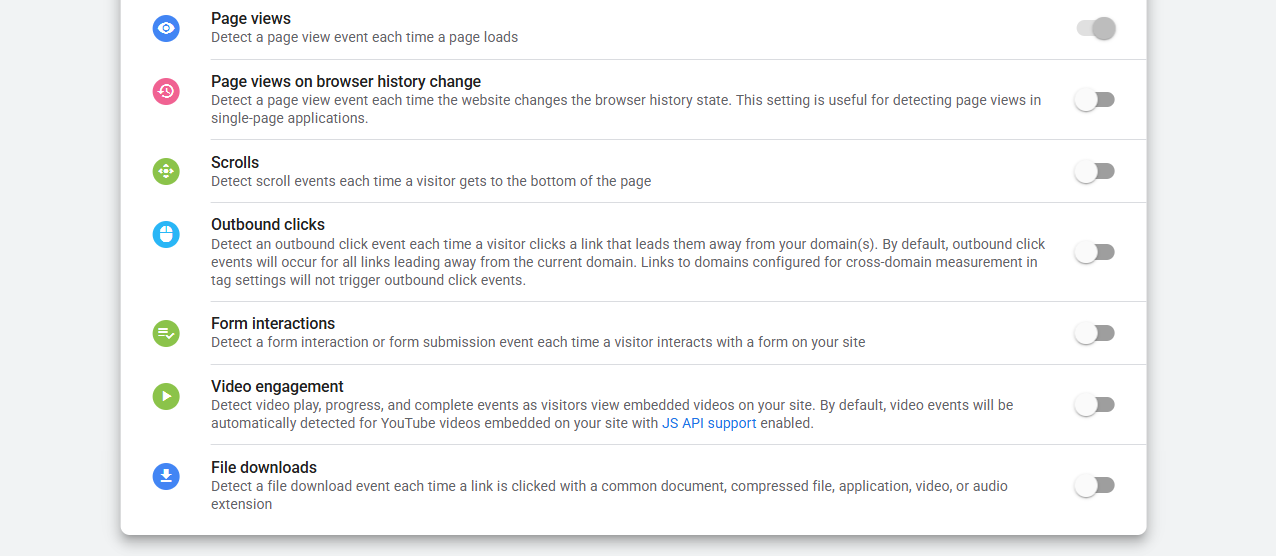
From here, turn off all of them. If we need any kind of event, we will do them in a custom way through the Google Tag Manager. This is our second important work after completing the GA4 installation.
Google Signal and data collection GA4 Settings
This option is one of the most important settings that you should make after installing GA4. Here you should make sure everything is enabled. This setting will greatly assist you with your remarketing efforts. Also, it will help you with audience creation under GA4.
For example, consider a user who visits your site at different times, once from a desktop and once from a mobile device, and completes two events. One event is from a mobile device, and the other one is from a desktop.
So here’s how GA4 will know that the two events are from the same user. This type of user mapping can only happen properly when you enable the Google signal and data collection.
To access this setting, you need to navigate back to your GA4 settings. From the setting comes the data collection and modification. Then click on the data collection.
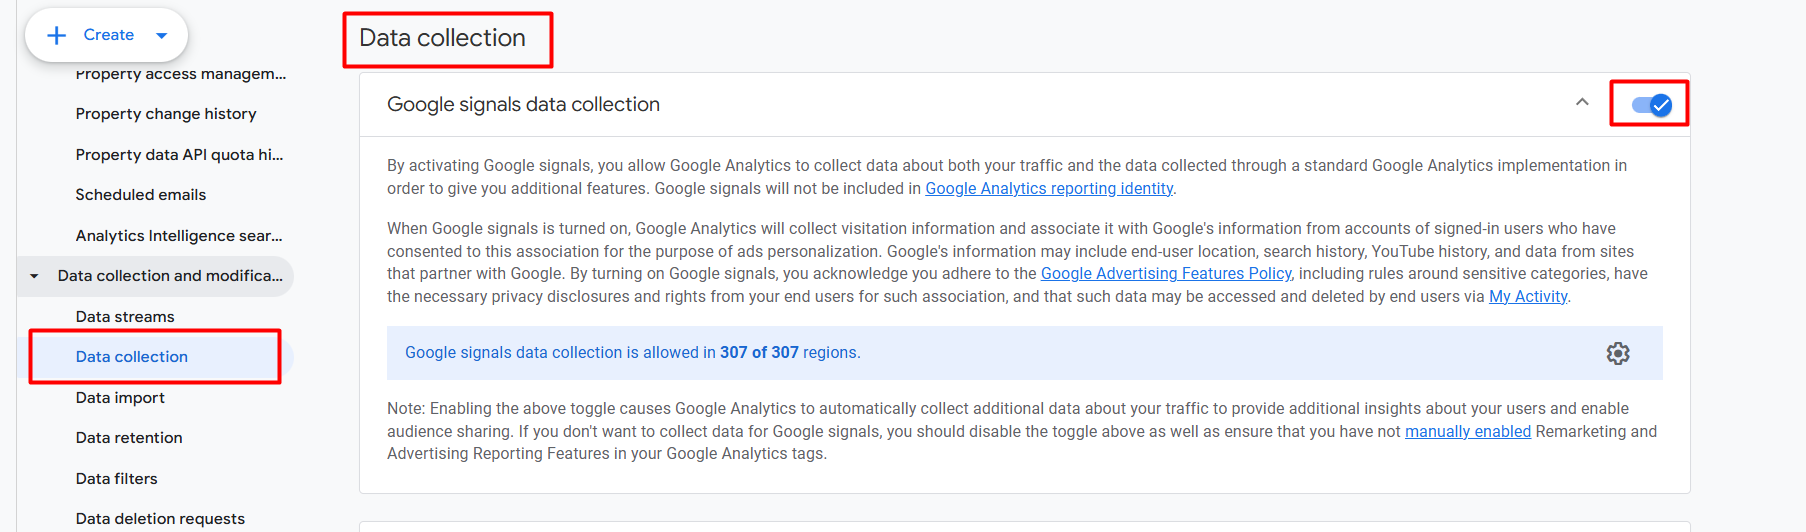
After entering the setting, enable the first one, “Google signals data collection”.
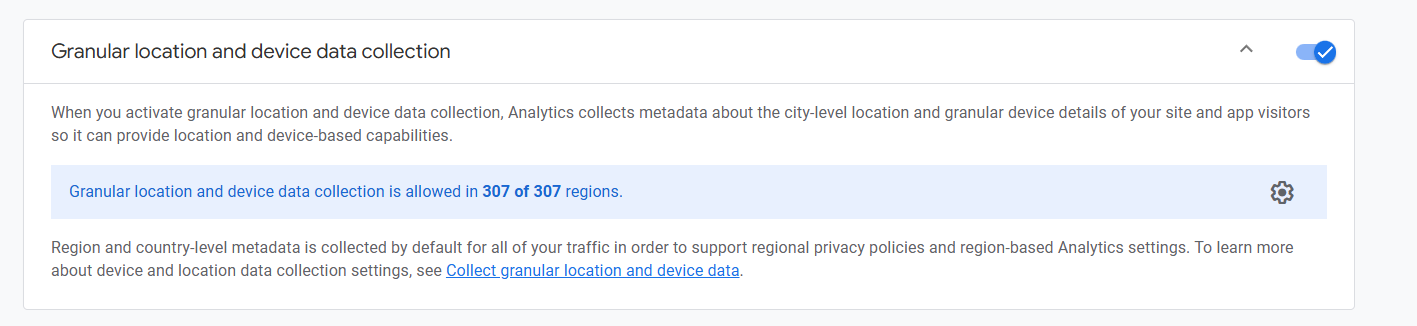
Next, scroll down and enable the additional setting: “Granular location and device data collection.”

After that, the final item, titled “User data collection acknowledgement”, is presented here. Give your acknowledgement. The third setting has also been completed. Let’s go for the fourth one.
Data retention GA4 Settings
It’s related to the data retention. Through this setting, we can create a single instruction for GA4 regarding the number of days we want to store our collected data.
If you want to increase the data, then again enter in your GA4 setting. Then, in the settings, navigate to “data collection and modification” and select “data retention”.
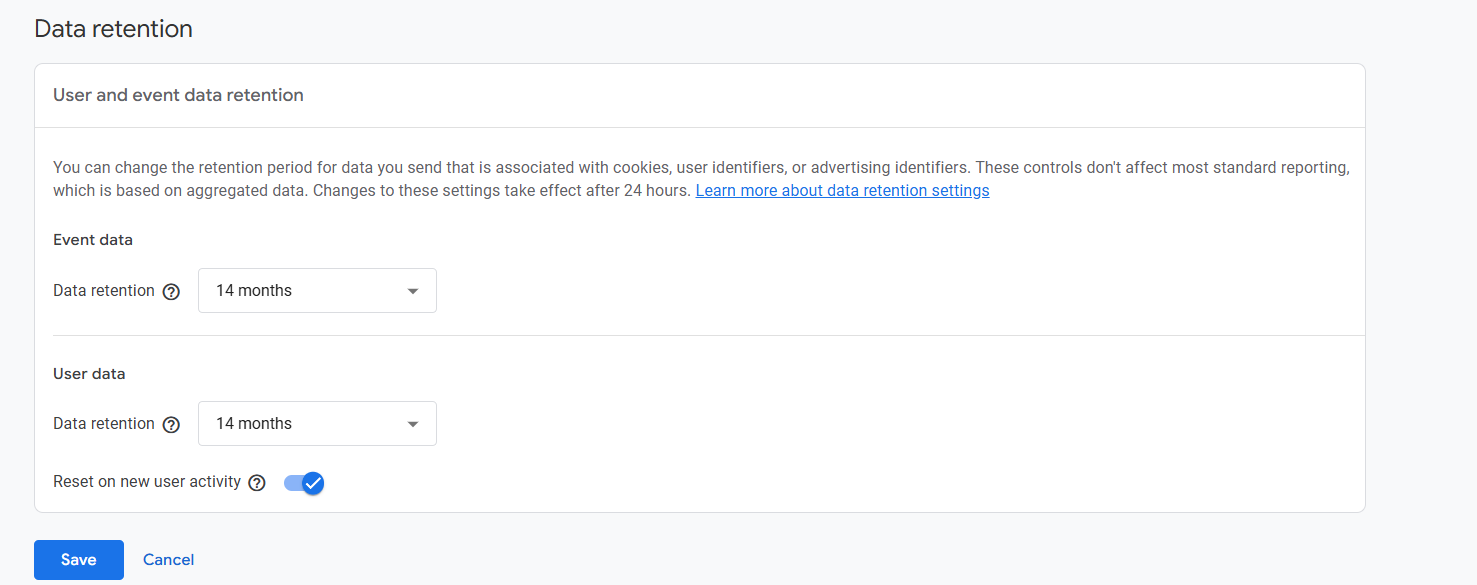
Now from here, increase your data retention from 2 months to 14 months and save the setting.
Filter out the internal traffic
Here you will have to define your internal traffic. If you are unfamiliar with internal traffic, consider this example: you have a website, correct? There your internal team is working.
For example, your social media team and your SEO team are frequently accessing your site to perform various tasks and create a wide range of events.
So all of the events they create will be listed in your GA4. So definitely, when reporting, you will dislike watching this type of event. That’s why if you want to filter out these events, you will have to first define who your internal traffic is.
In GA4, we can filter out internal traffic in many ways, but first we must identify it via the IP address. To do it again, enter your “Data stream” and then scroll down to get the “Configure tag settings.” Enter to get the next options.
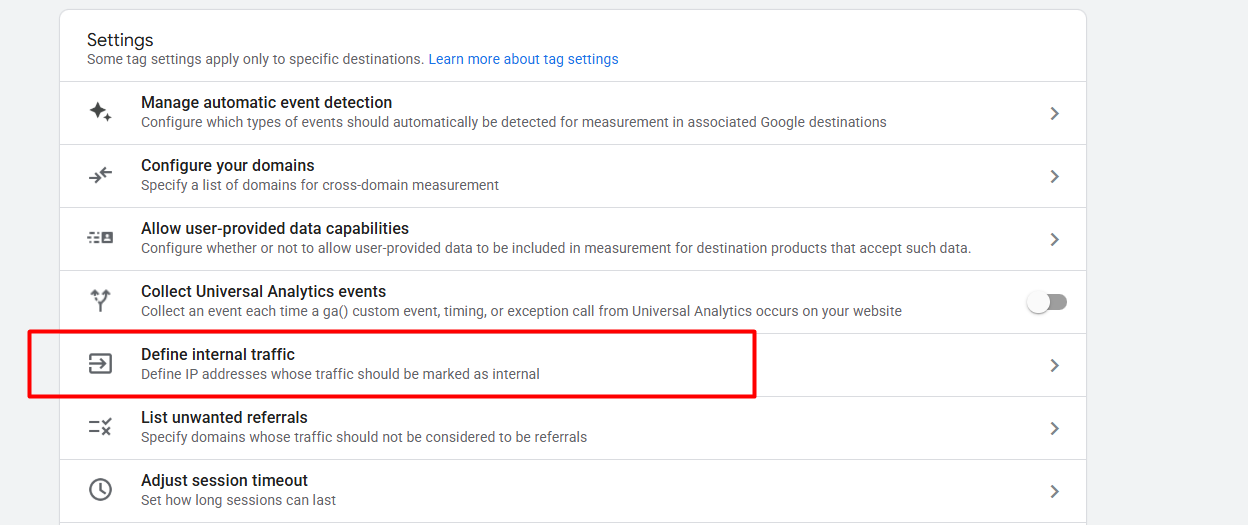
After entering “Configure tag settings”, if you scroll down, you will get the internal traffic definition section. Click on it.
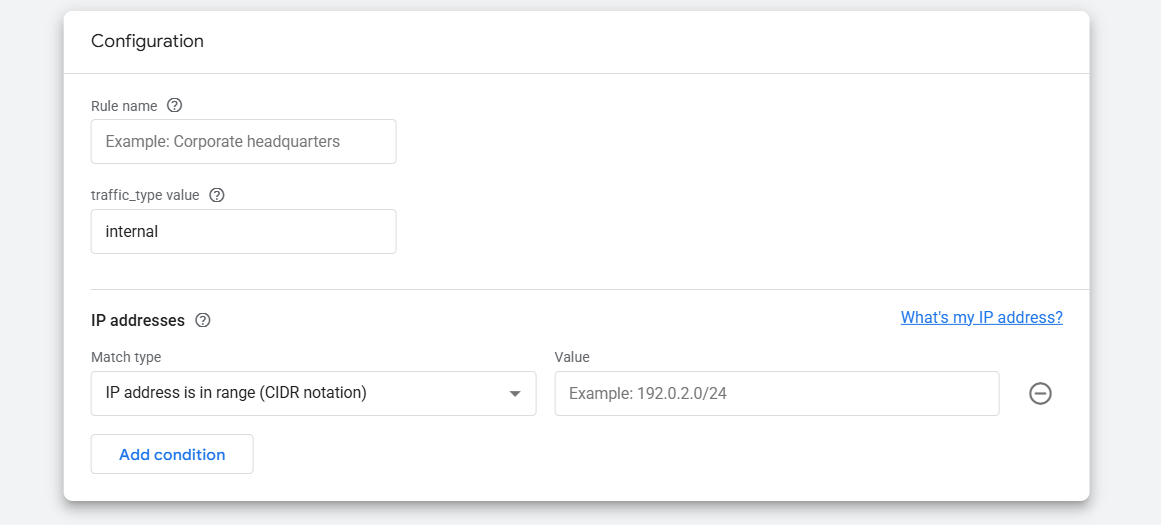
Here you can see the setting. As per your team member’s IP address, you can define them as your internal traffic.
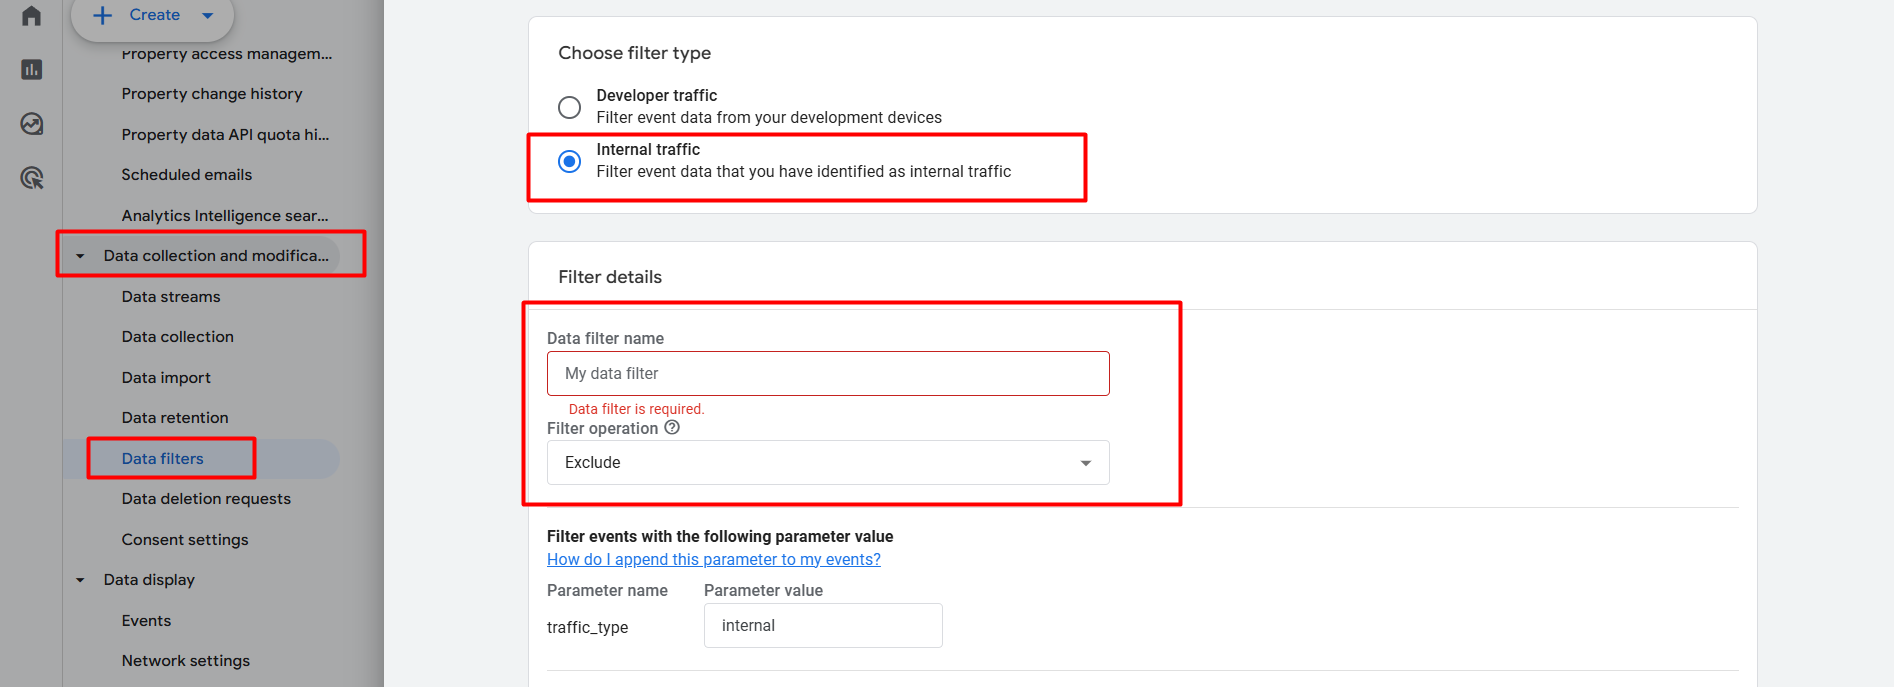
If you want to filter out internal traffic, return to the “Data filters” section. From here, you can complete the data filtering work.
Connect Accounts
After completing the GA4 installation with your website, now it’s a vital job for you to connect all of your accounts with GA4. For instance, you need to link your Google Ads accounts and your search console to GA4.
Also, you should add all of your data sources with GA4. If you want to connect your other accounts with your GA4, then try to create all of them with the same ID. If you do it, then your work will be effortless.
So if you want to connect your accounts or Google Ads accounts, then from the settings, navigate to the “Product Links” section.
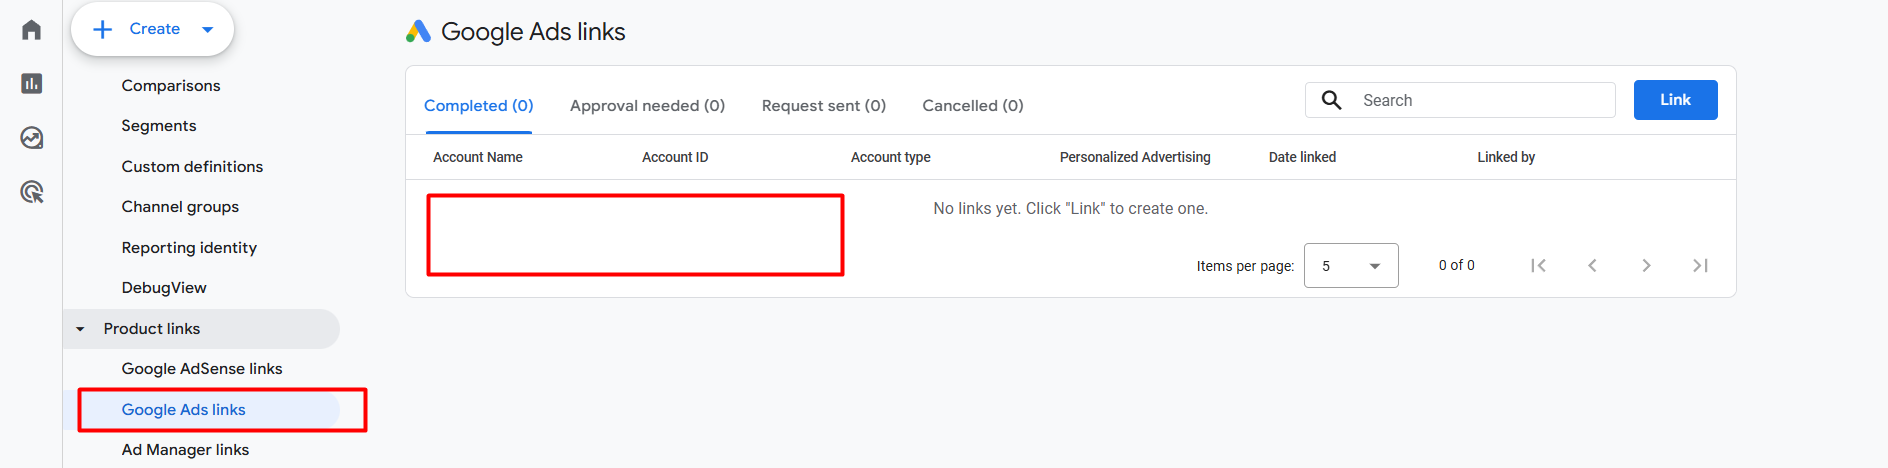
If your Google Ads account is linked to the same ID as your GA4, it will show here. From here, then, you will be able to connect or link them with your site.
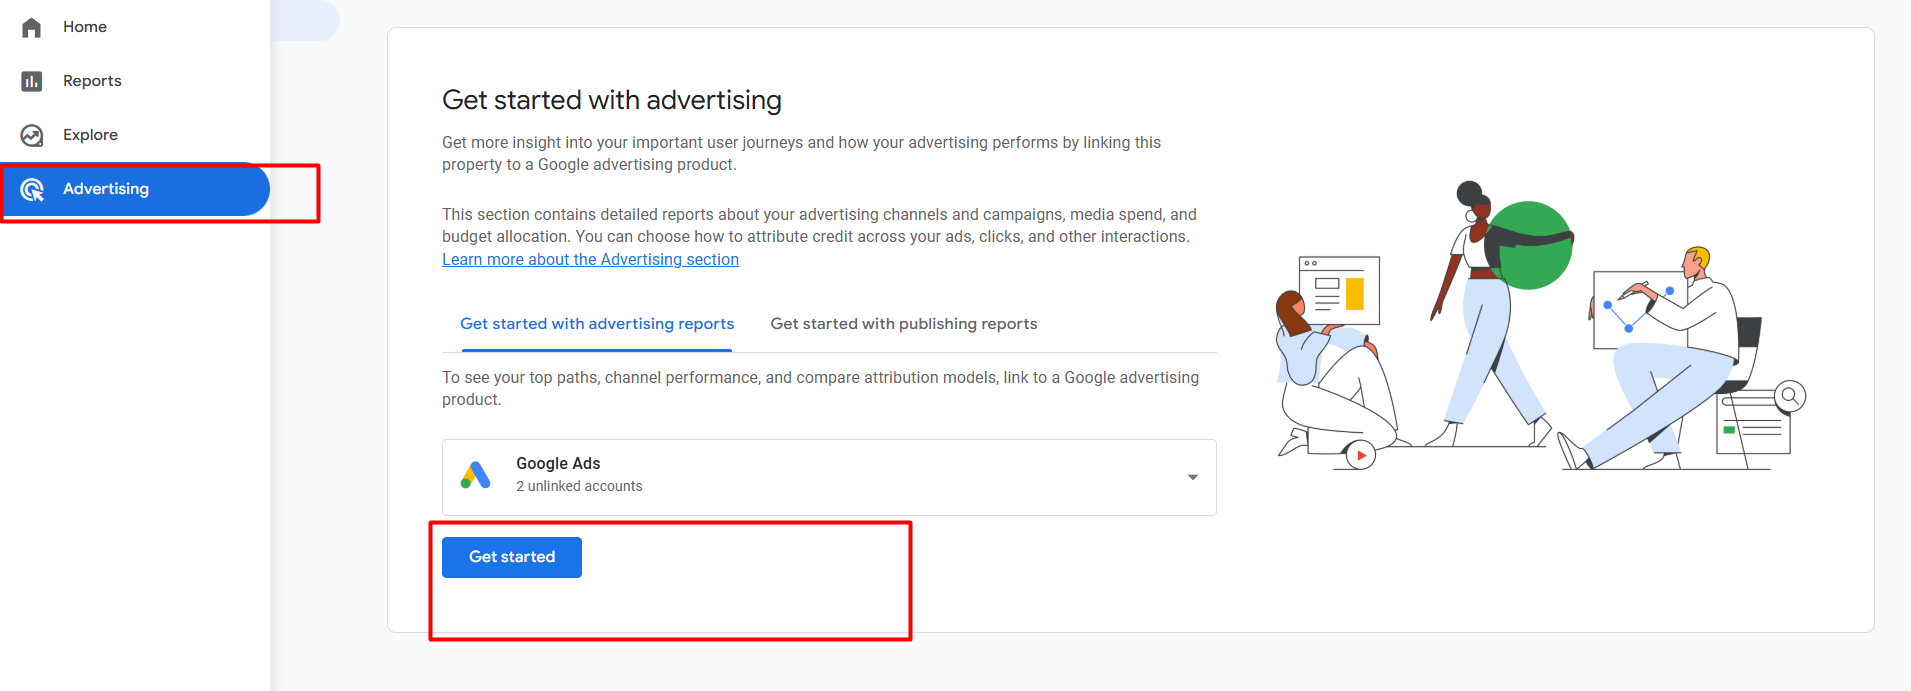
After linking the accounts, you can view all the data in your GA4 “Advertising” section.
User identity – Reporting options
User identification must be correct in the reporting option. What I mean is, how do you indicate to Google Analytics 4 that this is a user?
In this case, you can configure it based on the new device. This means that traffic from a new device in GA4 should be counted as a new user.
Also, you can do it in an advanced way where GA4 will use user ID, device, and modeled data. So to do it, come to the setting and enter in “Data display” > “Reporting identity.”
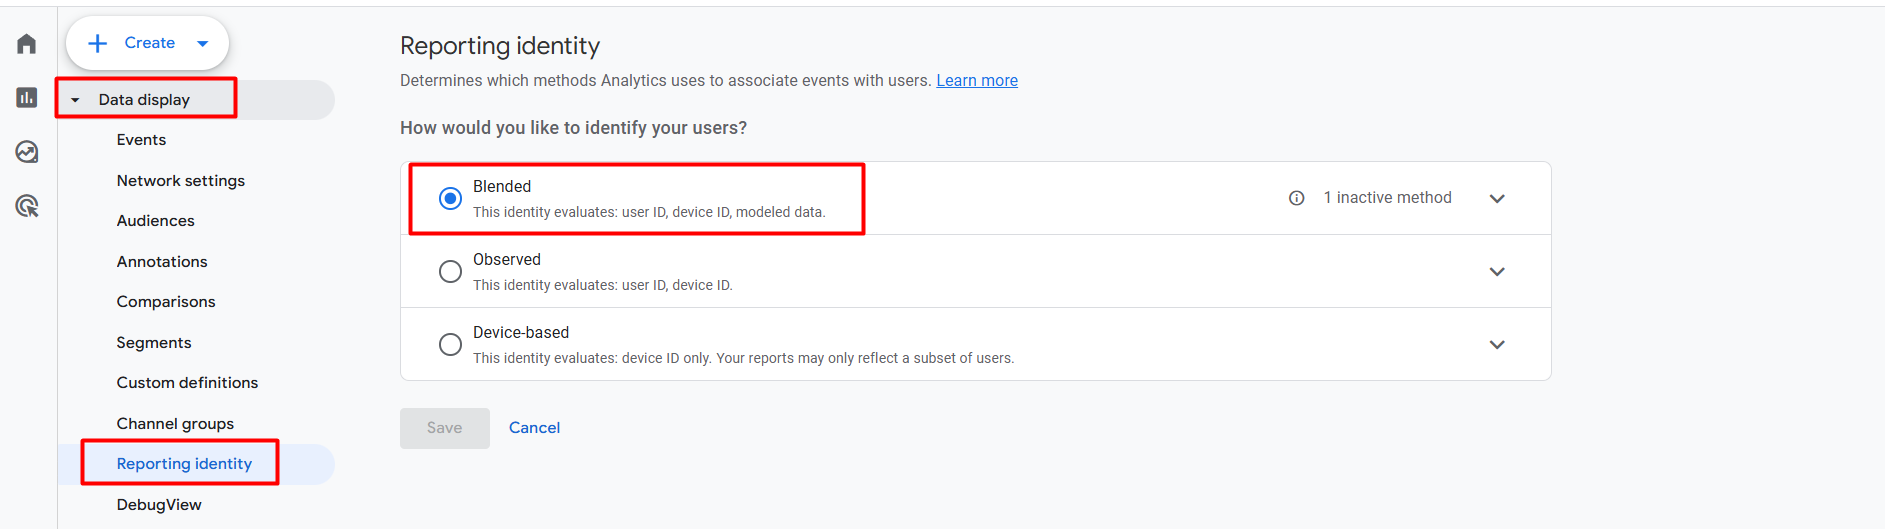
From here, select “Blended.” Then GA4 will function optimally. So with this GA4 settings, we cover 7 important settings for you that you should do right after the installation of Google Analytics 4.
Please remember to read our previous article for more details about this Google Analytics 4 series. Also, if you want to share with us anything else about GA4 settings, you can, we are always here for you.


