
This article will show you how to use GTM and the API to finish your LinkedIn conversion tracking. In our previous article, we explained the process of browser-side tracking. In this case, the API will facilitate the process, ensuring that the server completes the tracking.
Currently, server-side tracking is becoming increasingly important for day-to-day operations across all platforms. This is primarily due to the implementation of data policies. Currently, many users employ ad blockers or browsers that feature ad-blocking and third-party cookie-blocking systems.
If you do not use server-side tracking, your tracking methods will be blocked by the browser or the ad blocker. Therefore, you must make use of both server-side and first-party tracking systems.
If you want to know more about that, then you can read our previous article about that. This article discusses the use of server-side tracking in conjunction with first-party data.
Set up the conversion tracking
Before setting up the tracking, our first setup will be to send data to the server. We must transmit our event data to the server from our browser, and the GA4 tag will handle all the work.
Browser to server
At first we have to configure or install the GA4 page view tag in our website through the GTM web container.

Here you can see that to set up the first GA4 tag, we select “Google Tag” as our tag type from the tag creation sector. In the “Tag ID” field, we enter a single GA4 measurement ID. If you don’t have or want to create the GA4, you can use a number from your mind; it will work.
Now you can see that we used our server URL in the configuration parameter. If you already read our previous article about first-party server-side tracking, then you know from where or how we got it. Through this URL, our data will be sent to the server.

Please review the triggering section. Here, as a trigger, we select “All Pages.” So every time someone views one page from your site, it will trigger, and it will send the page view event to the server.
Now it’s time to set up the targeted events. Here’s our targeted event: view_item. This statement implies that whenever someone views our items, LinkedIn should receive the data. Let’s go to set up the event.
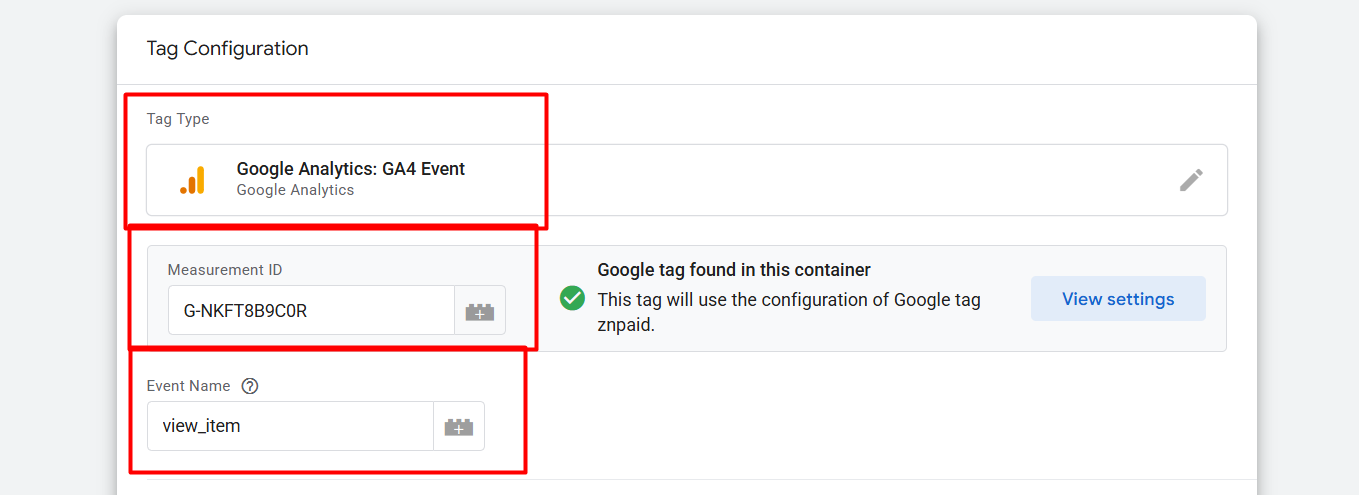
Check out the picture here to set up the event; we select “GA4 Event” as our tag type. Then in the measurement ID, we place the same ID that was used last time, and the event name is view_item. The server will enter the data under this event name.

Here you can see the trigger setup. We used custom events to track the event. Every time someone views our product, we receive an event with the name “view_item.” So now with the setup, our container is ready to send data to the server container.
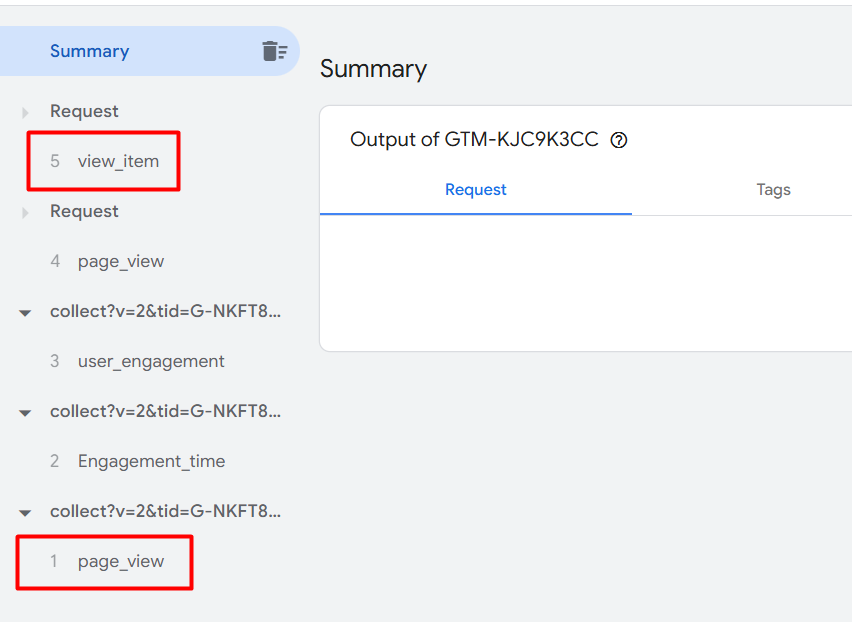
After completing the setup, you need to run a preview from both containers. Then, in preview mode, view one of your products on the website. You will then be able to see how all the events are being received on the server. Once this is confirmed, the next step is to send this data to your LinkedIn account.
Send conversion Data to LinkedIn
To do that, first we have to add one new template in our workshop. So from the server container, go to the templates section.
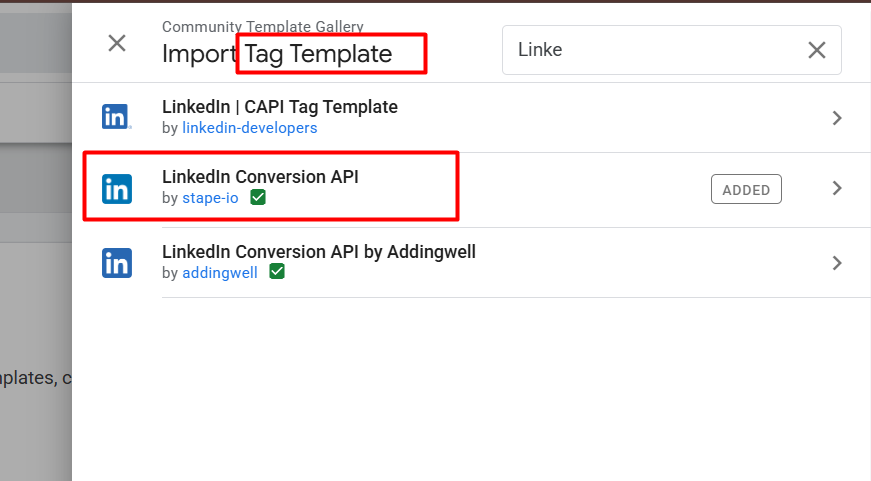
After entering the template section, from the tag template, search for a new template. Once you search for the template, you will find three distinct templates; select the one that Stape has developed. Please incorporate the template into your workshop and then return to the tag section.
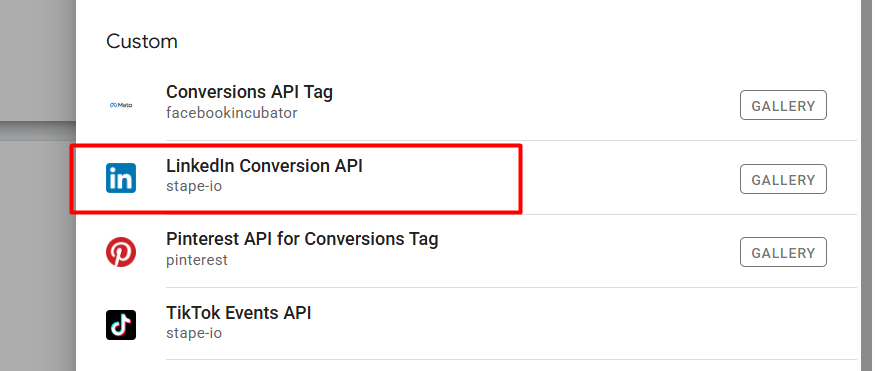
See, here is your template. Now select it.
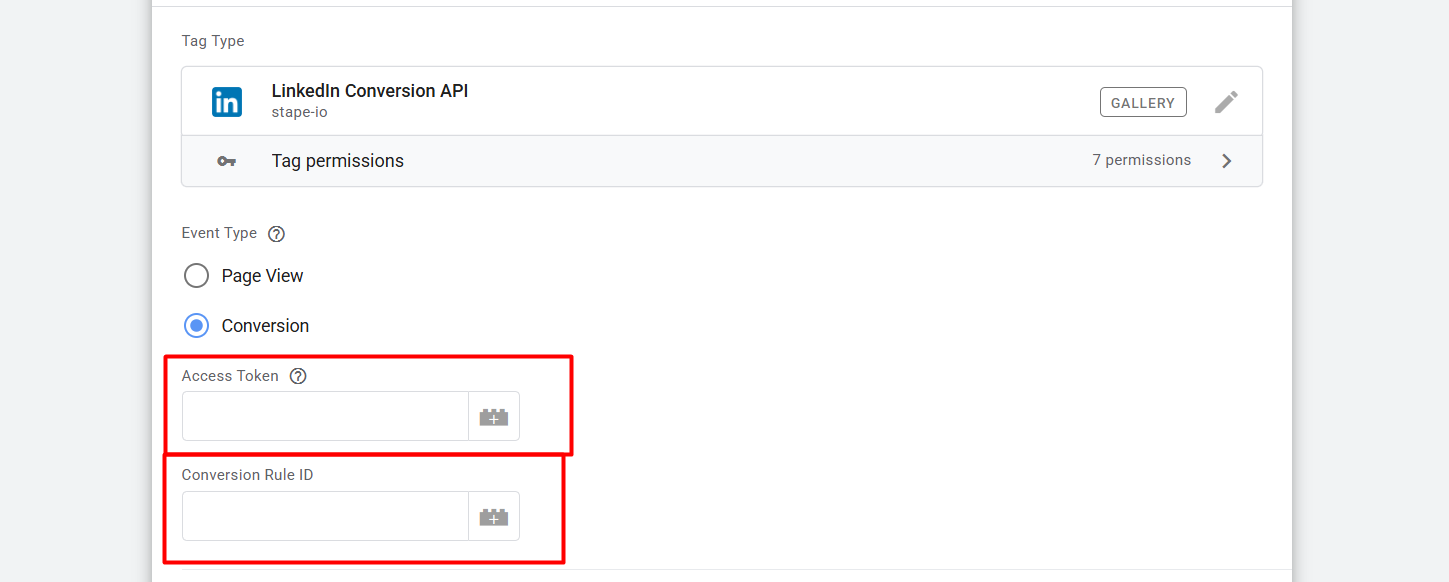
After selecting the tag type, now here you can see that you have to enter the “Access Token” and the “Conversion Rule ID”.
To collect these two things, we have to enter our LinkedIn Ads Manager.
LinkedIn Ads Manager
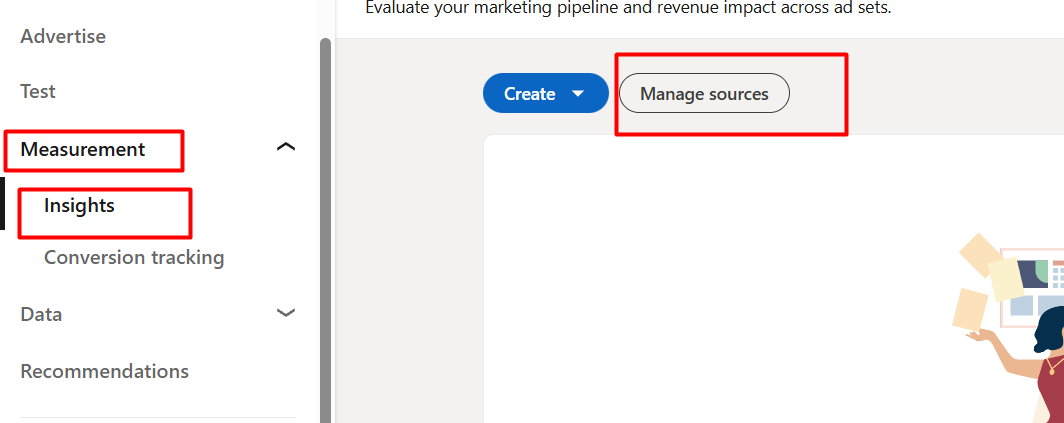
So now, after entering the Ads Manager, click on “Measurement”, then click on “Insights”, and then click on “Manage Sources”.
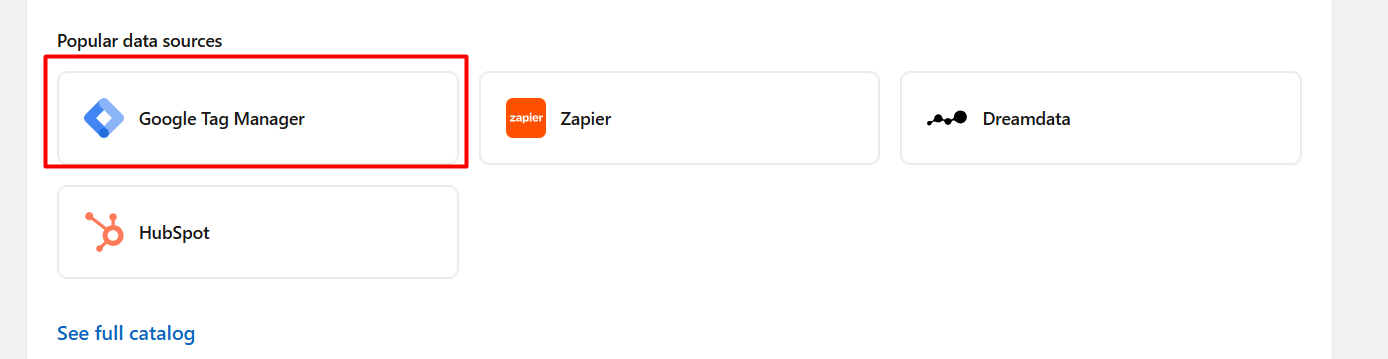
From here, click on the “Google Tag Manager”.

Now, from here, click on the “Generate token” button. Please generate the token and make a copy of it. Now it’s time to collect the conversion ID. To do it, you have to enter the “Conversion tracking section”. Now, start setting up a new conversion tracking.
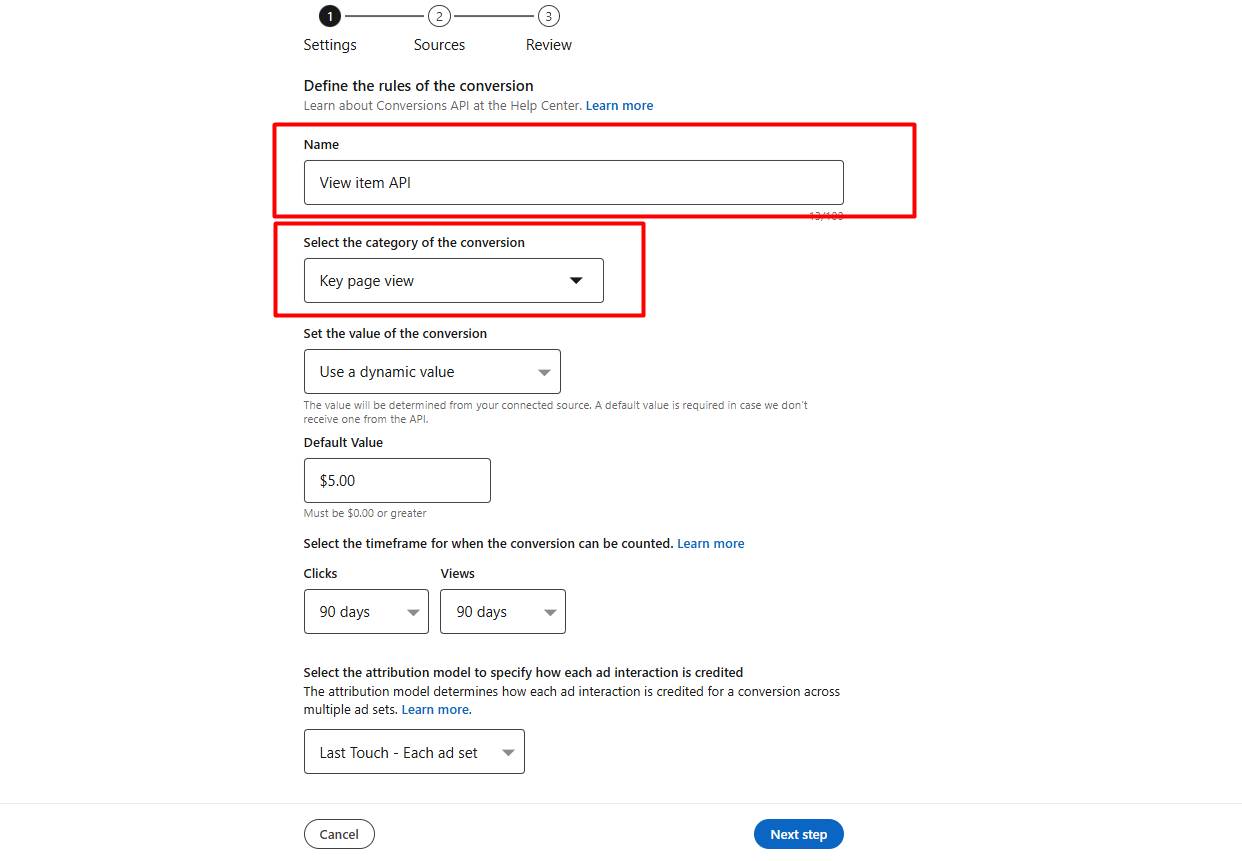
Here you can see how we deal on the first page. On the first page, you can select the conversion category. So check the full list and select your targeted one. In the default value, you can enter one value according to your want. Now next.
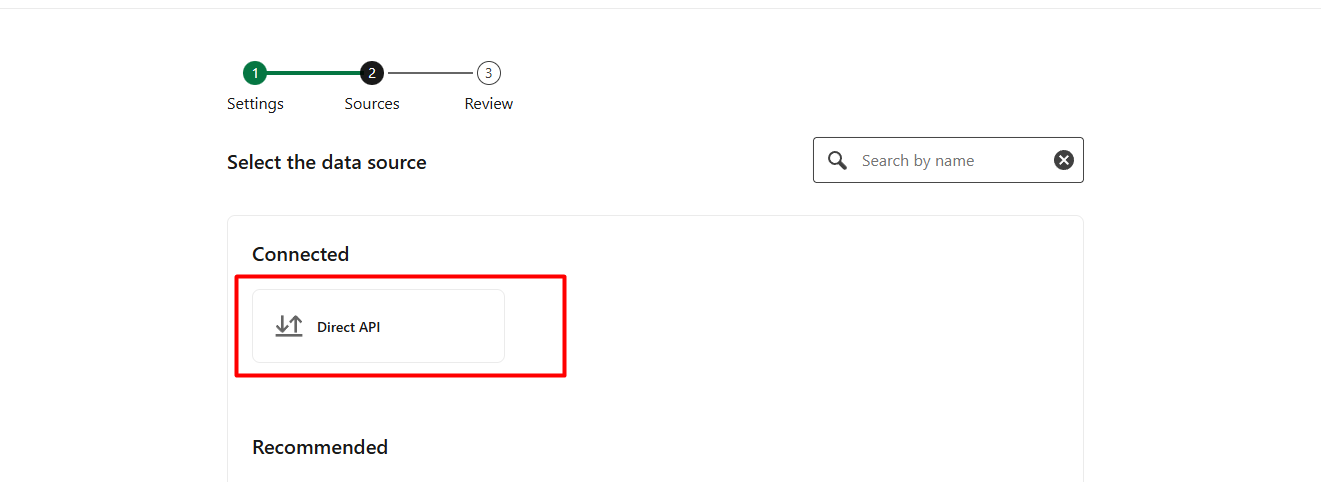
On the second page, select “Direct API” and finish your setup. After completing the setup, we need to return to the created conversion.

Now click on the event you created to enter.

After you enter the event you created, check the URL for the conversion ID. You will receive the conversion ID in your situation. Please collect it and return it to your GTM server container.
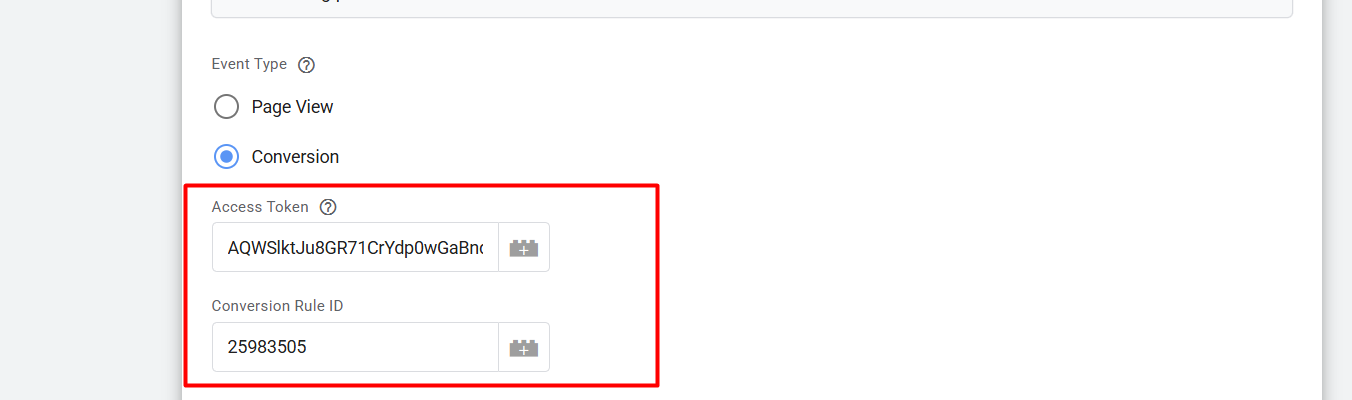
Please proceed by placing your access token and the conversion ID here. Now it’s time to set up the trigger.
Trigger

Now here, choose “Custom” as your trigger type.
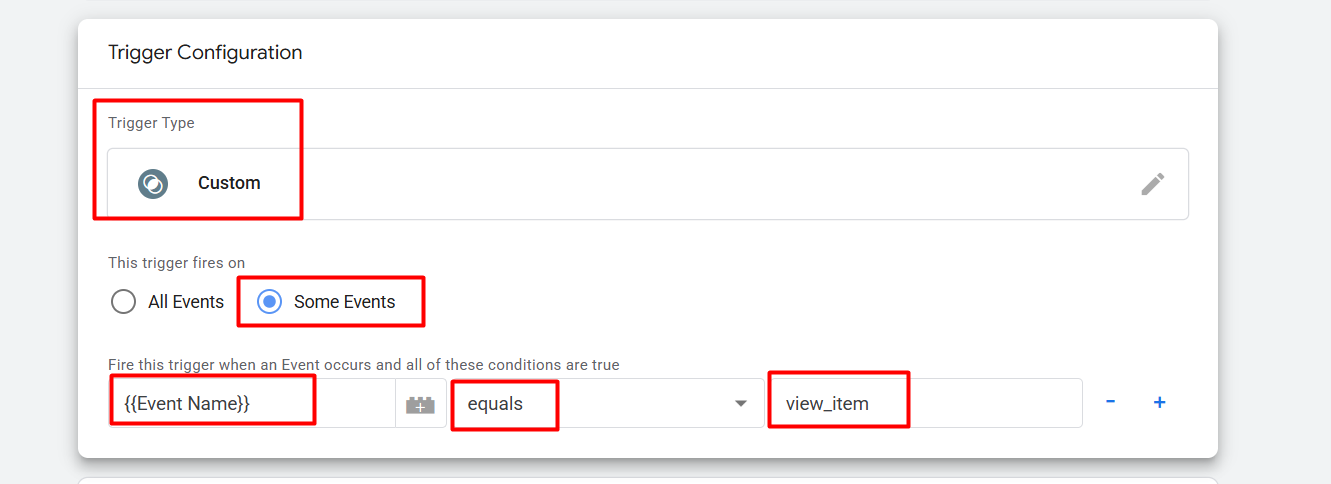
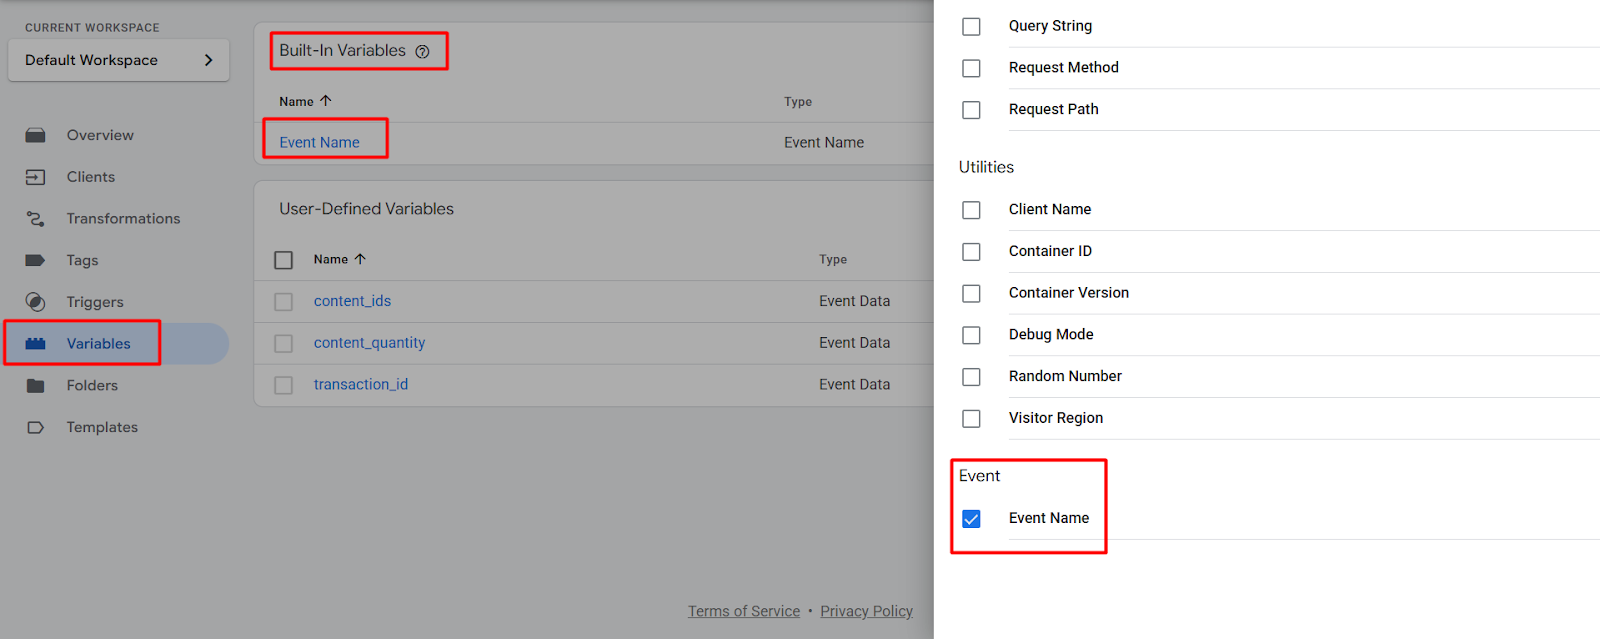
Now here you can see what we did. But in the first place, if you find that the “Event Name” is missing, then go to your variables section and from the built-in variables, select the “Event Name”, and you’re done.
In the same way, you can complete your LinkedIn conversion tracking with an API. Now that you’ve published everything, you can run a preview to see if your data is working!
The article ends here, but our relationship with you continues. If you want to share anything with us, you can; we are always here to help you.


