An iFrame (inline frame) is an HTML tag (<iframe>) that allows you to load an external webpage or document inside your own site. In simple terms, it creates a small “window” within a webpage where you can show content from another source. For example, when you embed a YouTube video, a Google Map, or even a booking form on your website—that’s typically done with an iFrame.
Why Are iFrames Used on Websites?
Website owners often rely on iFrames to bring in external content without hosting it directly. Some common uses include:
- Displaying third-party resources such as videos, maps, or ads.
- Embedding interactive forms (like survey tools, signup forms, or payment gateways).
- Improving user experience by keeping visitors on the same page while showing them extra content.
How to Track iFrames with Google Tag Manager (GTM)
As we know, iFrames are completely separate from the main website domain. When we embed a form through an iFrame, it doesn’t directly connect with our website—making it difficult to track using traditional methods.
To make tracking possible, we first need to establish an interaction between Google Tag Manager (GTM) and the iFrame form. But what if the iFrame doesn’t provide any direct interaction or the source site doesn’t offer such options?
No worries! Today, we’ll walk you through the solution. The key is to use custom HTML code inside GTM to build a connection with the iFrame. Since every iFrame can be different, there isn’t a universal pre-written code that works for all cases. Each setup requires customization.
And here’s the best part—if you’re not a coding person (don’t worry, most of us aren’t!), you can take help from tools like ChatGPT to generate or customize the required code. This makes the process much easier and less technical.
Step 1: Access Your iFrame Contact Page
First, navigate to the contact page where your iFrame is embedded. Open your browser’s Developer Tools and go to the Console tab.
Next, clear the console to remove any previous logs, paste the custom code, and press Enter to execute it.
![]()
window.addEventListener('message', function (e) {

console.log(e);

});
What happens: Your browser starts “listening” to messages from the iFrame.
When you submit the iFrame form: The iFrame sends a message to your page, and you see it in the console.
Why it’s useful: You can see exactly when the form is submitted and get its data.
Next, keep the console window open and start filling out your iFrame form. Once you submit the form successfully, you will see additional messages appear in the console section, indicating that the form data is being tracked.
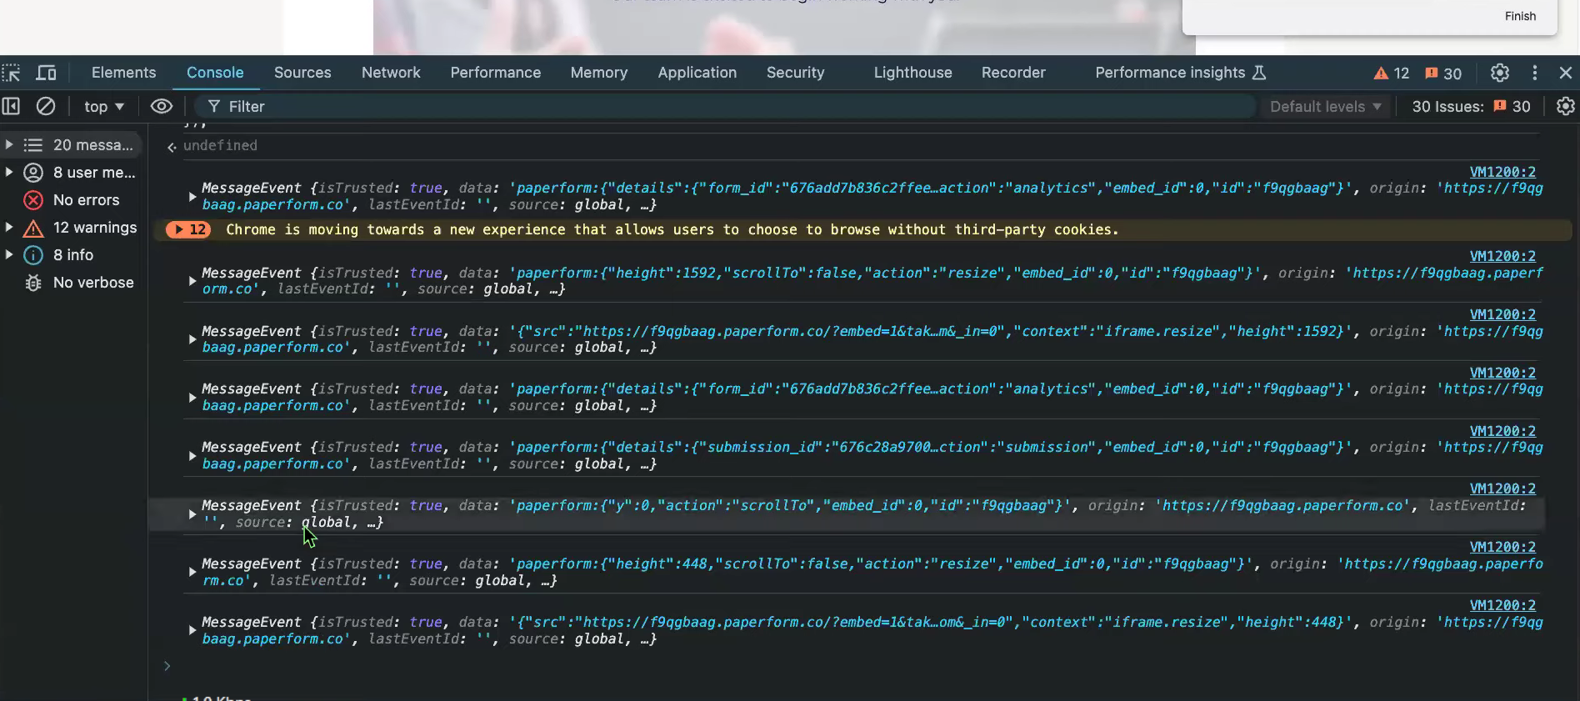
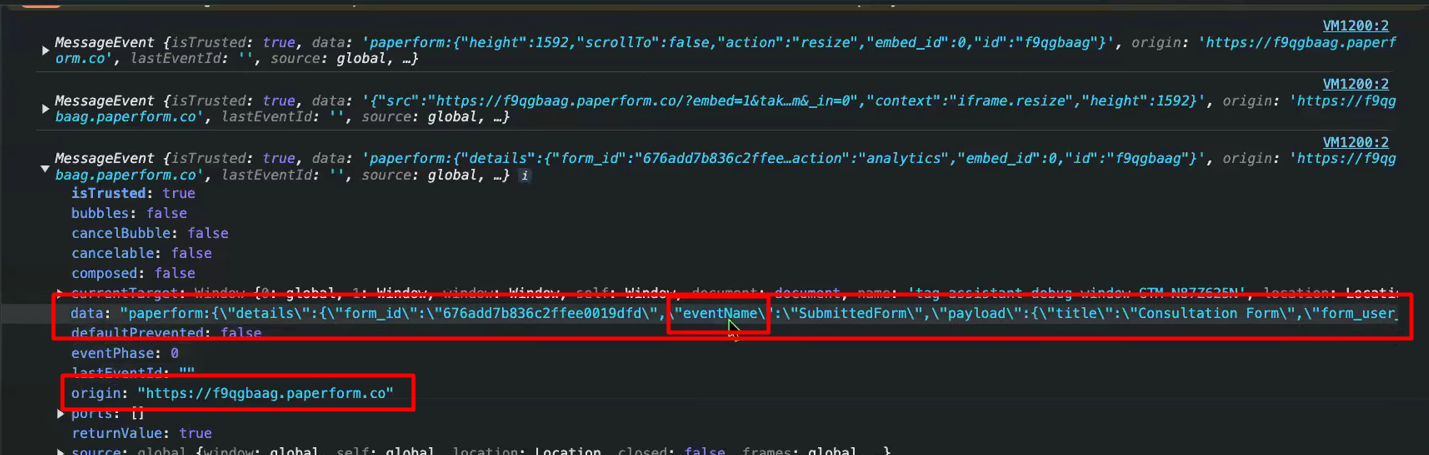
From these console messages, look for the event name or type, such as something indicating a “form submitted” action. Once you find it, copy the full line of code that contains the event name or type.
Also, note the origin link shown in the message and save both the code and the link in a Notepad. We’ll use this information in the next step with the help of ChatGPT to create the proper tracking solution.
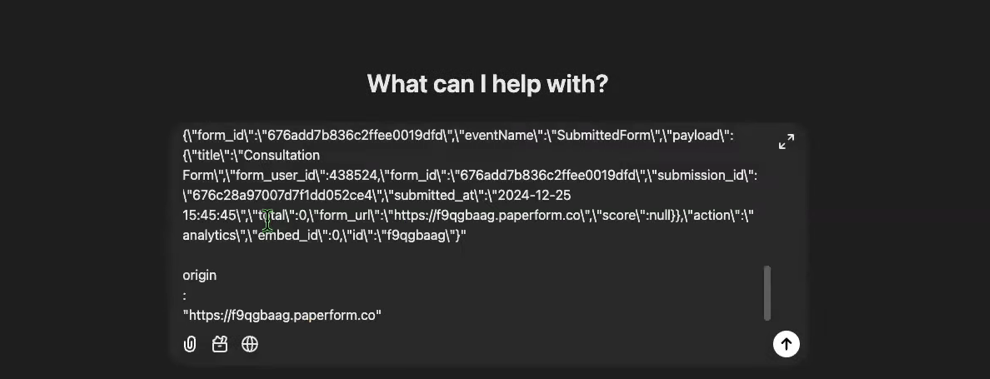
Great! Now, update the code by replacing it with your origin link. We’ve also prepared a prompt for you to use in ChatGPT.
Next, paste the code and the necessary information into ChatGPT. Once done, we can submit the data and generate the custom tracking solution for your iFrame form.
window.addEventListener('message', function (e) {

console.log(e);

    if (e.origin === 'yourOrigin link paste here') {

        var eventData = e.data.eventName;

        // Check if the URL contains “onFormSubmitted”

        if (eventData.includes('onFormSubmitted')) {

            // Push the 'iFrame_submit' event to dataLayer

            window.dataLayer = window.dataLayer || [];

            window.dataLayer.push({

                'event': 'iFrame_submit',

                'eventData': eventData

            });

        }

    }

});
Prompt: In the code above, I have written some code where eventData contains an event name: onFormSubmitted . Now, review the code below and follow the same structure.
This code you will get from the console: take it and use it.
"paperform:{\"details\":{\"form_id\":\"676add7b836c2ffee0019dfd\",\"eventName\":\"SubmittedForm\",\"payload\":{\"title\":\"Consultation Form\",\"form_user_id\":438524,\"form_id\":\"676add7b836c2ffee0019dfd\",\"submission_id\":\"676bc20c1d8f816c93011b1d\",\"submitted_at\":\"2024-12-25 08:27:56\",\"total\":0,\"form_url\":\"https://f9qgbaag.paperform.co\",\"score\":null}},\"action\":\"analytics\",\"embed_id\":0,\"id\":\"f9qgbaag\"}"
After that, you’ll receive a new code generated by ChatGPT. Take this code and return to your web page.
Open the console section again, paste the new code, and press Enter to execute it. This will apply the custom tracking setup for your iFrame form.
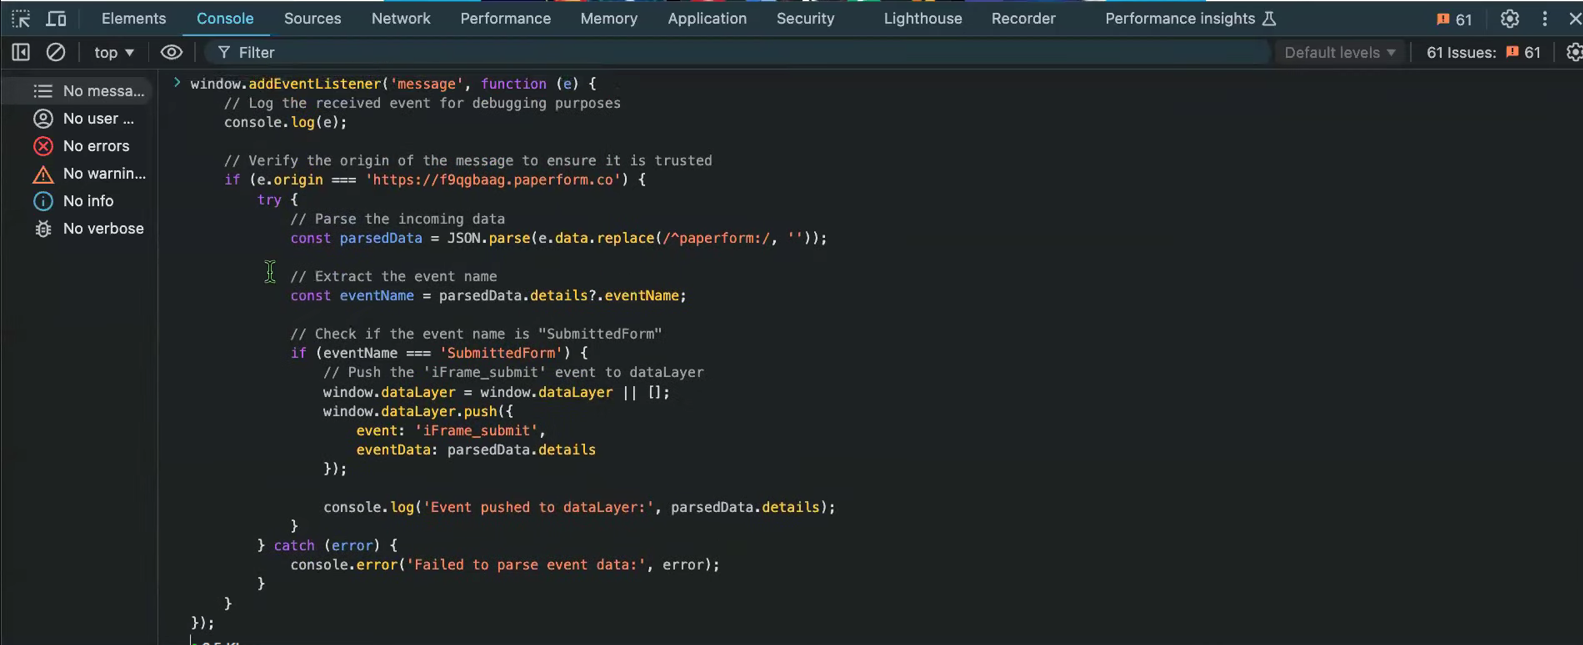
Fill out the iFrame form and submit it. Make sure that GTM is already open in Preview mode before doing this. Once you submit the form, the custom code will push a new event into the dataLayer, confirming that the tracking is working correctly.
Next, you need to provide one more prompt to ChatGPT to make this code compatible for use in GTM Custom HTML. Once you get the updated code, copy it and head over to Google Tag Manager to create a Custom HTML tag.
This new tag will allow you to track the form submit event easily in your dataLayer every time the form is submitted.

After pasting the code into the new Custom HTML tag, select “All Pages” as the trigger. Then, save the tag and switch to Preview mode.
If you encounter any issues during preview, simply copy the error or problem details and share them with ChatGPT. It will guide you in resolving the issues quickly.
Once all issues are resolved, preview the GTM container again. You should no longer encounter any problems.
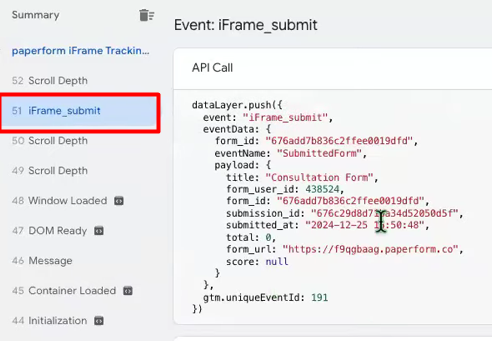
Now, submit your iFrame form once more, and you will see the event name appear in the dataLayer every time the form is submitted successfully.
From here, you can create a new trigger based on this event and send the data anywhere you need—like Google Analytics, Facebook Pixel, or other marketing tools.
This is the approach you can use for your iFrame tracking journey. However, you may face challenges in identifying the correct event name or type in the console.
Once you find it, you can use ChatGPT to help generate or customize the code for the next steps, making the tracking process much easier and more efficient.
However, if you have backend access to your iFrame form, things get much easier!
In this case, you don’t need to go through all the previous steps. Simply copy your GTM code and provide it to the iFrame form backend. Once implemented, you’ll start receiving data from the iFrame form automatically. You can then set up triggers easily using “Element Visibility” in GTM.
And that’s it! This is the complete solution for your iFrame tracking journey. From now on, you can enjoy seamless iFrame form tracking, and remember—we’re always here to help if you need further assistance.


