
In the previous article, we explained how to complete common or all important events for an e-commerce website. So today, in this article, we will explain the rest of the process that you should follow if you want to create a GA4 custom event for your website.
Also, what is the process of the GA4 custom parameters with the GA4 custom event and the standard events?
So let’s start the explanation, but if you didn’t read our previous article, you can read it. GA4 standard e-commerce event.
GA4 Custom Events & Their Needs
The term “GA4 Custom Event” indicates that this event idea is unique to the user and not a standard Google Analytics 4 event. When this type of event is fired, what parameters should accompany it? Nothing shared by GA4.
Everything we did was tailored to our needs, which is why we called it a custom event. Additionally, we refer to all events we know from GA4 as standard events. This is because we have a set of strict guidelines for when and how we should complete each event.
But the standard events are not enough for us. For many different needs, we will have to create custom events, and we will track their data on our GA4 property.
As an example, a lot of the time, we think that it will be helpful if we are able to understand how many people are clicking on the targeted button or how many people are copying our email. Then, one way to do this is by creating custom events.
Also, if you are perfectly able to create the custom event, then it will help you in the future to create a great report and give you many different types of matrices about your different marketing channels and many more things.
Create the GA4 Custom event
Let’s start to follow the total process of the custom events and their rules and regulations. In this article, we will explain to you how you can complete the custom event creation through GTM. So, at the beginning, log in to your Google Tag Manager.
At the beginning, consider a scenario where we want to track a custom event. This event will measure how many people click on our targeted “Shop Now” button.

To do this in Google Tag Manager, go to your tag section and create a new tag.
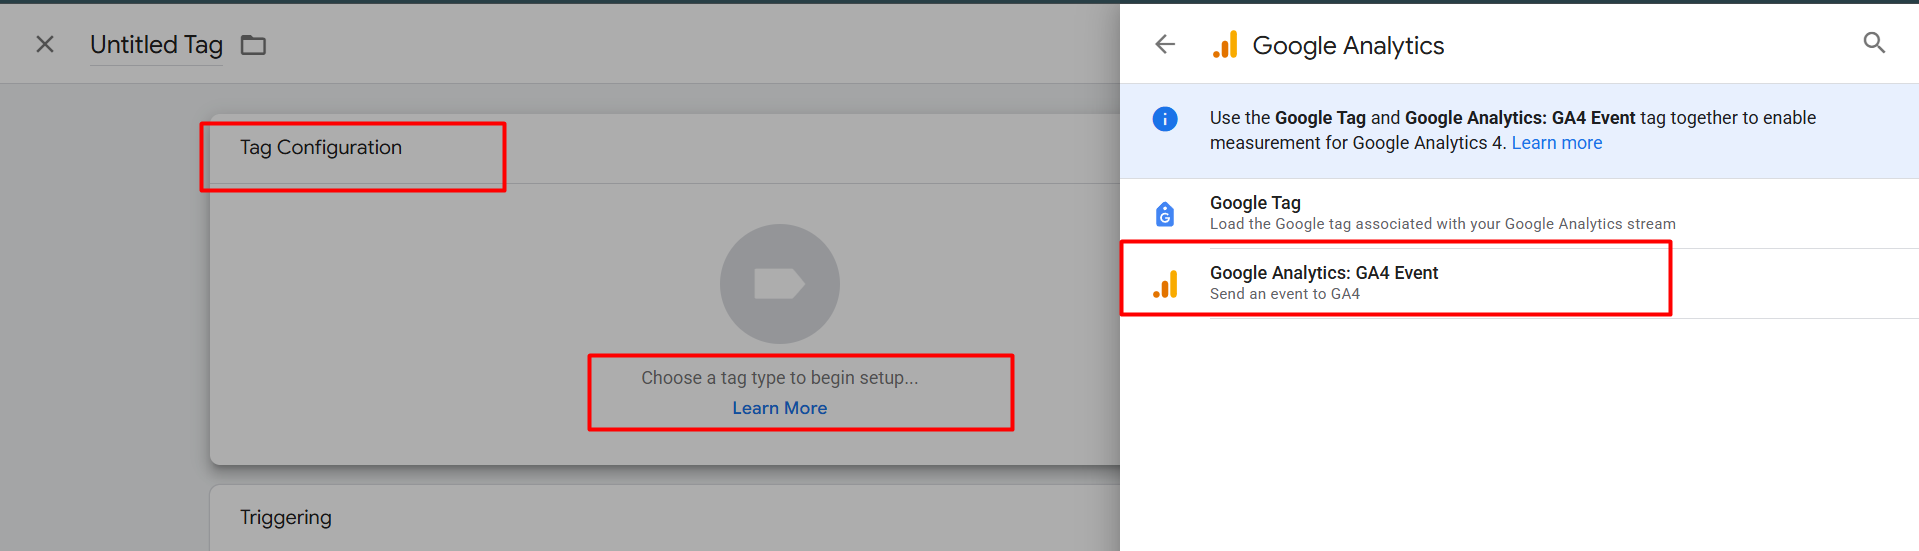
Here, as your trigger type, select “GA4 Event,”, as we did in our previous article, to complete the setup of the e-commerce standard events.
We already completed the setup process of creating a connection between GA4 and the website, so at any time, without hesitation, we can select it as our tag type.
Event needs differ for businesses; important event names may or may not be in GA4’s standard events list. However, for both standard and custom events, the method of sending data to GA4 will remain the same with this tag type.
If you haven’t yet completed the connection between GA4 and your website, please do so first. If you’re new to the setup process, our last article can help.
So
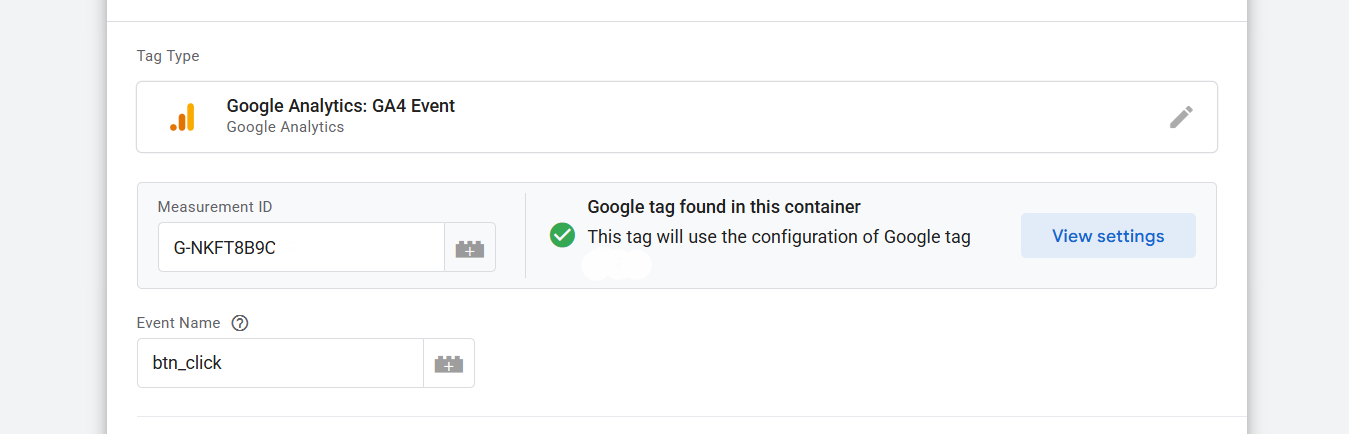
Like our previous standard event setup, we select the same tag type here. In the same way, we first placed our GA4 measurement ID. Now you have to write down the event name.
While setting up standard events for our e-commerce website, we had many event names to configure according to their specific purposes. But at the time of custom event creation, we don’t have any guidelines for the event name.
That’s why, as you requested, you can write down the event name. But I hope you remember one thing: when we wrote down the event name for standard events, we followed one standard rule.
If we get a standard long-format event, we use the “_” sign to write the name. For example, you see how we split “view_item” into two parts with the sign. This method is a standard way, according to GA4.
For writing custom event names, we can use any type of word we want. But if we follow the standard way to write down the names for our custom events, it will be helpful for us in the future when we start reporting.
This is because the standard method will provide us with a consistent interface, whereas if we deviate from the standard method, the format of the standard events and the custom events will differ significantly. You can follow the way or leave it; it’s not a rule.
However, we personally want to receive the benefits; that is why we follow the rules and write the event name as “btn_click,” as shown in the picture.
Custom Parameters Creation
Now it’s time to set up the parameters. GA4 has rules for all standard events’ parameters. But for GA4 custom events, we don’t have any single guideline.
As with our event name writing, we can also do whatever we want here. We can send any types of data in any format. GA4 standard events provide a list of GA4 guidelines, specifying the type of data and the format required for submission. However, if we recognize the importance of any custom parameters, we can include them with our standard events.
This means that when we create custom parameters, we can define our own rules for them in GA4 and send them with both standard and custom events.

Here you can see how we complete a parameter. Also, for the custom parameters, we don’t have to follow any rules to write down the parameter name.
As per your wish, you can define the name. You can also collect the value with this “Data Layer Variable” variable type, just like the standard event parameters, if you are retrieving it from your data layer.
Custom Event Trigger Setup
Now it’s time to set up the trigger for this GA4 custom event. In our previous article, we already explained all types of triggers. So if you don’t know about all of the trigger types, I think first you should read our previously written article about that. Triggers and Variables.
In this custom event, we are tracking a button, and it should fire every time someone clicks on it. So if you already read our previous article, now you know that GTM provides us a trigger type in the name of “All Elements.”
If we want to track anything that is clickable, then we can use this trigger type for our tag. When we click on anything that is clickable, we receive a variety of information, including click ID, click text, click element, click class, and more.
With them, we can define a trigger condition for our tags to fire at the perfect time.
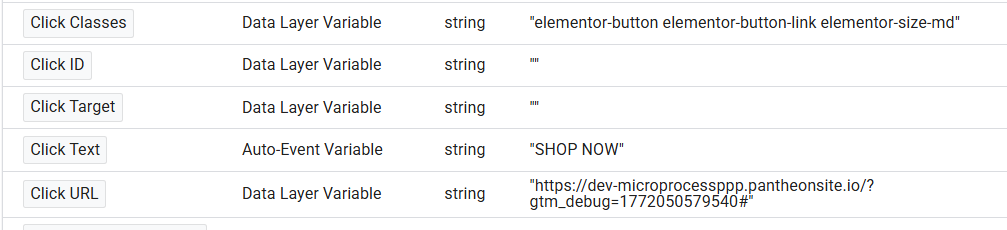
Here in the picture, you can see that after clicking on the button, we got the click text, the click classes, and the click URL. So from these three materials, we can use one in our trigger to create a condition.
Trigger type
To do it from the trigger section, first we have to select “All element” as our trigger type.
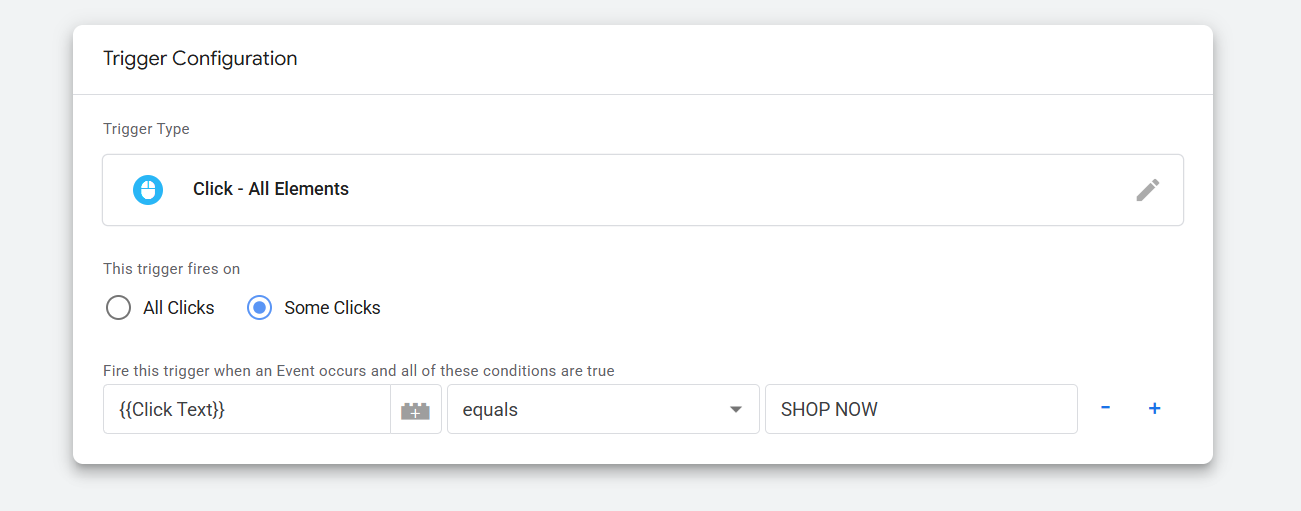
Next, select “Some Clicks” to ensure that the trigger does not fire on every click event. Then, choose “Click Text” as the condition, set the operator to “equals,” and enter the value obtained from the data layer variable.
Using the “equals” operator ensures that the trigger fires only when the click text exactly matches the specified variable value.
By the way, none of this click text, click ID, or related clicks will be available in your data layer variable section. We got it because from the GTM variable section, we enabled it under the built-in variable.
If you are receiving the event name in the way of the standard events format in your data layer after completing the event, you can use the “Custom Event” as your trigger type.
But if you think the trigger should work whenever any targeted text appears on the website’s page, then the best option for you is “element visibility.”
This is because you can easily retrieve the text’s class from the inspect mode and apply it to this trigger type. Just every time before placing the class in the trigger, use “.”, one dot every time before the class.
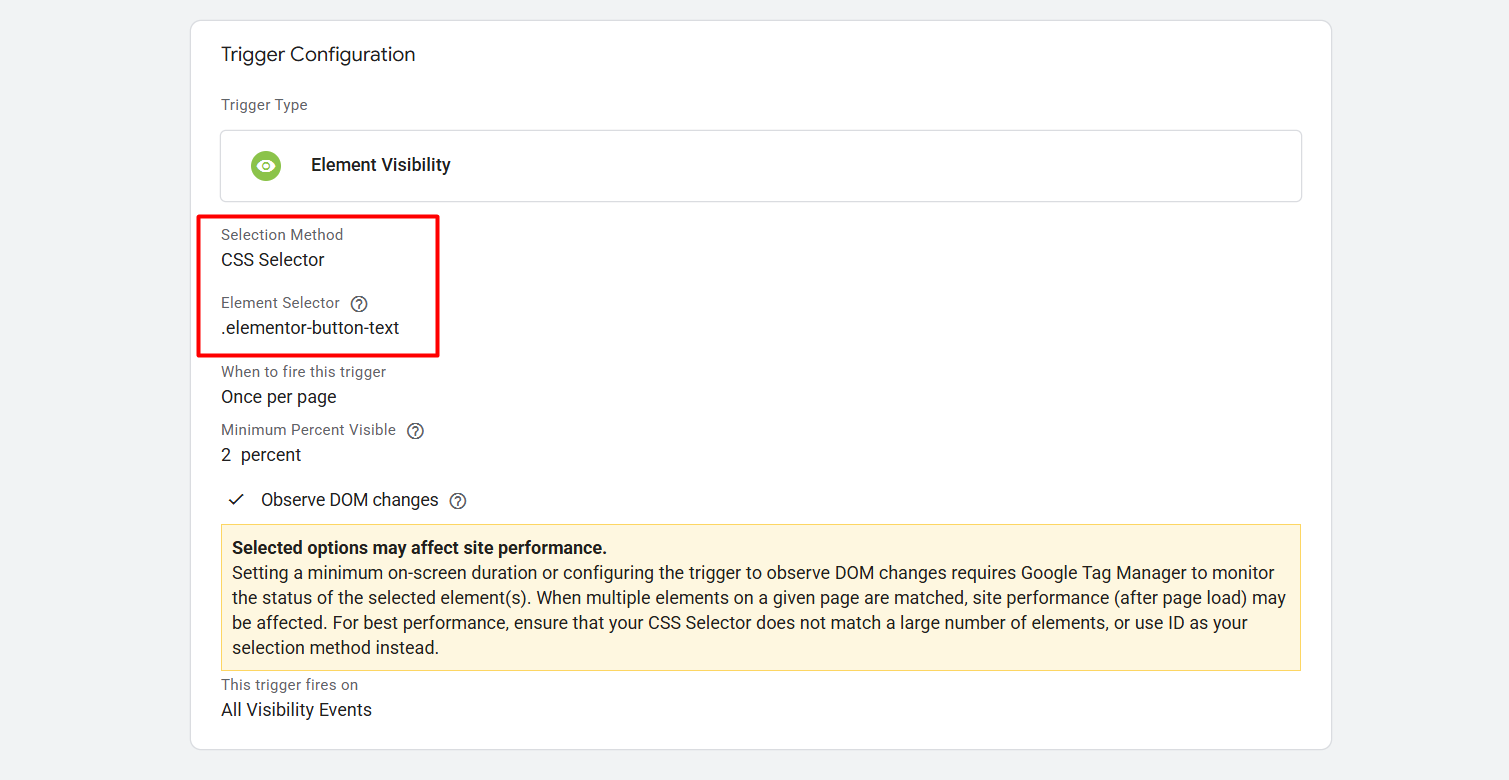
Here you can see how we did it. At the time for this trigger, we are using “All elements” as our trigger type.
But before starting to track any custom events, please try to understand all of the GTM trigger types. If you did, it will help you to pick up one perfect trigger type to complete your tracking. In the way our one custom event setup is done.
Register the Custom Parameters
Before finishing the article, we have one more important task to complete. If you are creating any custom parameters for your events, then you will have to register all of those parameters under your GA4.
Otherwise, your parameters will not be included in the GA4 reporting. At that time, GA4 only had an idea about all the standard parameters. That’s why, during the registration process, we will need to explain our custom parameters.
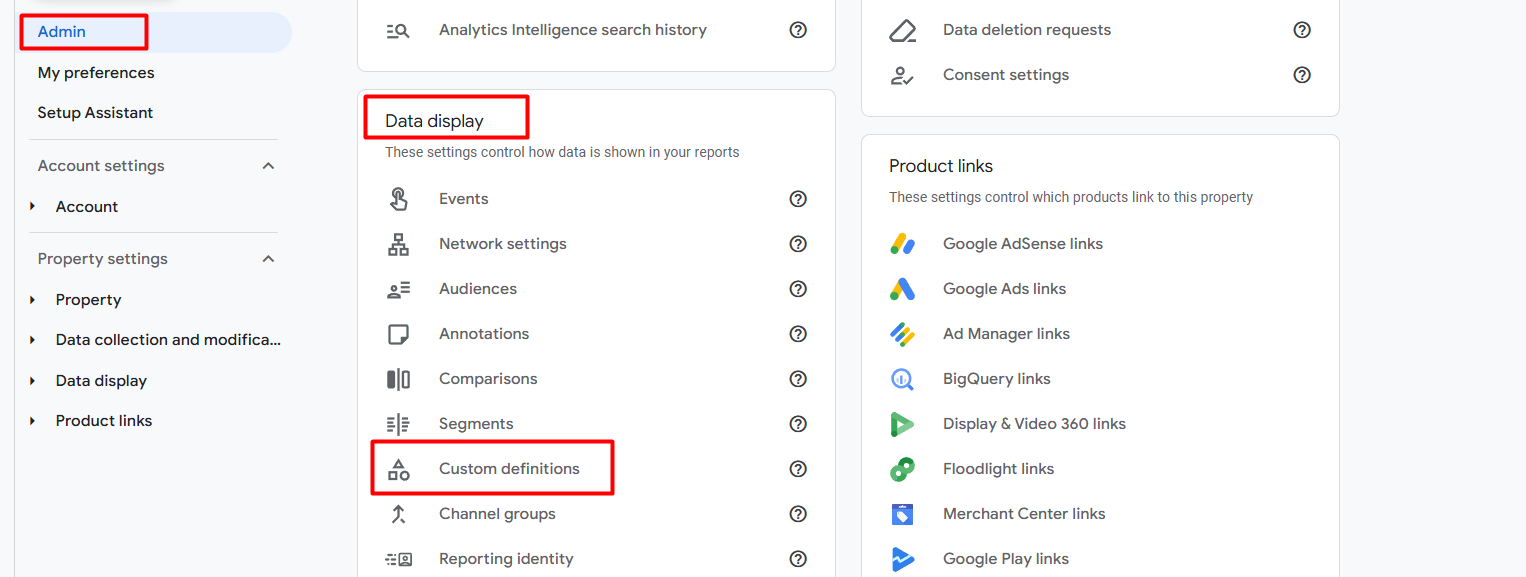
To do it, go to your admin section in your GA4. Then under the “Data display,” click on the “Custom definitions” for the rest of the work.
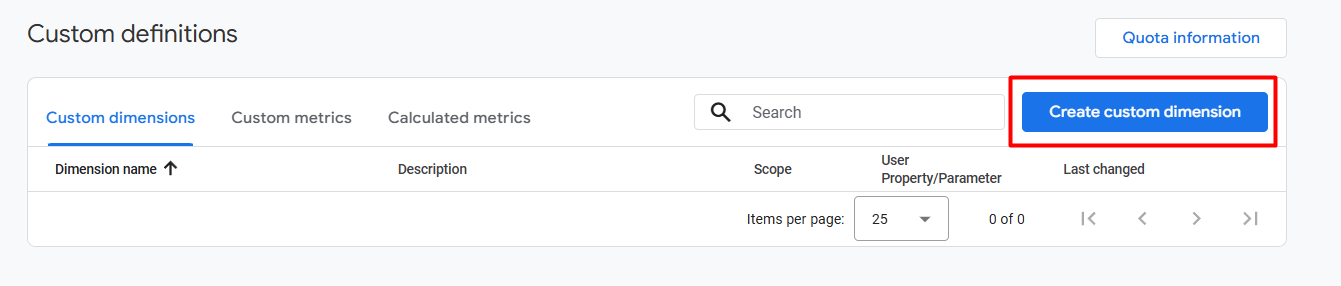
Now from here, click on “Create custom dimension.”
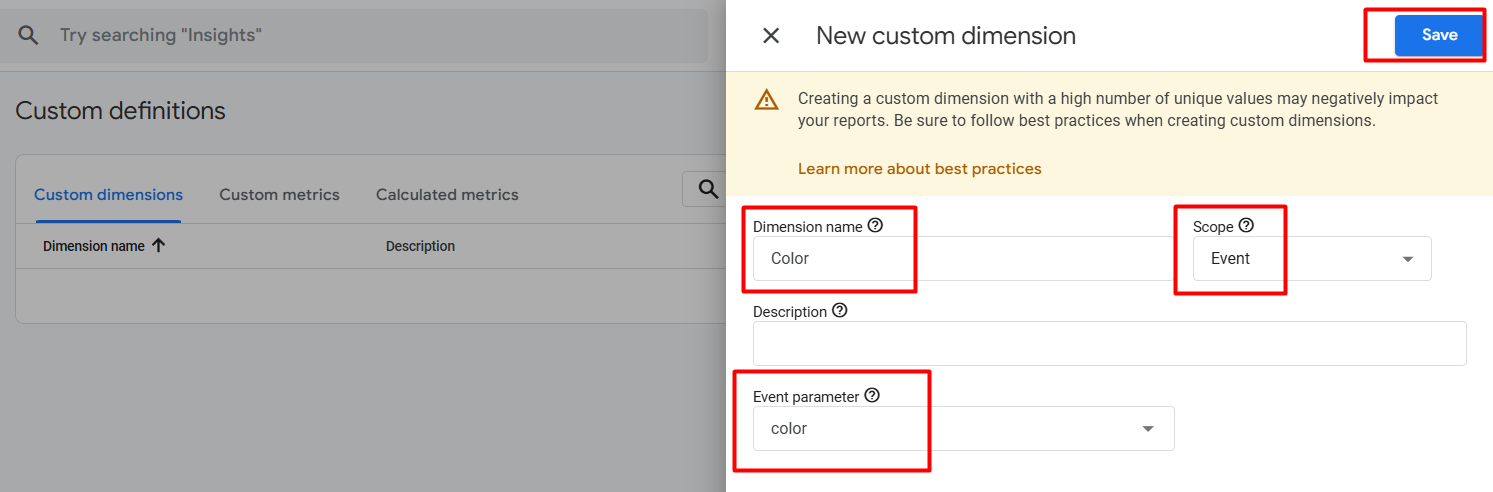
Now, in the first position, “Dimension Name,” write down one name. In this position, you can write down the name in any way you want. Your GA4 reporting section will display your parameter data based on this dimension name.
Then scope, from here, you have to select which related parameters it is! Is it an event-related, user-related, or item-related parameter? Here our parameter is event-related. If your parameter is user-related or item-related, select the correct one based on your needs.
You can write anything you want in the description section. However, in the last “Event parameter” field, you must enter your parameter name exactly as it appears in your GTM tag. Then save.
Great, you already covered the whole process of a GA4 custom event creation using GTM. If you still have any questions, you can share with us. We are always here to assist you with everything. Follow our site to discover other topics in this GA4 article series.


