
In our previous article, we explained many things about Google Tag Manager. In that article, we explained how to connect your GTM with your website, the reasons for using GTM, and the benefits you will gain from its features.
Additionally, we provided an explanation of the data layer. We also provided an explanation of the data flow within the data layer and your website. Working mechanism of the data layer and more. If you don’t know about them, then you can read our previous article.
Today in this article we speak with more in-depth knowledge about how GTM works. This question may arise in your mind. How is it possible to track everything so easily just after adding this simple and small GTM code to our website? Also, we will talk about GTM triggers and variables.
Google Tag Manager Mechanism
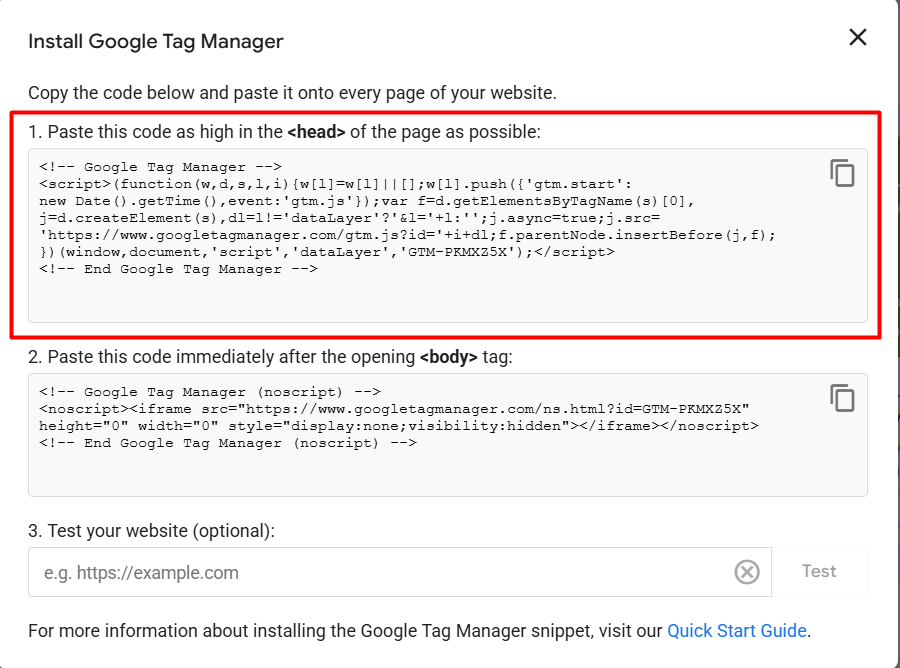
Here, you can view the code provided by Google Tag Manager. If we add this single code to our website, we will be able to track everything on our site so easily.
But do you know what exactly happened in the background after we added this code to our site? When we add this code to our header section, Google downloads additional code from its server to ensure that everything continues to function smoothly.
But before adding all of this new code to your site, the Google server got one request through a link.
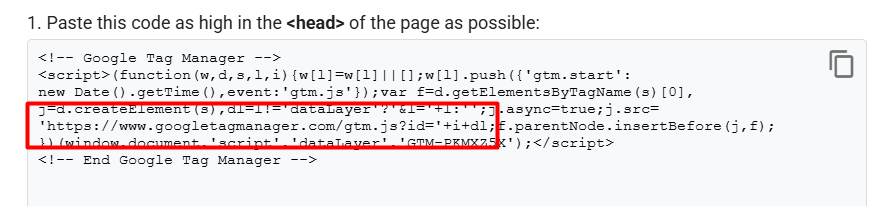
Here you can see this link. So let’s go and check it on our site. To run the test, click on the preview section and paste your website link.
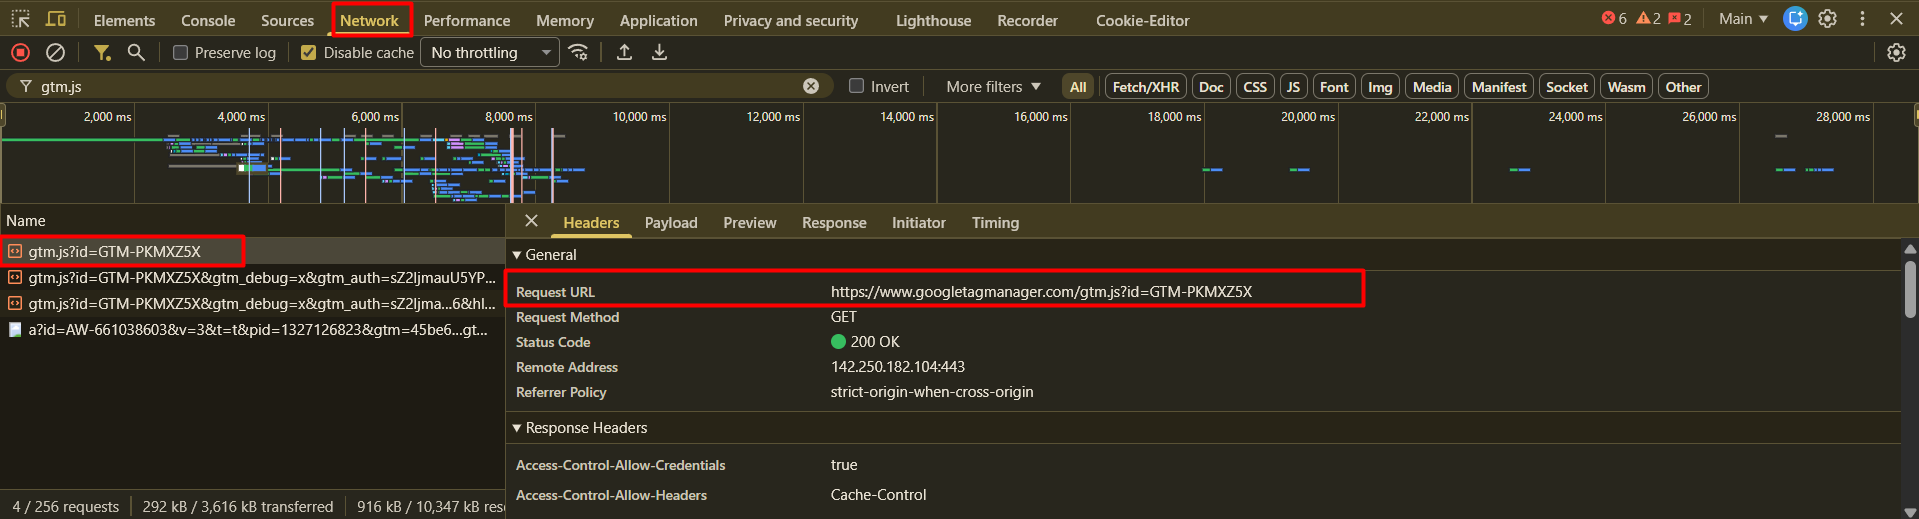
After entering your website in preview mode, you can confirm the results by inspecting the page and checking the network section for “gtm.js”. You just have to search for “gtm.js.” If you want to understand the GTM mechanism.
In this step, you will notice that we initially conducted the search. Then we select the first one from the search result.
After selecting the first search result, you can see in your website’s backend a request URL run automatically by your Google Tag Manager.
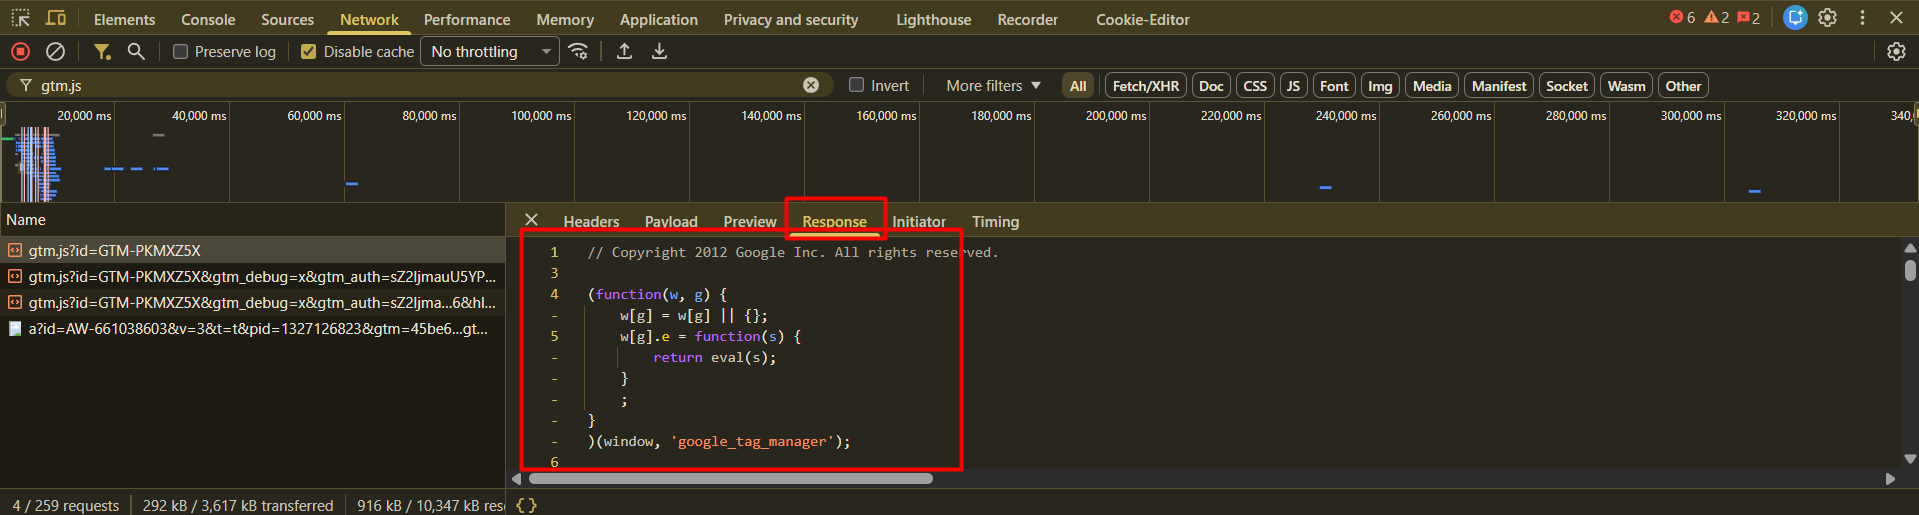
If you want to know the response to this request URL, then click on the “Response” section. Here, you can view the complete code executed by Google; simply scroll to see the full extent of the code.
That means your added code isn’t totally responsible for the tracking from Google Tag Manager. At the beginning, Google Tag Manager first runs one request URL in your website background every time.
So for GTM Mechanism
According to the request, Google sends one response with this long code. Then, this code will help you continue your tracking journey in an amazing way.

If you want to watch the total code in a more comfortable way to understand the GTM mechanism, then just run this link in your browser.
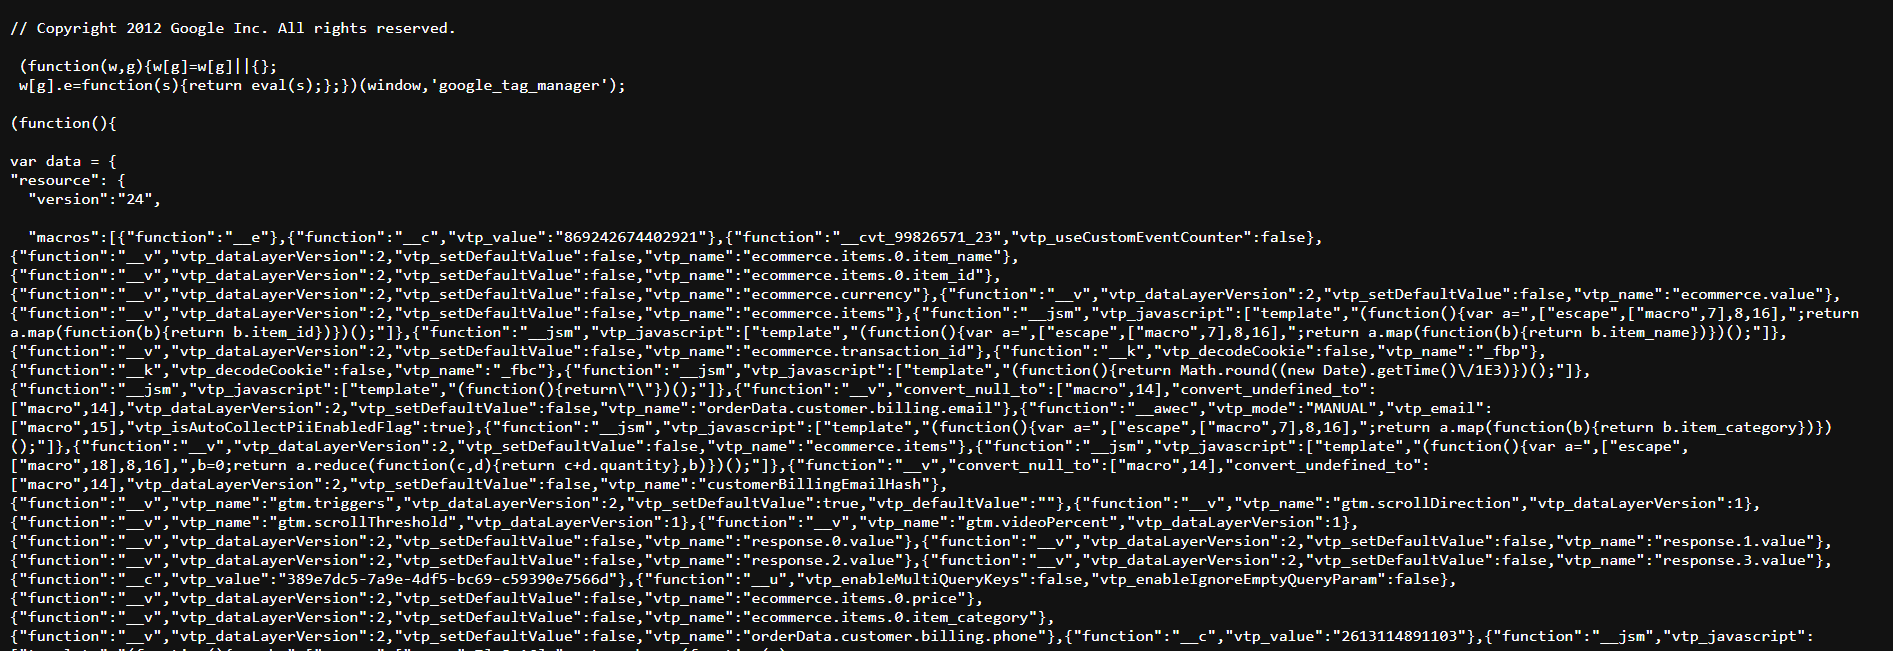
Then the code will open for you in a bigger tab. Thereafter, you can comfortably watch the code. If for any reason this total code doesn’t run in your backend, then your tracking will stop working. So I hope now for you the GTM mechanism is clear.
Trigger in GTM mechanism
In our previous article, it was already explained that a trigger is the setting through which we will give GTM instructions on when to carry out its duties in this triggers section.
So today let’s explore all of the trigger sections one by one.
Page view
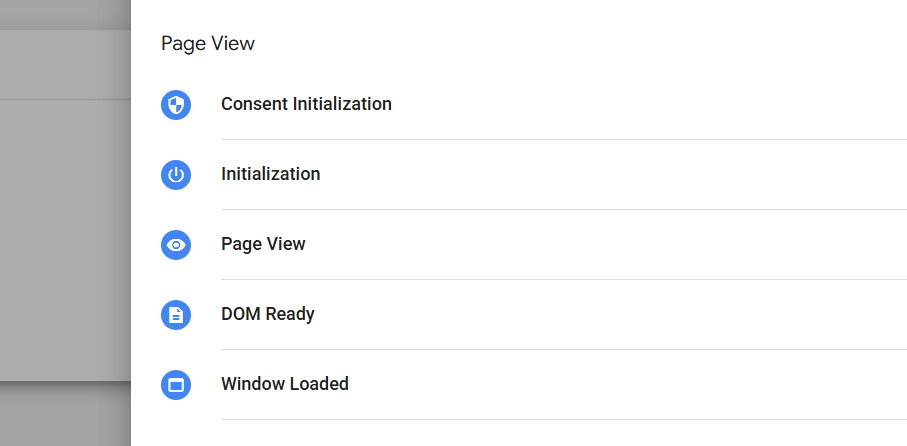
We can use all of these triggers to set up instructions based on a page view. Think about whether you want to know how many people are coming to the page. Then, from here, you can use one of the methods to complete the instruction setup.
Click
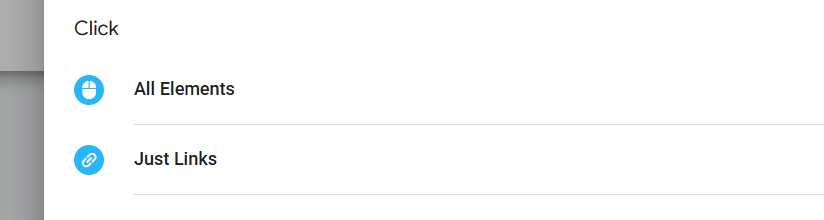
Click is one of the greatest and most popular in the tracking field. Through this method, you can complete setup according to the class, text, element, link, and more.
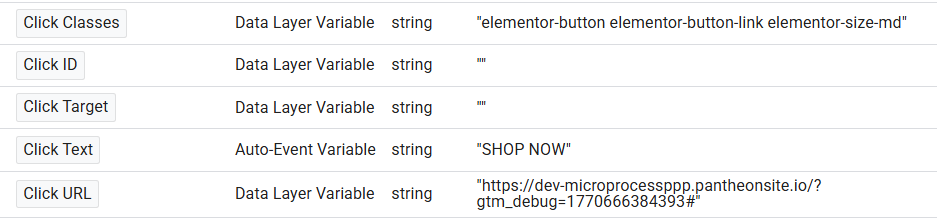
Here you can see the interface. Now, we can use the click feature. Whenever someone clicks on the “SHOP NOW,” the event should be fired. Also, according to the click class, we can set up the trigger. In the future, we will explore all of the settings more deeply.
User Engagement
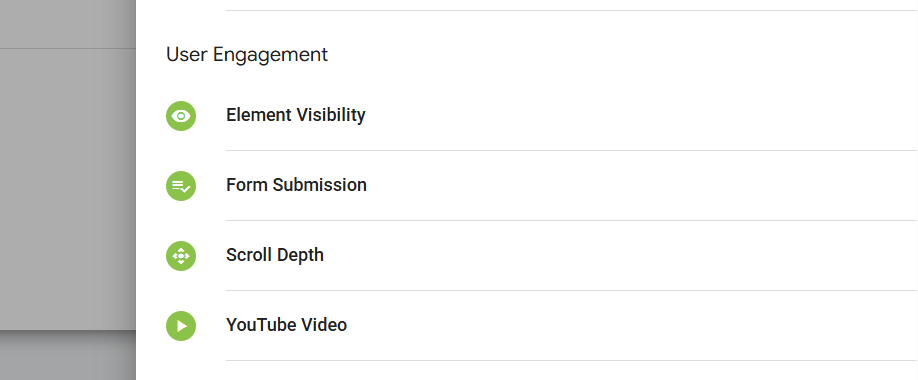
Element Visibility: If you believe that our event should fire once any element appears on any page, you can utilise these methods.
Form Submission: If you want to track any form-related event, then you can use this trigger. But yes, it’s usable for some forms.
Scroll Depth: If you want to track that event—how many users are scrolling your targeted page at 50% or 100%—then you can use this method to provide the instruction to GTM.
YouTube Video: If you have a YouTube video integrated into your site and want to create an event to track how many users start watching your video and additional actions, you can use these methods.
Other
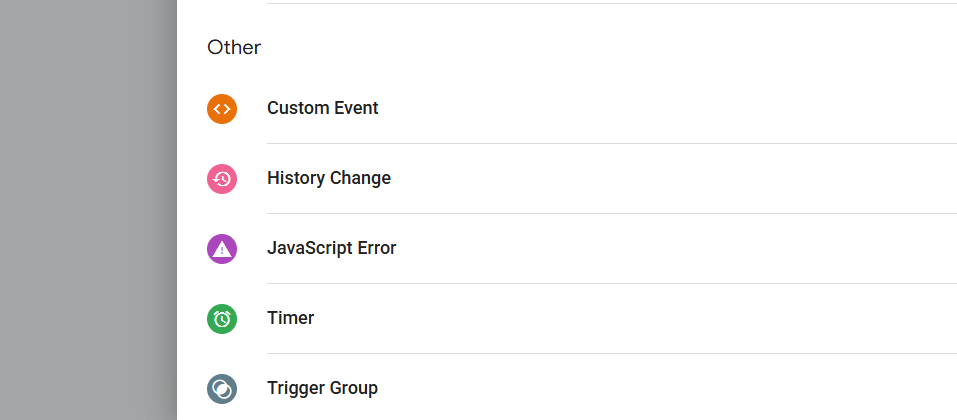
Custom Event: After enabling the data layer in your website, you will receive many different types of user-created events in your data layer.
If you want to create an instruction for GTM to work in this type of targeted event time, then you can use the “Custom Event” methods.
History Changes: We work on many different types of websites. On some websites, if we change the page, they just change the content. They don’t load a new page. For this type of website, if you want to create instructions, you can use it.
JavaScript Error: If your target is to create a tag for any type of targeted JavaScript error, then you use this instruction method.
Timer: If you want to know how many people are spending time on your targeted page, then you can use this method.
Trigger Group: With this method, if you want to create a trigger group, then you can use it.
We already explain all of the trigger types. But in our future article we will explain their uses in more detail.
Variables
In our previous article, we had already explained that a variable is like a bowl where we store our data.
That means if GTM needs something that we have saved somewhere in a specific location, that specific location is called a variable. With the help of variables, we can collect and send many different types of data on different platforms as per our needs.
We will encounter two types of variables during our work:
- Built-in variables.
- User-defined variables.
Built-in variables in GTM Mechanism
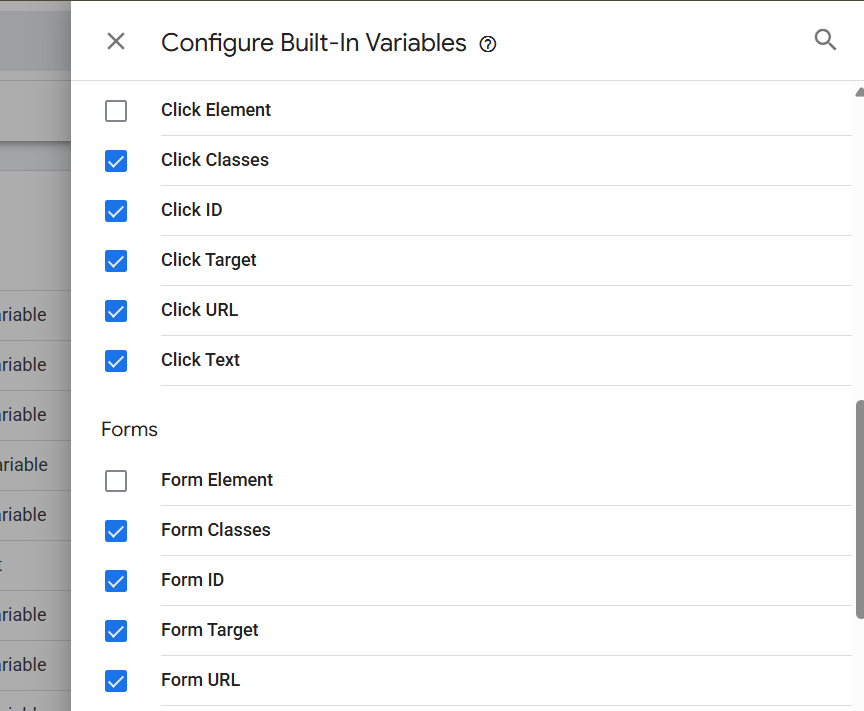
This type of variable will be created for you by Google Tag Manager. You just have to check them first, then you have to select which one is suitable for your work.
If you select “click text” and “classes,” GTM will collect the click text and classes whenever you click on any button on your website. Then, with the data you have, you can complete your work.
User-defined variables
Every type of data isn’t possible to collect through the built-in variables. That’s why Google Tag Manager gives you the user-defined variables.
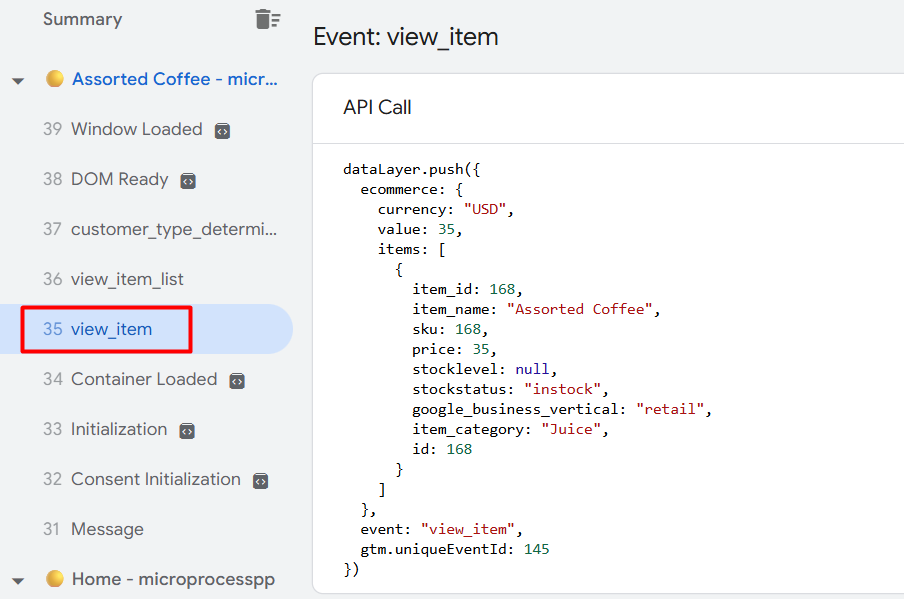
From here, you can create new variables as needed. As an example, if you want to collect any product price from your data layer, then you can use this variable as your variable type.
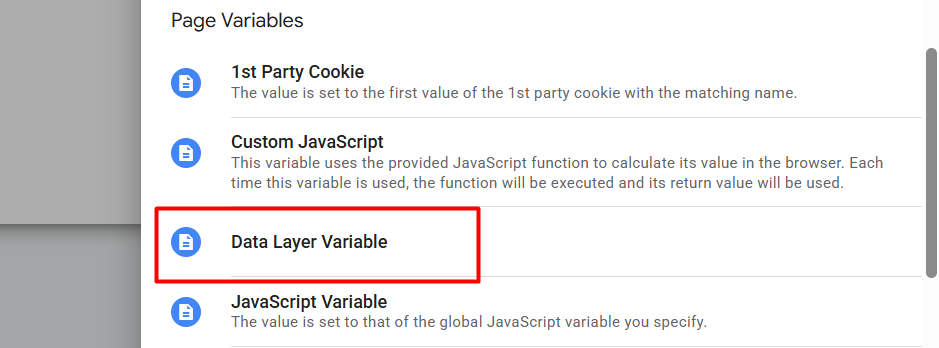
If you want to collect any data dynamically from the website, then you can use the “Custom JavaScript.”
Similarly, in the user-defined variables section, we will encounter various variable types. For now, focus on understanding the two variable types: “Custom JavaScript” and “Data Layer Variable.”
We will know when to use the other variable types in our upcoming article since we will be aware of them.


